About
Retired is a social heroic raiding guild established in the early days of the burning crusade. Our doors are always open, even for tent dwellers.
Retired is a social heroic raiding guild established in the early days of the burning crusade. Our doors are always open, even for tent dwellers.
Retired has has slain several bosses since its inception. Below you will find a partial list of the dangers we have faced and overcome. Jump to an expansion: ![]()
![]()
![]()
![]()
![]()
![]()
![]()

Kel'Thuzad and his philly, phally, folly, ....vase...., phylactery was next on the menu. A fight that slowly ramps up having the raid deal with a number of mechanics and adds while we kill his lich form. After having killed his lich form a small strike team enters his phylactery to start killing his humanoid soul. The fight has you doing this 3 times, each time adding more more numbers of the mechanics to deal with. Mostly struggling with unintentional glacial spike explosions and MANY SKELETONS HANDLE THEM we eventually got a grip on the fight bringing us to the last phase. The last phase has the room filling up with frost patches rather quickly meaning the split soak mechanic is rather quickly better to be ignored instead of handled in order to keep the burn up. This is dubbed the "fuck off and die" strategy which our token boomkin knows all to well.

Holy mother of what is this madness. Fatescribe at its core isn't that complicated to get your head around. There is dodging a bad area, which is only shown for half of its shape. Then there is moving your bomb out of the raid and planting it somewhere safe. Aside from that there is A big tank add and many small adds that pop out of the big one once it's dead. So far so good were it not for the rings of fate. Roh-Kalo spins up some rings, lights some runes sometimes 2 sometimes 3 sometimes 4 whatever he is in the mood for seemingly. After having activated the rune bonanza he picks who gets the run about the place and spin their run into the appropriate socket going clock or counter clockwise. Once team "dad" had settled on a way to assign players we started making progress on the fight and soon after Roh-Kalo was put out of his misery.

The guardian fight is the patchwerk encounter which is eerily similar to Sludgefist. After initially struggling with the positioning for the new tank combo mechanic: part single tank soak, part half raid soak and add a splash vinegar we settled on something that worked out fine. After seeing the damage output onto the raid we also adjusted where we used our healing cd's as we felt we were consistently falling behind. Once those issues were sorted it was merely a matter of pumping out the damage and guardian. His death clearly upset Bolvar as he would often run into the playing field staring into the distance and being quiet, very quiet.

Painsmith Raznal is our "up to 4 traps" boss. At seemingly all difficulty levels painsmith at the start at least almost felt like a brick wall. Almost more akin to a 8-bit nintendo game: spike pattern dodge and rolling spike balls, the fight is quite high paced. After having to learn that up to 4 traps means 4 traps at all times ....always we struggled to find a right location and pattern to drop them. For us at least in phases 2 and 3 traps needed to be dropped across the spike line due to timings of mechanics. Once that was sorted it merely was a matter of ramping up the numbers and soon after Painwall Raznal lay in shambles.

Next on our list was soulrender Dormazain who was appointed to be the token boss of old familiarity. Look and behold it is Garrosh, our favourite orc. Okay so clearly we needed to see some more familiar faces as Garrosh is strung up like a anima battery being tortured by Dormazain only to shout how he will never be a slave. The fight harkens back to Heigan the unclean and his original safety dance. This room is also sliced up into 4 zones only one of which is safe from time to time, with an intermission that has you moving from safe zone to safe zone in rapid succession. With that out of the way there is merely some adds and debuffs going around sprinkled with some chain pulling aoe. All in all the fight was relatively straight forward as long as there always was a rune underneath the adds. Dormazain was no more and Garrosh broke free all ends well.

Ner'zhul once chieftain of the Shadowmoon clan and later Warchief of the horde of Draenor struck a deal with Kil'jaeden. That deal did not work out great for Ner'zhul as his body was swiftly killed and his spirit crammed into the helm of domination to become the first lich king. We fight the remainder of his soul in a weird game of don't stand in the bad while knockbacks throw your character across the room. The timing of these knockbacks through dispels is 99% of the fight and once we had that under controlled Ner'zhul was no more. Off to greener pastures with him to search for his wife, mankrik anyone?, I'd suggest starting in our garrison.

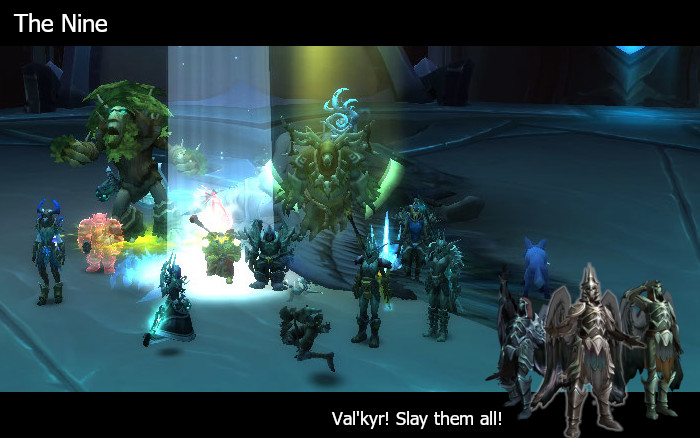
After the eye we find ourselves in a room of Sylvanas RP. Apparently here is where Sylvanas stashed her dead/undead posse of loyal fans. Valkyr ready to save Sylvanas from deader than dead time. The fight has us fight 2 Valkyr at the start until a 3rd comes in which takes it up a notch. The real crux of the fight was dealing with the clashing of certain mechanics which had raiders needing to spread and stack at the same time. Our good friend immunity was called in and stepped in to aid. That settled the healers play an important part in the fight as timely dispels at the correct time were crucial in avoiding untimely deaths.
The eye of the jailer secretly is not his eye at all, it's Havi's eye....sorry... Odyn. Odyn has had many mishaps in his life ordering the murder of the skovald family waves at Sigryn and conjuring too many damn balls during his boss fight to name a few. The lists doesn't end there as Odyn felt compelled to poke his eye out for Mueh'zala to have a gander into the shadowlands. And so Odyn's lone eye, given a decade or so of torment, magically became the eye of the jailer. A laser cutter beam with a jump twist and some paint dropping skills later we made quick work of that eye making it shut forever.

The Tarragrue, once the monster of torghast that chased you down if you died too much is now handily relocated to the sanctum. The fight is quite unique as it will let you play with torghast powers for the majority of it. Borrowed power times eleven. Alas with such power comes great responsibility so some powers are off limit. The Tarragrue didn't pose much of a threat to us although nor to the greatest love story of Shadowlands: Buttons & Moriaz.

At the top of the castle we face the final boss of the raid, the ever gallant Sire Denathrius. Having 3 distinct phases we quickly grew bored with phase 1. As you get better at the fight phase 1 becomes more and more annoying like a waiting to board the plane gate. Phase 2 is where the real action happens as boss positioning becomes crucial and so becomes sidestepping a lot of abilities while keeping dps and hps at a high level. Having adds spawn at out of reach platform was a nice idea on paper but in practice becomes a bit of an issue is you run certain comps and or specs. Having gotten to grips with phase 2 killing the adds in time and not stepping into crescendo's and the lot we found ourselves in phase 3. It soon became apparent that we needed more coordination to deal with phase 3 properly so we did. After having drilled in the dance that is positioning in phase 3 Denathrius soon was no more.

As we moved up the castle through the magically restored mirror we find ourselves on top of the castle facing both General Kaal and General Grashaal. A fight stuffed with mechanics many of which are positionally determined whether you handle them successfully or are causing a wipe. Once we managed to get through the learning curve of getting to grips where to be at which time we started to progress through the fight. The fight itself is quite lengthy and the pressure doesn't really abate. We managed to persevere however and feed that anima to Renethal as he blasted us into the final phase where no goliath would ruin the mood of our tanks anymore. Facing both Grashaal and Kaal at the same time now it was just a matter of keeping their HP as equal as possible while handling all of the mechanics in whatever order that may be, oh hello spell queue.

We find ourselves back at the entrance of the castle basically when we have to face Sludgefist. One of the many giant brutes found in Revendreth. This one is more brawn than brain as well and so the mechanics are relatively simplistic. Mainly functioning as a patchwork fight to determine whether you can push the appropriate numbers to venture further into the castle. With some sidestepping for falling debris cave-ins and dealing with a chained with a partner don't move further than 8yds apart mechanic you'd say it would be hard to kill yourself on this fight. We proved that theory to be wrong quite some times but in the end we got better and at least delayed deaths. Once Sludgefist was about to break pillar #4 and the proper heroism was used all hell broke lose to try and burn as much of his HP as possible. Sludgefist being near death kept on going and had one more hateful gaze in him and so of to Mudlumps room he went. As the brave few survivors of the impact noticed they weren't dead they mustered the last of their DPS to finish him off.

The council of blood fight takes place in a large ballroom where all the venthyr are ignorant of the worlds problems and instead are having a grand feast. The council consists of thee notable venthyr: Castellan Niklaus, Lord Stavros and Baroness Frieda. Prance forward. It is also in this order that we decided to kill the bosses as when one boss dies all other bosses will heal to full HP. An excellent fight to needlessly pad and gain the ire of the officers. Boogie down. Given that you can do the fight in 6 different ways each group will have to figure out for themselves what the most ideal kill order is. In the end this turned out to be one of those fights with a noticeable hump which once taken became much more manageable. Sashay left. For us this hump was fighting Stavros in de middle section of the fight and making sure we would reach the dance macabre quickly enough. Once that was sorted heroism would take us the rest of the way to face Frieda alone eventually. Shimmy right. The dance intermissions are a nice way to break up the fight and let healers recuperate some of that precious mana.

Further up in Castle Nathria we find Lady Inerva Darkvein who we bumbled into earlier while questing in Revendreth. She maintains the anima stored in the containers ready to be shipped off to the maw. Like a good little villain however she has skimmed some off for her own and has weaponized it. The fight itself deals with 4 anima containers which represent certain mechanics and these mechanics will morph into stronger or different versions pending on the amount of anima in said container. While one person is tasked with controlling/draining the anima in the containers there is plenty going on for the rest of the raid to be occupied with. Soaking, adds, interrupts, movement of debuffs, void zones on the floor, projectile dodging, distance dropoff explosions and last but not least triangle orbs and linked triangle orbs and cutter beam triangle orbs. Threading the linked beam of players through the orbs proved the most punishing mechanic as RNG can be a cruel mistress leaving behind a corpse with a beam pulsing out causing a wipe in the long run if not quicker. With some more experience under the hood we managed to polish up those trigonometry skills and Inerva was no more.

Back to the bowels of the castle we went and through its sewage pipes to be welcomed by an invasion of devourers. These devourers are creatures from...err...they want....errr... Okay everybody hates them, no one knows where they are from and they like anima as much as we do. We face a really big one but his mechanics are rather tame, well sorta. Projectile placement: check. Spreading out for everyone being turned into living bombs: check. Boss does a channeled explosion onto the raid with a distance falloff component: check. Okay this isn't bad, wait one more mechanic "gluttonous miasma" makes the target healing immune and instead will leech health of nearby friendly units.. noooooo it's Uu'nat all over again. Thankfully in practice it's a much more tame mechanic. Aside from dealing with some orbs that need cleaning every now and then on heroic Hungering Destroyer didn't pose much of a challenge.

After making our way through some more trash we wind up seemingly at the armory of Sire Denathrius. Here we fight our first bit of furni..Broker The equally evil cousins of the ethereals. Xy'Mox seemingly is so excited about all the weapons he goes on a testing rampage with us as guinea pigs. The fight revolves around placing two teleporting pads and using these effectively to counter the various mechanics. There are angry ghosts that chase you. Wildseed bombs that will engulf almost all of the room in their explosion and last but least a big sword, clearly made by dyson as it has some extreme hoovering mode. Once people got a bit more cautious with their movement Xy'Mox beamed up and away and left us with a chest of spoils.

After leaving the bowels of the castle we worked our way up the castle dealing with our favourite trash, oh hey red traps *insert explosion* We came upon a large room with some enemies inside and a chained up NPC, wait a minute I know that NPC. It's our old nemesis "merely a setback" Kael-Thas Sunstrider, pronounced Cale-Thosss among his closest of friends. This fight bring back the old concept of healing a friendly unit while the main raid staves of waves of incoming enemies. After making some changes in our approach the fight went from sluggish to lightspeed became much less of a handful.

After Shriekwing is defeated castle nathria opens up in a multitude of directions. Which one you picked especially at the start of the raiding season was almost entirely determined by which trigger would actually work to open the gate and which ones bugged out. The Huntsman lives in the cellar with his trusted gargons: Margore, Bargast and Hecutis. A largely cleave fight while dealing with projectile placement. Each gargon brings some other mechanics to the fight, some split soaking, some cc-ing and some painting in the room. After watching his gargons fall in battle the huntsman was no more.

The first fight in little castle nathria is shriekwing. A fight with a bat, such levels of prescience by blizzard. A standard tank and spank fight where some debuffs cause you to paint in the room. Then there is a original and fresh intermittent phase that we have never seen before where shriekwing goes on a hunt and attempts to find its prey through sonar discs.

As we find ourselves in the inner chambers of N'zoth's husk an eye-balloon is inflated which is..him

We finally arrived at the old god himself. Accompanied by Wrathion with his shiny new dagger he leaps into the air and thrusts it deep into N'zoth's husk. Apparently a xal'atath was all that was required for that, shadow priests during legion you missed your opportunity. N'zoth who is seemingly the size of a small continent or just wants us to believe so gets rather upset with Wrathion's attack and send a minion, the fury of N'zoth, to confront us. The is divided into 3 phases with each phase taking place deeper and deeper into the physical manifestation of N'zoth. While there are a plethora of mechanics in the end the fight revolves around burst aoe to deal with a great number of adds. Initially we had issues pressing through phase 1 as nightmare antigens lived for too long and caused the gaze adds to live too long as well. Once we finally got past phase 1 we were greeted by phase 2 and 3 which seemed like a snoozefest compared to phase 1. We quickly killed the fury and as we stood slightly perplexed gazing over its corpse we realized that the actual difficulty of the fight was phase 1. Oh well a kill is a kill even though the fight doesn't feel slightly right.

Delving deeper into the maw of Gor'ma we stumbled on a familiar face. Wait a minute didn't he look different before. Yes it's our old pal il'gynoth who used to hug a tree in the emerald nightmare while reciting bedtime stories. No longer looking like an infectious blob but as an actual creature now with wing! The fight is vaguely reminiscent of its emerald nightmare counterpart as blood adds play a role and so does cursed blood. The fight starts off really tame and slowly ramps up over time. Laser beams paint in the room causing you to have less free real estate. With the spawning of blood adds ramping up over time causing the dps to have less and less free time to actually damage Il'gynoth itself. As an extra mechanic players get mind controlled who will spread said mind control if they come into contact with other players. Since so many mechanics require the ranged to swap to these targets most of them actually wonder if there is an actual boss on this fight. With some adjusting to the mind control mechanic Il'gynoth, reborn or not, didn't prove that much of a hurdle.

Vexiona fulfills the wishes of a screechy dragon boss. Another twilight brood dragon, Nefarian will be so proud. Dead, but proud. The fight revolves around debuff management and add control with a hectic final phase to top it off. As an extra mechanic tanks get to role-play dragonball z as they will kamehameha a big laser beam melting everyone's face of. After initially struggling with the damage intake which was mostly due to manhandled despairs and some repositioning we started making decent progress on the fight. We arrived at the final phase only to realize that it goes up to eleven as the damage intake with the void debuff on everyone started to ramp up rather quickly. Burning 40% HP from Vexiona did take a bit of time but in the end we managed to get through it and silence Vexiona once and for all.

The only true tentacle boss of Nyalotha Drest'agath proudly bars your way with its more than annoying mechanics. At its core the fight is based around add waves which you need to keep in check while finding the time intermittently to damage the boss. That is sorta easier said than done in a smaller raid group as the room is huge and the adds spawn in a set pattern. The boss will heal up all damage done to him except for damage done to him by a player who is debuffed by void infused ichor. These debuffs are obtained by running over said ichor which is placed after an add dies around it and will exist only for a short while (thanks blizz for the clear visuals when it runs out). We struggled a lot in the beginning with the sheer distance and the los mechanic with only 2 healers and we either fell behind on add waves or the boss. After some more research we eventually handled the tank debuff more efficiently to aid with killing adds more quickly at that point things moved forward. Not long after we finally killed Drest but it remains a fight I don't look forward to as the limited amount of ichor available and the add spawn timings will always make you feel feast/famined and never in a natural pace.

Poor Ra-den all he wanted was to uphold his titan task and flirt his way into M.O.T.H.E.R.'s heart. Alas as time once told before Ra-den becomes the objective for us to kill. The fight itself is quite straightforward but the mechanics need proper coordination to be dealt with properly. Failing to do so will result in an instant death. Since the fight didn't change one bit versus its normal counterpart we made headway with it straight away. Aside from adjusting to the hectic damage intake in the final phase and finally being able to better let tank HP drop Ra-den was quickly dealt with.

Hivemind was next on the menu and it was quite a detour versus the other fights we have done so far. Most fights were single target based with priority add switching and perhaps some light cleave but hivemind changed all that. AoE and cleave is lathered all over this fight. Some promising early attempts resulted into our raiders to having swap talents/essences/gear around to better accommodate the fight. The adds were dealt with much more efficiently now together with the better positioning we soon found ourselves killing the hivemind and looting all their shiny spoils.

Next up on our kill list was Xanesh which felt eerie similar to Varimathras in terms of setting as poor Azshara was getting tortured much to the amusement of Xanesh and perhaps ourselves. The actual boss mechanics on this fight are quite docile as it merely involves a safety dance and moving away from an exploding version of yourself. The fight all comes down to playing football with 3 people. You headbutt the ball by moving into it guiding it from the spawn location to the goal without hitting the boss, the non football players, the obelisks, Azshara, the edges okay so yes basically it can't hit anything but the 3 players. Aside from being forced to rotate players and thus making sure everyone gets the time to practice the football mechanic the fight posed no real challenge. Out went Xanesh and in came ...Xal'atath... the plot thickens.

After the first 3 bosses the raid opens up and gives you plenty of free choice which boss to tackle next. We opted for Nzoth's puppy Shad'har. The fight mainly serves as a number check with relatively few mechanics. A tank combo breaker, some fixate adds and some soaking aside from the usual don't stand in bad stuff. The real hump in this fight seems to be the second half of the second phase. Once we were past that the final phase slowed right down again and Shad'har fell.

Maut was next on the menu, an obsidian destroyer. It has been a while since we saw these *cough* Ahn'Qiraj. The first fight in the raid that proved to be a step up from imposter Wrathion and Skitra. The fight itself revolves around limiting the amount of Mana Maut gains. This is achieved by spending as little time in the mana sucking void zones on the floor and killing adds quick and away from Maut. Any add that gets near Maut will very quickly be treated as a Jägerbomb amplifying Mauts damage output. During the intermission Maut is stationary encasing himself in a stone skin shield that we need to burst through. The problem herein lies that the shield reflects 100% of the damage back to the attacker. Sometimes DPS managed to blow themselves up and sometimes we held back too much. After some more practice we got the handle on it and we consistently pushed further into the fight. It didn't take much more and we finally cut Maut off from his mana supply.

After the first boss the path you can take splits and we decided to have a go at Skitra. A qiraji with a David Blaine crush. The fight itself is really basic. One run away mechanic that spawns a copy of the players which explodes onto the raid with distance falloff. Aside from that the real crux comes from finding the real Skitra asap when he creates multiple copies of himself. In an organised group this really is no challenge making Skitra feel more like a loot pinata than anything else.

As the first boss in Ny'alotha the Waking City we faced ....Wrathion?? Didn't he help us to actually fight N'zoth and his black empire. As the typical dragon themed bosses of vanilla this one breathes fire and smacks his tail also. A pretty docile fight as long as you move out of that fire pattern he hurls on the floor during his flight. Throw in some static stalagmites for us to dps and some stun crazed assassins during the intermissions and you have yourself a introductory boss. Soon after we killed Wrathion but what's this? an imposter and a grumpy real Wrathion who seems slightly disappointed in us. Doves need not to cry the black prince lives on to fight another day.

She split the sea, mocked us throughout the eternal palace but finally we are here to confront Queen Azshara herself. As an end boss the fight is long and rather intricate with a long, long, long, loooong list of mechanics and abilities. There are adds, debuffs and buffs, interrupts, projectiles but most of all there is line of sight. Yes that line of sight that is everyone's favourite new rubs me in the wrong way azshara mechanic. In a nutshell the fight revolves around using a titan platform which creates an airpocket in the ocean. Azshara does her best to power down the platform, causing the air bubble to collapse causing certain death while we do our best to keep the platform charged by giving it our sweet juicy health points. Adds, void zones, fixates and a plethora of other mechcanics try to complicate this as there is always something to do. Five phases total of which two are intermissions you think you can get some respite during those alas Azshara welcomes you with double decrees. Perform two tasks at once or suffer the dot of death as we have experienced many a times. While we made significant progress we felt that overall the fight was going too sluggish and eventually settled on ignoring the second tidemistress add. After rearranging our heroism usage we managed to push Azshara into the last phase while everything was under control. Now it was just about keeping calm and avoid nether portals on top of runes and/or the titan console. About that titan console that's a sheer death machine and requires the tlc of a newborn. After getting the hang of it slightly better more people remained alive for longer during this last phase to finally chip away at that last % of hp remaining and there she die....fell....got snatched by N'zoth whom we just released from his prison. Here we are feeling confused about what just happened and i'm not just talking about lor themar who thinks the fight is a shuttle run race.

As we delved deeper into the eternal palace we were confronted with a N'raqi abberation named Za'qul. The fight consists of four phases where phases one, two and three basically are a crash course how to handle mechanics X, Y and Z. The tricky part comes from the long phase four as all of these mechanics are happening and need to be dealt with but in different realm phases. At prudent times assigned groups need to travel through portals into the correct realm and deal with a certain mechanic making sure they don't die in the process as all of our healers remain in the normal realm. Initially we struggled with the DPS check in order to push the boss into phase four. Our hysteria stacks from being in the fear realm were getting just too high for the healers to cope with. With some readjusting of cooldown usage (and eventually extra gear) we managed to get passed this hurdle and into phase four properly. Aside from gaining some experience with the last phase in terms of positioning and timing everything started to come together and soon after Za'qul was no more.

A council type fight with independent health on the bosses. While the bosses mechanically are pretty straightforward and not that huge of an issue to deal with. Queen Azshara issues out some decrees which complicates things a tad. Ordering you soak certain pools, or to not stand near other people, preventing you from receiving healing etc Azshara enjoys the schadenfreude. The fight progressed fine until mechanics were heavily clashing with one another. Mostly this was dealing with deferred sentence while we needed to be grouped inside the bubble and a spark was firing off. Once we managed to unsync the spark we pushed on. It proved to be the major hump as further clashes were only dealing with the Form ranks decree being active while charges needed to be split soaked. Soon after the queen's court was no more, good riddance High botanist Tel'arn smirked.

Orgozoa a octopus/jellyfish/deepsea monster thing. Positioning wise with the incubation fluid debuff mechanic the fight is quite similar to Tichondrius in the nighthold. Not getting crushed by dribbling ichor cave ins and aptly swapping to the adds whether those are zoatroids or naga is the bread and butter of the fight. While we were expecting issues having to deal with zoatroids in phase 2 aside from the naga we managed to show that orgozoa is not that scary as it died in a one-shot. Not quite what we were expecting after spending the time we did on Ashvane.

My cabbagesAh who doesn't remember the epic horseback chase around boralus while trying to apprehend Priscilla Ashvane. Eventually the Alliance does manage to capture her and lock her up in Tol'Dagor. Unfortunately those pesky horde free her and deliver her to Sylvanas who seemingly has "other" plans. We meet up with lady ashvane in nazjatar again uncovering she is making azerite weapons for Azshara. Being as witty as a Disney villain lady Azshvane eventually is turned into a fishy abomination waiting for us to put her out of her misery.

Arriving at the third boss we find ourselves back in legion. A lot of mechanics on this bossfight are straight up similar or downright copies from the Wrath of Azshara bossfight in the Eye of Azshara dungeon. Sporting heavy movement due to a plethora of tornadoes the fight itself felt rather tame and as there were no mechanical changes from normal we didn't have to spend a great deal trying to master the fight. Some dispels and knockbacks later Azshara's radiance flickered itself out.

The second fight in the eternal palace is quite unusual as it's an underwater fight. Vash'jir didn't create a huge fanbase but this fight is quite tame. Revolving mainly around the timing at which you kill 2 pufferfish thus allowing you to be healed. The main difficulty during the fight is making sure you aren't clumped as the boss his chain lightning will easily kill you. Aside from this the behemoth proved to be more like a goldfish than a scary lurker from the depths.

The first boss in the eternal palace is Abyssal Commander Sivara whom we last met in nazjatar. A layering of mechanics that all have to do with your current debuff. Poison and frost or green and blue. After initially being overwhelmed with unstable mixtures this was soon handled more carefully at which point the fight went along nicely. The occasional ill placed pool of frost or poison caused some positioning issues but we managed to overcome and take out Sivara without any major difficulties

The final boss squeezed into 8.1 is a naga on steroids. The Uu'nat fight is quite a complex fight as there really is not a cut and dry tactic how he is defeated. Having issues at the start to even push him into the first intermission at the proper time eventually this sorted itself out and oh boy if you think timing is not important on this fight it all revolved around timing. Using a relic or swapping targets too soon or too late has a huge impact and basically sets you up for failure and a wipe. After rethinking our relic usage we settled on something that worked for us to get us into the last phase reliably. And so after much work and many wipes the last phase surely is just some pew pew... in cometh the vampires. The sheer volume of vampire players meant we were just reaching a wall at around 8% or the 3rd beam set.
Rethinking our positioning again so we could stand still more gained us a few more % but still a ways of a kill. A few tries later we managed to remain alive for long enough that when eventually single vampires died (alleviating the healing pressure on the non vampires) we were over the hump and managed to bring Uu'nat down. According to blizzard he is fine but I could swear those nerf bats onto restless cabal are off the mark and need to hit Uu'nat some more.

The prelude to the crucible of storms introduces us to Xal'atath an entity which shadow priest are intimately familiar with. She introduces us to 3 powerful relics that the naga try to obtain for Queen Azshara. We find ourselves back in the shrine of the storms where we are pitted against a faceless one (n'raqi) and a K'thir. The 3 relics we obtained are there as well since someone double crossed us after we managed to collect them. The fight here revolves around control as there is a ranged dps tank all of a sudden and independent health pools of 2 bosses that need to die at the same time while dropping 25% in health will active a relic that cannot activate twice. No zerg tactics here or foolish positioning but all finesse and if done correctly the fight doesn't even feel all that bad. Once we altered our positioning to give our ranged tank some more space and tightened the rules about dispelling we starting making good headway. Not soon after the restless cabal was no more only to discover that underneath the shrine lurks a giant tentacle monster with N'zoth eyeballs...

The final battle in Dazar'alor is the fight against Lady Jaina Proudmoore. The fight starts off on her flagship where you face off her icy abilities while being bombarded by other kul tiran ship cannons. This first bit is a bit of a snooze fest as aside from not standing in bad and moving into fire patches to negate her ring of ice ability there is not much going on unless you are ranged. Ranged deal with adds, exploding barrels and ballista commandeering. Phase 2 really starts the interesting part of the fight as jaina blinks away to create a frozen ice island in the ocean. There is a plethora of frost inspired abilities but the bottom line is all frost abilities (and jus time in general) grants you stack of a debuff that slows you increasingly more and at 20 stacks will cause you get encased in ice. Other people need to damage the ice cube to free you. While the second phase allows you to reset your stacks through barrels of flamey goodness in the last phase there is no fire whatsoever making it a race against time. Phase 1 and 2 quickly became a mere nuisance obstructing our time spent in phase 3 but after some attempts it was clear phase 3 required some finesse in order to get right. As with conclave timing is key in this fight and once we had our order of ice cubing down we started making progress. With "el jefe" gone the raid found new inspiration and managed to defeat Jaina. Well done all.

Stormwall blockade is somewhat of an interesting fight that revolves all around control. Since we often run a odd numbered composition this fight can be a royal pain in the ass since getting targets to the same health % with lopsided dps is hard. Having getting used to the minibosses on the ships the real portion of the fight begins as we munch away the boss health while having to deal with kelp and adds. This actually proved to be easier on heroic than on normal as having full control over who becomes THOR "janitor of the kelp" makes the fight so much more controllable. The blockade proved to be more of a detour than anything else. Onwards to Jaina...

In our new horde memory forms we had to suddenly face alliance NPC's and bosses. First up: our beloved Gelbin Mekkatorque who proved to be more than a handful. Exploding sheep, graviton debuffs, living bombs that give you and anyone in line of sight a dot that makes you wish you were dead and a sweet minigame of shouting out colors to colorblind people. We struggled quite a bit with progression on the fight which mostly had to do with the tuning and seemingly RNG from hell. Standing out of LOS while getting targetted by buster cannon is never a good thing nor is having clockwork robots spawn in china. That said once we managed to get into the second phase with everyone up we started to make some leeway. Delaying our heroism slightly more proved to be the icing on the cake as we managed to topple Mekkatorque. He's not dead by the way hordies ;)

Rastakhan proved not to be a huge hurdle. While the fight consists of many phases, 4 in total, you go through them relatively quick. Avoiding toads and serpent totems in phase 1 is the real challenge until all adds are killed. Phase 2 is like still water and very dull if the positioning is done correctly and the MC totems are killed in time. Phase 3 kicks things in overdrive where half of the raid is in the death realm fighting off Bwonsamdi's wish to keep spamming the same player with caress of death. The living realm contends with phantom adds which due limited personnel we eventually opted to mostly CC. After getting through phase 3 without major hiccups we found ourselves in phase 4 at which point the fight mostly revolves around dodging watermelons. We get the impression Bwonsamdi secretly wanted to be rid of Rastakhan as he didn't give as much opposition as expected.

Our next hurdle in the battle of Dazar'alor was the conclave of the chosen. A council type-ish fight that draws from several loa that the zandalari worship. A fight that progresses in difficulty as you kill more council members as more mechanics get activated that remain firing throughout the course of the fight. Especially around the time of killing the 3rd loa aspect the fight just feels hectic with abilities and wrath spells firing one after another. Struggling with timing first, which is crucial for this fight, as you want to limit the amount of deadly overlap as much as possible. We eventually managed to get the timing down. Once we overcame the hurdle of killing the 3rd loa aspect in all the frenzy of abilities we were on the home stretch and soon after the conclave fell.

After having dealt with all the enemies outside the pyramid, Mekkatorque decides to blast us a way inside. We find ourselves in the treasure room of Dazar'alor. A place we visited once before to steal the Abyssal Scepter back. Interesting as a fight concept with trap rooms and Golem adds that need to drop in health equally fast. The treasury concept goes further with the ability to loot specific gems that grant certain boons. Once you have dealth with the adds and all the various trap rooms the raid gets back together in the central treasure room and fight an animated gold pile. At this stage the fight largely boils down to killing an array of small adds in time but Opulence himself didn't prove that much of a hurdle.

After Grong volunteered to embiggify himself to fight the horde we were surprised to see him hostile. While valiantly fighting the horde in the end Grong was slain and subsequently raised by Bwomsamdi as an undead horror. It was our moral duty to put Grong out of his misery and grant him eternal rest. The fight largely revolves around the timing of an extra ability which is obtained after adds in the fight are killed. These deathknells hit pretty hard and when they overlap with other mechanics can spell an easy death. Having tried a multitude of positioning and timing in the end we settled on something that was working out for us as we were pushing his HP down more and more. In our own iconic style we decided to have one more pull before calling it quits for the evening which proved fortunate as Grong fell.

The jadefire masters is quite an interesting fight. A monk and mage are fought at the same time whereas the monk needs to be on a lower health than the mage at all times. Along the way we have to deal with monk and mage blinks as well as summoned tigers and acme magma traps. Gaining energy throughout the fight the duo of bitterness conjure living bombs with lasers albeit blind ones. A maze of amazement and wonder and finally as their pièce de résistance animalities in the form of a jade fire serpent and a flamey phoenix. Once we managed to reach the animal form stage and didn't lose half the raid to whack-a-mole mini-games we managed to secure our kill

The first boss of the new Battle of Dazar'alor raid is a angry Paladin troll. The fight boils down to hitting the right target over the head which alternates between hitting the paladin lady and her healing and photographing adds. A bright flash later and if you weren't facing away you wander around like some zombie who's been hanging around with Wulferd Fizzbracket too much. Aside from the flash, a banana wave will move at geriatric speeds towards the adds healing them and granting them a hot. All in all the fight is relatively docile unless you're a tank as you certainly get smacked around the room with the incoming damage.

The final boss in the Uldir raid is the lovely minor old god G'huun, who was accidentally created by the Titans while they were busy sciencing. G'huun posed several challenges as the encounter is filled with a plethora of mechanics and adds but in the end the most impactful one is the game of hot potato that takes place outside of the main arena. While there certainly is a great discrepancy between classes in terms of orb carrying speed which kinda sucks we managed to get quicker and more efficient at it. Once the orb carrying was settled in phase 1 no longer posed an issue and phase 2 orb carrying wise went fine as well. The odd hiccup from blood feast gathering while depositing your fuzzballs caused some mayhem but that got better as well. Finally in phase 3 we posed the same old challenge as other end boss long encounter styles: namely getting to the end to quickly wipe. With a bit more phase 3 / safety dance experience we managed to pop that pus filled boil of a G'huun. Well done all.

Mythrax proved to be an easier challenge than Zul as the fight remains mostly the same as on normal. With some slight readjusting of when to pick up orbs the main phases seemed to be going fine. The intermissions took some getting used to as a tonnes of adds that spam mind flay proved to be a hassle. Eventually with proper spreading and re-prioritizing the adds fell and so did Mythrax.

After the outer ring of bosses is dead we descend deeper into uldir bringing us to the most fun trash in the raid. There is random aggro-ing packs, sublime pathing, interesting knockbacks and a copious amount of being scared to die. If the trash was bad certainly the boss itself wouldn't right ? well you're wrong here. Raid size and composition have a large impact on this fight so in some sense it was an uphill battle but the Zul fight boils down to an add control type fight. Damage Zul down to 40% hp while not getting overwhelmed will all of the adds that join the fray to find yourself in phase 2 where dmg spikes on tanks and its a burn to the finish. A short type of fight that rekindled some memories of Blackhand in blackrock foundry. That fight had just one setting "full on". Dealing with limited dispel opportunities eventually we started pushing into phase 2 on a regular basis, now we just needed to push him into it while being in control. While attempting to handle a truckload of minion adds and dodging the blood stains on the floor Zul was finally put down to rest... again.

Zek'voz is a multi stage fight that blends its own mechanics with a blast from the past from the old god fights of C'thun and Yogg'Saron. After several attempts we felt that we struggled too much with phase 1 where the eye beam would occasionally kill off half the raid. This was mostly due to the slowing effect of the bleed dot the adds place on players but after trying several other tactics we reverted back to what we were trying in the first place. Sticking to our guns we managed to get past that stage on a regular basis. Phase 2 seemed to be no real issue bar rolling deceit cloud dropoffs when they coincide with surge of darkness but that was picked up quickly as well. Phase 3 went along relatively quickly as well with people turning into demigods for 30 sec and then going mad. Those people we killed, we killed them dead and so we did Zek'voz.

A not so friendly infectious monster was next on our kill list. Filled with plague and disease Vectis hovers about the place but whatever you do, do not mention Hakkar. The fight boils down to carefully controlling the spreading of a debuff that jumps to the nearest player upon running out. This debuff leaves a permanent stack behind which amplifies the nature damage you take. Having people on really high stacks causes them to fall over when the boss pulses for said nature damage. A very stand still fight with the odd intermission to soak some plague bomb zones. After our initial hiccup we made quick work of Vectis.

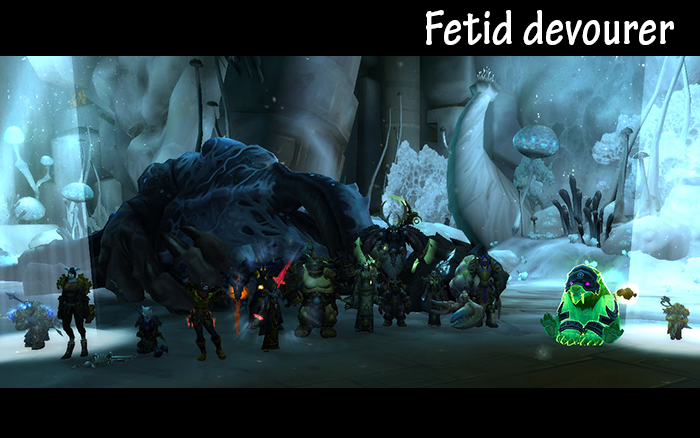
We chose to tackle Fetid devourer as our next target. Cobbled together from different animal parts Fetid devourer does have a unique confident stride while parading around the wastebin landfill area that is his boss room. Aside from dealing with the stomp knockback the fight was largely the same as normal. The dot and tank damage did put quite a strain on the healers but we were making progress steadily. Once we managed to push him under 50% we started to get into the heroism and burn territory where the fight significantly sped up. A few more goes and we put the boss out of its misery.
The second boss in Uldir is a titanic watcher: Matron of Tenacity, Herald of Endless Research, MOTHER. The fight takes place in 3 separate rooms divided by force fields and xenomorphs. While the actual boss fight is a simple don't stand in bads. The rooms adds some extra spice in the form of adds that require interrupt lockdown, each time a player passes through the force field an add is created. More spice is added through the uldir defense system of more lasers, laser walls, laser ceilings everything looks better with lasers. MOTHER proved a easy step up from normal with only additional lasers to take heed off. MOTHER quickly was properly reset although she remains very shy, unwilling to talk to Brann and all.

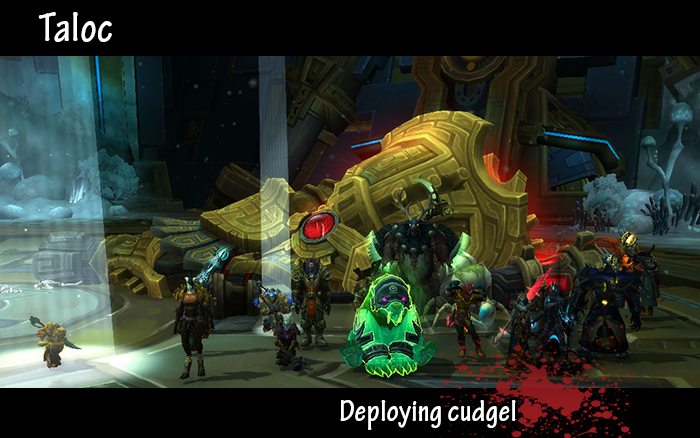
The first boss in Uldir is a titan construct. The blood trolls attempted to use Taloc to destroy Dazar'alor but were foiled by the horde. Clearly the horde did a half arsed job so we are here to put it out of business permanently. As the first boss of the introductory raid we didn't expect huge issues and aside from a struggling dwarf hunter and some OMG IT BURNS misjudged laser beams we didn't. A straightforward painting yourself into a corner fight with some adds and some falloff damage Taloc fell quickly and proved to be a hurdle easily taken.
Having defeated Aggramar we were pumped to to tackle the last boss in the instance. One click and a couple of "oooohhh weeeeeehhh aaaaaahhhhs" later Magni teleported us to the seat of pantheon. There we faced the tormented titan world soul Argus the unmaker. Expecting a long list of changes vs normal we were happily surprised that the differences were minimal and mostly affected phase 1 handling. After reshuffling how we handled phase 1 we started pushing along quite nicely and managed to get to the last phase quickly. The last phase certainly puts the pressure on as people were toppling over quite a bit faster resulting in quick dead life giving trees. Time ran out but surely the week after we could have a nice evening of progress on him and so we did. After initially struggling with phase 1 for some goes we managed to get past that point and soon after albeit with quite a dodgy finale we managed to kill Argus.
Well done all we put an end to the legion. Illidan is on permanent vacation battling sargeras in a time loop and we get to enjoy a huge sword sticking inside our planet in silithus of all places. WoW:Legion has been an interesting grin..... journey and we resolved the storyline of one of the biggest threats in wow history. We will see what kind of adventures WoW: Cataclysm Battle for Azeroth will bring us.

Once Sargeras his lieutenant and successor Aggramar fell in battle against Sargeras only to be resurrected and enslaved. Now trusted to guard the world soul of Argus deep in the planet's core. The fight consists of roughly 2 phases. The phase in which you fight Aggramar and the phase in which you battle a slew of adds. The fight to me at least reminisced heavily to the Ragnaros 2.0 fight in the firelands. While Aggramar uses a set of abilities all which require careful positioning the fight boils down to add control. 2 types of add exist large ones that do increasing aoe damage and emit a 15 yard aura that will amplify, speed up and make all other adds cc immune if they are within its reach. And small adds that will simply run over towards sulfura...sorry Aggramar and then explode once they reach him debuffing the entire raid for 20 seconds. This means you have to ensure all adds will reach Aggramar with 20 second intervals to ensure the debuff doesn't stack and the explosion thus killing you. Being worried about the non scaling of these things in raids of late luckily we were only presented with 6 adds. Once we had our CC assignments down and managed to execute them properly we made good progress on the fight and eventually brought Aggramar down. Which leaves us with poor Argus.

After having dealt with Varimathras we shifted our gaze upon his tormentors the coven of shivarra. These lovely demons revel and excel at torture going so far as torturing the souls of the titans. This fight was quite a struggle as it has both high spiky damage and positional requirements that could cause major out of range or painted myself into a corner issues. We started with dividing the raid up as the shivarra require to be 18yards apart or else they will link reducing damage taken by 99%. After trying this out for quite some time we felt like we were making too little progress as we kept seeing too many deaths where people who were on high/full hp simply died from taking unavoidable damage over X seconds. New positioning plus another healer and we started to make much better progress at living through the initial combo of shivarra. A few more goes and those dodge skills started to pay off as we worked our way through fire and shadow, frost and shadow and eventually frost and fire to slay the shivarra.

Once we knew Varimathras as that dreadlord guy who stood next to Sylvanas in the undercity. We then killed him during the invasion of the undercity scenario in the Wrath of the lich king expansion. Here in antorus we meet him again being tormented, gimp mask and all. The fight closely resembles a patchwork style fight with minimal movement and no adds. The main mechanic is misery which prevents you from receiving any healing for 7 seconds. Any shadow dmg taken will proc this effect so limiting any avoidable shadow damage is the recipe to counter this fight. We benefited from tanks being used to the standing side by side but within 8 yards to deal with the additional cone mechanic on heroic. Most issues we had was with dealing with the necrotic embrace, a dot which after 6 seconds explodes in a 10-yard radius for shadow dmg. Moving out of the raid but not too soon (as this would increase your misery duration) got some getting used to. We had individual deaths and misery spread through the raid like a plague but once we got the hang of it we made quick work of Varimathras.

Kin'garoth is mostly a fight that revolves around positional awareness with 3 main abilities that emphasize this. A ruiner cast, oh hello lurker below. Forging strike, a stand 5 yards apart attack and diabolic bowling ball which you dodge as a frogger game throughout the fight until tanks blow them up. Before our Christmas break we were having some issues with the fight, mainly the bowling balls but once we managed to get there again after our break we made good progress. After fiddling with the positioning of the raid and the assignments on adds we started closing in on a kill and soon after kin'garoth and his war toys were no more.

After a truly epic cutscene of the vindicaar flying off to somewhere else we find ourselves near a hallway. The whole moving forward to spawn the boss while he stands the wrong way round because blizzard expected everyone to have moved forward is just awkward but hey let's see how this fight actually goes on heroic. Sleep canisters have a bigger aoe, okay we can live with that. And we have boulders roll in over the bridge as we do the obstacle run, seems reasonable. After slightly readjusting how we positioned we made great progress on the fight. The bridge crossing went okay with one of our bear tanks leading the way as spearhead. Getting to the last phase already on the first attempt it seemed like a welcome change from the struggles we had with Hasabel. An attempt or two later we reached the last phase mostly unscathed and Imonar was no more.

Next up portal keeper Hasabel which didn't seem that frightening given its few changes over the normal difficulty mechanics. Sure more laser lanes to dodge and imps require interrupting now but that will be fine... right. In comes the imp spawn...1....2....3....4....5.woooh.6.7..woooaahhh..8...too..many...9 and we wipe. So yes those imps posed a major problem in our raid size as the number of course doesn't scale with raid size. Having only 4 dps on the main platform dealing with imps we struggled massively especially since we lack any way to group the imps up meaning our aoe stun/disorient spells don't hit that many imps either. After having reassigned dps we now had more of them on the main platform and while we made progress it did feel more like being lucky than being in control of the fight in terms of dealing with imps. We manage to kill her but not before she took out all of our ranged 2 poor hunters and a warlock. I'd like to see a change where there are less imps but higher hp as then it would actually revolve around interrupting properly as opposed to too many imps with very little health. I feel like these adds simply miss the mark to accommodate for smaller raid sizes with less diverse classes.

Where the antoran high command lacked information, the Eonar encounter does present you with information but does so in the most clunkiest of ways. A tower defense fight encounter where you face no bosses just waves of "trash". The demons pour in from 3 possible lanes and make their way over to the essence of Eonar in the center of the encounter. Bats every now and them join the fray as they descend from the sky. The raid is divided up in half or even more strike teams and learning where lanes were going to spawn was the real progression for the encounter. The game makes no secret about where a lane of demons is going to spawn however it announces this in the most clunkiest of ways. On your actual map, so half the encounter revolves around toggling your map on and off until you memorize the spawn order. The actual demon lanes were not that hard to deal with as the distance they need to travel before they reach Eonar is quite forgiving. While everyone was still busy with lane switching or killing of demons Eonar shouted for the 4th time and killed off the paraxis. A chest appeared and the encounter was over.... was that it?? crackled over discord

We faced the Antoran high command as our third boss on heroic. At first we struggled somewhat with the encounter but some more attempts and experience sorted that out. Soon after we were in the second cycle of phases getting ready to use that golden umbrella for fusilades while suddenly the raid started to take massive damage. What did just happen ?? people toppling over in the course of a second or two. Where is the damage coming from.... mines?? who is stepping on them.... no one ? They are what.... detonating by themselves... but...but dungeon journal...info
We didn't realize this was fully happening until after we got our kill as a mine pack only took out 85% of our raid as opposed to 98%. But yes mines detonate by themselves a "intended" mechanic and you have your off-tank step on them forcefully during the admiral and engineer phases of the fight /headdesk. Way to go blizzard with your clear communication and lack of dungeon journal information.

After the first boss you can pick any of 4 different bosses to do next. We opted to try out the dogs. 2 lovely puppies who sometimes playfully roam about outside the raid in the antoran wastes. One dog loves hoover.. wait no.... shadow... he loves shadow while the other dog loves fire. It may seem they get along nicely but looks deceive here as they do like to be apart. 40 yards at least else you know they get a bit territorial. 3 main abilities per dog which trigger based on the energy % 33-66-100. There is meteor swirly dodging, laser line point away, living bomb run out, split soak aoe void zones, hooverball and aoe fear split soak. Some abilities favour grouping up others favour spreading out. The main thing we had adjust to was the fear. After having reshuffled some positioning for our raid size we managed to make quick work of the fight.

The first boss in Antorus, the burning throne is a big immobile robot named Garothi worldbreaker. As the first boss in the raid you'd expect it to not be too complicated and really it isn't. The boss has a weapon on each shoulder which during the intermission you destroy after which that weapon will no longer fire its unique ability. There is some soaking, which we have gotten pro at from the tomb, and some void zone dropping and some missile strike dodging. During the intermissions and throughout the last phase everything is spiced up with angry laser truck drivers. All in all these ability give you ample of time to react and move out of the way and so we made quick work of this robot who soon will be forgotten.

The last hurdle of the tomb of sargeras is Kil'jaeden as the sunwell was merely a set... oh sorry... wrong boss. The fight definitely falls into the category of long multi-phase bossfights where a single player making a bad mistake can cripple or wipe the fight in an instant. A whopping 5 phases with multiple types of adds, soaking mechanics, displacement knockbacks and living bomb abilities the fight is jam packed with events. As a smaller raid group we struggled at times with reaching certain areas on the platform in time as not everyone has access to sprints. Luckily a nerf to the fight alleviated this problem. Spending ample time in phase 3 we had mixed results but finally managed to punch through to the illidan phase. Pending on the hp going into the illidan phase we didn't have much trouble with it and emerged out of it into the final phase. Everything seemed fine, some more obelisks hey what's this swirly armageddon again? OH MY GOD it's a ball of fire..... get it off get it off. Another fine example of going over mechanics != to executing them properly. Seeing/experiencing them first hand was needed and so our adventure in the last phase was quickly ended. After getting to the last phase a couple more times things were improving and soon we had a very neat start of the last phase. That excitement however soon ended as some more obelisks and fire orbs came along and started taking out people. 1% left on Kil'jaeden and only a bear and a warlock alive would this be it? An epic wipe and we had to try again or... BOOM he fell over and we managed to get out first kill. Well done all KJ surely made us work for it.

After defeating the maiden we get to enjoy a long titan elevator ride into the bowels of the of tomb complex where Kil'jaeden awaits us as he reanimates the fallen avatar. The fight has a docile phase one which is all about proper execution/positioning which if successful will delay the amount of energy that the avatar can absorb. Once fully laden with energy the avatar will shatter the platform and cause everyone to tumble down except for Velen, who rides in a golden bubble chariot. We find ourselves on a small island in a fel lava lake while getting bombarded with tornadoes and boy to they hurt. Training you to become excellent tornado dodgers the fight quickly ramps up in damage as soaks are getting more difficult to execute as the island shrinks with every aoe blast. Eventually although with one sliver of land left the avatar fell and was no more.
![]()
The Maiden of Vigilance stands watch next to a non functional elevator boss as the seventh boss in the tomb of sargeras. The fight itself is really not that complicated with limited movement and no adds it mostly boils down to debuff management. The fight hearkens back to the Thaddius encounter in naxxramas which is pretty much the same at its core. Players either get holy infused or fel infused and touching any other player or mechanic, flying projectiles or floating orbs of the opposite colour turns you into a bomb. The bomb mechanic is dealt with by jumping into the elevator boss with less than 3 seconds remaining in order to negate the explosion to hurt the entire raid. Aside from managing this debuff, there is ofcourse some soaking involved this time in the form of a frontal cone. Once we altered how we soaked we were seeing less soaking deaths and managed to get close to a kill. Now we just needed to wait for people not to hit wrong orbs and turn half the raid into a bomb before we would get a kill. Soon after everything was right on track until mayhem broke out and we wound up with just a handful of people alive yet the Maiden was sub 5% HP. A successful solo soak by our bear extra-ordinaire and the Maiden was no more.

The Desolate Host fight takes place in a room where the raid can freely phase in and out of 2 specific realms on their own accord by interacting with braziers littered around the edge of the room. The bulk of the fight revolves around add control and positioning. While in a realm you can not be near another player in the other realm as this will cause a large amount of damage called dissonance. For this reason its imperative that everyone moves or stands in a predetermined way/location so that the amount of "screw-up" dissonance damage is reduced as much as possible. In the spirit realm there are some small adds that fixate on players leaving a trail of goop on the floor while moving about and some priestesses that sorta chain cast 2 spells. The scream being the important one to interrupt unless players in the corporeal ask for a scream to go through. I think one of the main things everyone needed to adjust to was the amount of spike damage/healing required when certain mechanics go off. This is especially true for soulbind / spear / wither and if these coincide with phase transitions. Once everyone got a wee bit more experience with the fight we were pushing it into the last phase. This last phase starts out hectic with the mini bosses stil alive and so you have to still consider all of their mechanics but once those are dead the fight just becomes a move away from X or stack at X while damage onto the raid slowly ramps up. After a few more attempts we were able to slay the Desolate Host.

After having dealt with the sisters we went back to our friendly naga and her battery of aquatic friends. The first issue we had was a lack of damage to kill eels on time before a tornado wall would sweep us away. After some talent adjustments we were ready for some silly cleave fiesta. Murlocs were a slight issue as they wound up in china more often than in the melee pack which eventually improved with more attempts resulting in more cleave. After having seen plenty of phase 1 things were looking up and we finally were able to spend some time in phase 2. Hydra shots become more a spur of the moment mechanic in phases two and three as strict positioning is out the window. Sidestepping a big crashing wave is easy enough and dealing with the shark by feeding it some ink was learned quick enough. Phase 3 was quite the change as the tornado wall of doom returned and eel juice disappearing straight before it. Under heroism we were killing those eels slightly too quickly so we postponed the hero somewhat to alleviate that issue. Fingers crossed while everyone was soaking in ink pools to keep the room manageable clean. Finally we were having really close wipes but had some shoddy attempts after that. Time almost up we ended up at our traditional final pull of the evening. Which in our long standing tradition thus also resulted in the kill.

After spending some time on a disgruntled naga we decided to have a go at the Sisters of the Moon. This trio of elven ghosts shower you with abilities and spells in such large quantity it has the potential to blow up your gfx card or so we're told :lol:
A council like fight where you have to deal with abilities of all 3 bosses but only one is active to dps harboring a similarity to the blood prince council from ICC. The abilities are rather straightforward with aoe voidzone type abilities that should be placed near the edges of the room and just moved out of and a plethora of line shot attacks ever popularized by WoD. The uniqueness of the fight comes from the platform you fight on. A representation of elune which cycles through its day and night stages. While standing in the light side you receive a stacking debuff increasing the arcane damage that you take while standing in dark the debuff will increase the shadow damage that you take. It's important to keep track of this debuff and reset it by moving over the terminator at appropriate times. This is especially important just before full moon or new moon as the bosses will use their ultimate ability meaning you are stuck on full moon/new moon for a prolonged period of time which could result in high debuff stack count if you didn't reset at the proper time.
After having some mixed results we managed to get further along into the fight and soon we found ourselves in the last phase. After a wee bit more experience we managed to slay the sisters and comfort the healers, all driven mad by healing off shielding.

The demon inquisition is a jolly partnership between two demons, one who wields a scythe and one who travels about with a honey-i-shrunk-the-kids cage. While initially we tried a more spread out approach we eventually settled on a more managed spread and stacking method to counter several of the abilities in the fight, notably suffocating dark and calcified quills. With that said the fight especially for ranged remains quite hectic as the tempo of spells that require re-positioning is quite high but we were making progress nonetheless. After tidying the interrupts up slightly we were finally getting into the last throws of the fight. Not long after and with several deaths we managed to beat the inquisition.

We decided to tread downwards into the naga infested territory and stumbled upon a Naga brute. The placement of debuffs and the handling of the constant stream of murloc adds are the 2 mechanics that try to disrupt your positioning. Harjatan will every now and then do a huge front cleave attack that needs to hit as many people as possible to make the damage bearable. The longer the fight goes on, the more debuffs are placed on the floor, which in turn will increase the amount of frost stacks the boss gets with which he aoe's the raid. After some attempts the murlocs were getting under control and the debuffs were placed in favorable locations and soon after Harjatan fell. Mrgll mrglll!

As the first boss in the Tomb of Sargeras you'd expect it not to be overly complicated, and indeed it's safe to say that Goroth is a straightforward pit lord. While in a lot of pain, especially when moving, Goroth simply cannot give up his fondness for bowling. While the "main" raid positions itself near the center of the room to bait the spawning of bowling pins, Goroth will pick a random member as his target to lob a giant fel bowling ball at. The objective here is simply for said player to ensure the ball will roll through enough pins lowering the damage of the impact which is spread onto the raid. Seeing how bowling might not be a successful tactic Goroth backs his strategy up with a game of peek-a-boo. Aside from these 2 mechanics there is some being turned into living bombs and the room getting cluttered will fel eruptions from time to time. I guess blizzard is starting a trend here with LoS style mechanics for the first boss of a raid instance.

The final hurdle of the nighthold or Draenor pending how you look at it, is Gul'dan. The Gul'dan fight is a long one and as we've seen in the past with end bosses things get hectic in its last phase. Gul'dan is no exception to this as phase 1 is short and docile, phase 2 is long but can be executed with much control from the raid itself. Then there is phase 3 where things seemingly break down especially if the raid size is on the lower end of the spectrum. We have seen this on several bosses in the nighthold where from a design standpoint blizzard really dropped the ball by allowing certain mechanics to be a fixed number. 30 people present 7 people deal with X, 10 people present 7 people deal with X come on blizzard you have enough experience not to screw up like that. Hotfixes along the way alleviated some of these issues but Gul'dan is still going strong in this department. The sheer amount of people afflicted by flames of sargeras on our raid size meant our overall throughput just evaporated. This caused issues in both the DPS and the HPS which quickly meant a death of one or two people which only exacerbated the excessive number of mechanics as people with flames of sargeras now also were targetted by eye of sargeras. Aside from those issues the windows of opportunity in which to soak a soul inside the eye of amanthul was very limited esp with so many ppl affected by flames up the point of the double eye we managed to get that under control. After having dealth with the double eye bit many souls were left in inside the eye of amanthul unsoaked and thus many people died around the same time Gul'dan started his black harvest. That said with still a couple of people alive and Gul'dan being at 2% there was much butt clenching but eventually he fell and we got our first kill. Well done all.

After having dealt with the rabble of the cleavehold we finally reached the last two bosses. First off we have Elisande, Suramar's favourite dictator. After having killed off half the city she retreated into the nighthold only to pop out as a huge hologram and weave a fancy time stop spell on our assault force. It comes to no surprise that the fight heavily relies on the playing around with time and recurrence. Two times Elisande will avert her death only to rewind time and start from anew before she is defeated. She does this while attaining any spells she used in a previous incarnation and echo these abilities through space and time into her future self. Oh boy and we thought draenor was a time-wreck. The bread and butter of the fight is a ring of arcane orbs that collapses into a copy of elisande. You cannot avoid this ring in its natural state and will take near fatal damage if you get hit by one link in the chain or insta-die if you get hit by multiple. Two adds are summoned by Elisande who on death form spheres that slow or accelerate the flow of time. Any links in the circle chain that pass through these sphere thus are slowed or accelerated causing the chain to break apart forming gaps through which you can pass safely. While there are about 15million more mechanics this arcanetic ring is the staple mechanic. It wasn't the hardest thing to overcome for us as other abilities were more challenging to our group but we managed to finally put Elisande down with a one shot after having not been able to reach her for a wee while.

Star Augur starts off in a room that's clearly bad for people with claustrophobia. Soon after, the walls fall away and we find ourselves in this hologram star observatory room, where Etraeus shows us all the star systems that could spell our doom. We start out on Hoth, we then go to Quesh and we finish on Taris... oh sorry wrong universe. For all phases on this fight, positioning plays a crucial role in terms of handling the mechanics. This is especially true on heroic, as we get to deal with a new mechanic: Nooooooovaa! This mechanic only really impacts positioning in the fel phase. As the nova dmg is reduced based on distance it becomes important to paint in the room in a sensible way so everyone is able to reach the edge without hassle or running through 15 fel patches. The real crux of the fight is the enrage timer near the end once you push him into void phase, which is also the reason why we left him till last. Once we managed to reach the last phase with everyone alive, Etraeus was no more and the observatory fell into the hands of Suraiya.

High Botanist Tel'arn certainly likes his privacy as he has laid claim on the largest section of the Cleavehold all to himself. Taking his obsession with plants slightly too far, he's turned himself into one. The fight revolves around quick target swaps, some reactionary ouchy ouch fire no touchy and of course [b]cleave

We opted to focus on Tichondrius as our next target as Star Augur was clearly still out of our league dps wise but this filthy nathrezim surely was ripe for the picking. Again the smaller raid size and moreso the ratio of melee vs ranged seemed to be problematic on this fight. This resulted in a lot of experimenting with different positioning and handling of mechanics. Eventually we settled on something that worked for us as we managed to reach enrage several times. The slight problem here was that he still had 10% HP while doing so. After enjoying a nice glass of wine with some delightful cheese, okay a lot of cheese, we settled on keeping the blood adds in melee during the first main phase. Our dmg was still sufficient to cleavehold them down prior to a new set and thus overall dps on the boss went up. We did the second and third main phase as sane people in the usual way. We managed to compensate the lacking 10% of earlier enrage wipes this way and slew us a nice dreadlord.

Patrolling the courtyard is Spellblade Aluriel, a keen and very observant nightborne guard. She proved to be quite a handful especially in our smaller raid size as the scaling of certain abilities in the nighthold is not that favorable in a smaller raid setting. Once we had enough practice to strictly handle the mark of frost we managed to delve into the other phases. The fire phases relied on a healthy dose of pre-planning to make sure no superheated George would ruin our fun. Last but not least was the arcane extravaganza of position and re-position to make sure no one dies and that adds are sufficiently clumped for the good ole cleavehold dps. Some people would find themselves in front of an ANNIHILATE during arcane phase aside from that the odd deaths were either tanks or mark of frost targets. The fight certainly keeps the pressure on but we managed to down her in roughly two spell cycles.

I guess Blizzard felt like they couldn't wait long before having us face another giant creature who we fight from the waist up at some ledge, oh hai Kromog Krosus. Krosus has very little mechanics to him, dodging his fel laser hands, a run away mechanic when a huge orb is being lobbed at you and a stand in swirly or face deadly imps. Aside from these things there is the minor detail of him breaking down the bridge you stand on, so you definitely don't want to stand on that section *cough* melee
Aside from some individual mistakes and deaths the only real issue we had to get to the end of the fight properly were the imp swirlies as the soaking went from good to poor to good again. Once that was further under control Krosus didn't take long to die in his own lavatory lake. This pleased Khadgar.

After having defeated the first 2 bosses Trilliax proved to not be as easy as pie. Having the extra stuffed debuff on heroic became a bit of a nuisance on our raid group size as the number of cakes and scrubber bots is fixed for all raid sizes. This in turn caused us to re-emphasize to eat cake, EAT CAKE AND DO IT NOW. No soul was spared from eating the cake not even khadgar and thalyssra if we could help it but all they do is watch. The sheer distance to cover in the room in a small(er) raid size did seem to take out the fun of this encounter as you could wind up running around all the time chasing scrubbers who were about to explode. Still the best bit about this fight are those unpredictable scrubbers, those you chase in high spirits ready to soak its explosion only to see them steer right for a wall....and then ride through the wall never to be heard of ever again! /boggle
After a couple of attempts we were progressing further into the fight and at that stage we felt the kill was in our grasp. Not much later Trilliax was no more. Now only if we knew what happened to his master.

There it was, the nightwell in all its glory... okay its actually quite pretty. Circling the nightwell is this lone elemental who didn't get killed by living that close to it. Instead it gained new powers and abilities which mostly are puns about time. The fight on paper seemed more involved than it eventually turned out to be. Dodging the ring of spheres that spill out of the nightwell was handled pretty well and the living bomb / add casts didn't seem to have a huge impact on the raids overall health. Making sure the tanks didn't accidentally wind up on 10 stacks of the debuff (yes it was my own fault) and enjoying that sweet fast forward time mode where you spam your spells like some crazy FPS game and a dead elemental followed.

With the release of a new raid and tier gear we were all excited to see the new bosses. First up was a mean scorpion who evidently shouldn't have made his home that close to the nightwell. A fairly straightforward fight with some adds and aoe/cleave madness we surely wouldn't see on other nighthold bosses :lol: Making sure the adds were positioned correctly under the main boss for optimal aoe while not losing dmg on the boss itself was the main crux as dealing with the focused blasts and the shockwave proved to be quite docile. Without much hassle this scorpion lost its sting.

Our first attempts at Helya on heroic proved to be quite a challenge as we had quite some issues dealing with the bilewater slimes due to our raid comp. We only had a limited amount of time on her pre 7.1.5 but once we reached her after the patch we seemed to be doing much better in terms of handling the slimes. Some experimenting with the positioning in phase 1 finally resulted in getting into phase 2 on almost each attempt. Reassigning the dps made quick work of handling the various adds and tentacles in phase 2 with only the odd fetid rot or decaying ghoul being out of place. Phase 3 with its lovely seaweed paint proved to be less of a nuisance especially with the pacing of the adds. Time was lenient enough that we could focus on the mechanics and have plenty of time to deal with the mariner.
Soon after we managed to get into phase 3 with nearly everyone alive and Helya was no more.

After having our annual Christmas break we once again set foot in the trial of valor which got nerfed in the meantime. Pre-nerf we were already able to endure the entire length of the Guarm fight. Guarm's main purpose is to serve as a number check before Helya so mechanically he is a very docile raid boss. Having more dps-er with more traits in their artifacts coupled with the nerf should prove a dead Guarm. And so it came to pass that without much issue we killed the three headed norse inspired guard dog.

I think everyone was surprised when Blizzard announced a "new" raid out of nothing that was going to conclude the stormheim questline. In came the Trial of Valor where we fight Havi...oh sorry Odyn, Guarm and Helya. After having worked efficiently through the emerald nightmare the trial of valor proved another story. Someone at Blizz HQ apparently had tripped over the tuning knob and turned it to eleven!1 Heroic ToV especially at release day proved too much of a chunk to bite combined with the poor item level of loot it dropped it didn't feel like worthwhile time investment. Onto normal it was where we quickly made work off Odyn and slew Guarm without much trouble either. Helya proved to be more challenging but that's a story for another day...touchy.....touchy. The Odyn fight borrows quite some mechanics from the dungeon fight and adds some new things while dragging out over 10min+ making it a real long fight. Divided into 3 phases Odyn tests our capabilities in combat to determine whether we have what it takes to face Helya his arch lover nemesis. Phase one makes you fight Hyrja and Hymdall to get familiar with their abilities. Hymdall blows his horn forces you to be 5 yards spread while Hyrja shines her lantern and forces you to group up and the dmg is split on targets hit. Aside from these 2 champions we regularly deal with adds who if you want to kill them need to stand on their corresponding runes. We have lovely shapes and colours like icecream cone Green, Purple K and Yellow F
Phase 2 shifts the fight in overdrive as many spears land that automatically shatter causing a wave of unavoidable raid wide damage that is relentless once it starts. Sphere join the fight and need to be dodged 24/7 adds still need to be chaperoned to their corresponding rune and last but not least Odyn keeps inviting Hyrja and Hymdall to rejoin him time and time again. Phase 2 has caused many of us headaches and perhaps the will to live but in the end we did manage to get better at although the fight does still currently punish you severely if you make a personal error. Every now and then we managed to reach phase 3 and we had the 6, 4 or 8% wipes which was frustrating enough as we had proven we were capable of overcoming the fight. After a promising start we had a string of questionable attempts but suddenly the stars realligned and before we knew it we were sub 15% only 5 to go. People falling over left and right but still a couple alive MORE DEEPS MORE DOTS everything even the kitchen sink and BOOM 10% Odyn became friendly again; gave us a pat on the head and presented us a chest. Well done everyone working hard on getting him down and persisting on him especially now that we did it pre-nerfed state.

Xavius the nightmare lord is the last boss in the emerald nightmare. Having thrown the entire environment artist team at it the Xavius room features.....nothing aside from some fog and a lamp. The fight has plenty of mechanics and 3 phases heralding back to some bosses of old, notably Cho'gall. The core of the fight revolves around managing your corruption as nearly all sources of dmg cause you to gain corruption. At certain breakpoints you start seeing special mechanics and if you manage to reach a 100% corruption you will get permanently mind controlled. After having quite some time and attempts spent on Xavius we felt our progress to be too inconsistent and decided to take a different approach to the fight. As opposed to letting only dreamers deal with certain mechanics in phase 2 we tried a everyone soaks the meteor approach which worked out in favor for us. Adds in phase 2 were no concern anymore and bonds were handled more quickly like this as well. After having spent some time in phase 3 we also decided to take a burn approach here by simply not altering our positioning and not actively killing tentacles. After re-iterating the nightmare blade mechanic Xavius finally fell when most of us were at or near a 100% corruption.
The corruption faded and we finally see Xavius his night elf body...hey wait isn't that the illidan model ?

The Cenarius fight, which is considered by some as the actual end boss of the emerald nightmare, is quite a hectic high movement fight. At its core the fight revolves around dealing with add waves and the specific mechanics that these adds bring while maintaining as much dps on Cenarius as possible. Adds come in four flavours: wisps, dryads, dragons, ancients of lore. Some of these adds favor being spread out and some of these favor being somewhat clumped with many waves being a combination of contradicting combinations. After having quite some attempts we felt like dealing with evil wisps posed the greatest threat to our raid so we changed our cleansing rotation somewhat to make sure we never got evil wisps. Aside from adds Cenarius buffs himself and allies within 30yards with a reflecting aura causing 50% of all dmg to be reflected back to the attacker. The icing on the cake comes from brambles or "SACRED VINES!" a fixate mechanic that cannot be detected by addons and relies purely on players scanning the environment and determine whether the brambles are following them or not. Having those brambles move through the raid clump can be devastating. Over the course of the attempts players have gotten better and quicker at detecting and responding to the brambles coupled with the hunters and paladins who clear patches we managed to get a grip on the brambles. After having Cenarius rotated into the wave pack during non reflecting period we managed to push him into phase 2 at the proper time at which stage we downed him quickly as phase 2 is mainly a burn phase.

Coming from the lands of... ehhh who is this boss ? and what is its name ? Eleee, Eller, Ailee, nghhh Ellie referral your local no one knows who it is boss. Coming in two flavours of spider and raven she is the subject of debate and hotfixes changing her fight mechanics quickly after release. More painting in the floor mechanics driven by poison pools and tornado's this time while making sure you execute a platform crossing well. The fight being quite straightforward on the platforms themselves the crossing of one platform to another is quite hectic. Having part of the raid take up feathers granting them superhero jumping abilities the other part of the raid needs to traverse a spiderweb of bridges to get across. Making sure the group moves as one unit and doesn't run into tornado's or egg sacs becomes vital as tornado's sucking up poison pools hurts...a lot. After cleaning up the positioning a wee bit we were making good progress and with many people already dead this mystery boss fell. Seriously ...WHO IS THIS... even Malfurion had to go to wowpedia and look it up.

Corruption incarnate and whispering you with the sweetest of tales is Ilgynoth a beating mass who has taken residence in a local hollowed out tree. Not interested in tourists who come to check out the lovely interior design Ilgynoth has barred his entrance with a big floating eyeball. I'm still really waiting on nose or ear inspired old god creatures btw blizz. Ilgynoth is an add fight which attempts to overwhelm you before you go into the tree to actually damage him. The first half of the fight adds spawn relatively slow and kiting is not as hectic. The second half however ramps up quickly. Adds spawning further away from one another and having to deal with a sheer greater number of nightmare ichors, who cause you to consistently run about to kite them, puts quite a strain on throughput. Having reshuffled some cooldown related things we managed to get the second half of the fight much more under control. In hindsight the fight feels like its defeated once you manage to reach the tree the second time around. At that stage it's basically a free kill. A good haul this week in terms of new boss kills. Well done all and spew corruption for all or cookies.

The patchwerk fight is a stra....... Okay we have seen this happen a few times now in raids where sometimes a boss is put in with relatively little mechanics who serves the purpose of making sure you able to ouput the right numbers in terms of healing and dps. Enrage timers are strict and dmg taken is unavoidable and brutal. Ursoc is a fight like that. If the strategy is executed properly then the fight feels 100% in your control and it just becomes a number game. With a relative new expansion still and people still working their way up the gearing ladder and getting used to any new class reworks we fell a bit short on numbers in our first week. In the second week we felt that it might be doable but it was still cutting it quite close. In the end ursoc fell but not before taking almost everyone with us.. a proper buttclenching will it die kill.

After having defeated Nythendra we mainly focused on bringing down the dragons of nightmare. 3 Dragons in total of which Ysondre is always present and the other 2 alternate on a weekly basis. Heralding back to the original world boss from classic the other dragons are Taerar, Lethon and Emeriss. The fight has the raid divided into 2 groups 45 yards apart from one another as the dragons have a stacking aura debuff that causes you to take increasing damage from being near them. While tanks sort out the swapping of dragons the raid itself has to be aware of a wide variety of abilites that all 3 dragons unleash. There's adds, there's spreading and stacking, there's soaking, there's a fear and there's dispelling. A wide selection of death and mayhem indeed. Initially we struggled somewhat with the fight but after some changes we got a better handle on it and started to make good progress. As long as we limited the amount of people who got hit by defiled spirits we managed to stay in control and soon after the dragons fell.

The first boss in the Emerald Nightmare is Nythendra. A screechy dragon who is plagued by disease and poison and apparently the female version of gollum to some. The core of the fight revolves around dropping poison at pre-assigned spots, dodging a conal breath and making sure you don't hug inflated insects. Blizzard didn't wait long to introduce the non detectable mechanics which in the case of Nythendra means you don't get any warning for big bad insects near you aside from your own two eyes. Struggling in the first week to meet the DPS requirement as we went into enrage several times. The second week we seemingly had more issues with having enough healing to keep the raid stable and topped up to cope with the damage of infested and volatile rot ticks. After some dodgy attempts we starting making progress again and were able to sustain the fight for longer periods and soon after Nythendra fell to the floor. This time not to soak up all the lovely poison but to give us some well deserved loot.

After working our way through hellfire citadel from its entrance all the way to its rooftop we finally faced Archimonde at the black gate. A 3 stage fight or 6 or 4 however you want to spin it. It's long it's brutal and it's certainly worthy to be considered as a true end boss. A couple of key elements for the fights are priority target swaps on "must die asap" mobs. Mass re-positioning of the entire raid at set intervals while maintaining the layout of where to stand and the spreading and collapsing to counter certain boss mechanics in very short timeframes. Ofcourse we have seen movement and adds before as they are pretty much a part of any boss fights these days but the sheer amount of mechanics on Archimonde and how they conflict or challenge you in order to execute them properly is the real fickle.
In the fashion of imperator Margok the Archimonde fight kicks into overdrive when he reaches 25% and big ole meteors start tumbling from the skies and sets of 3 infernals are unleashed. While there really was a learning curve to tackle all phases prior to the 25% as on heroic everything was taking more time. The crux of the fight for us was the last phase and being able to deal with the rain, the infernals and the living shadows. We lacked a lot of cc control in order to split the infernals up properly if they weren't engaged immediately when they were born. Limited taunts and displacements meant that once a second infernal started to make its way to the tank it was nigh impossible to get it off. Gradually we started getting further into the last phase especially so if infernal spawns were slightly staggered which lead to sub 10% wipes and at later stages sub 5% wipes. Very close to a kill but with time having ran out we needed another reset hopefully another 3 levels on our fancy rings would close the deal.
So we started on him again in a fresh reset with 3 more levels on our ring and managed to get pretty far again with a sub 10% wipe on our first pull. Imperative not to get greedy and to keep being focused on the assignments it felt like tonight was gonna be the night. A third rain of chaos unleashed and people slowly starting to topple over. Infernals rising up but not being handled as too little people were left to do so it was all focus on Archimonde. He was fast approaching 0% and just in the knick of time before the infernals started with their hellfire he toppled and we got our curve. Well done everyone involved in the learning and executing of the fight.

Taking another portal ride from our crow shifting mage friend Khadgar we wound up on the roof of hellfire citadel and had to face off......Mannoroth?....wasn't he dead?
Those pesky demons never die unless you kill them in the twisting nether itself, blame afrasiabi for that. We had plenty of practice on Mannoroth on normal and mechanically speaking the fight is the same on heroic. The only real worry was handling the gaze correctly. 3 people get feared for a short time where they run uncontrollably. Once the fear effect expires they blow up for fatal damage. The mechanic requires non feared players to run along with a feared one as the explosion is shared with anyone within X yards. You basically want the least amount of people to share in the fear mechanic we tried 2 per feared player on our raid size. The twist to this mechanic is in the last phase, phase 4, yes this is a long fight. In the last phase the explosion also creates a permanent voidzone (white) and its size is determined by the amount of people that shared in the explosion damage which if handled badly means half the room is covered in a void zone. I'm sure the lich king is kind of jealous because at the heart it is very reminiscent of defile one of the top contenders of $#@$#!$ mechanics of WotLK. Mannoroth proved to be better of dead as on our first pull we put him down like a flea infested rabid dog. This leaves us with only one boss left Archimonde and his booklet of mechanics and spells.

The last boss to deal with in the upper section of hellfire citadel for us was the anti-paladin extraordinaire Tyrant Velhari. As opposed to the other bosses this fight doesn't have that many mechanics. There is some positional stuff, one debuff, only 3 adds and a floaty purple hammer. The lack of a truckload of mechanics to counter doesn't mean Velhari is easy actually as its the tuning of the fight that made us do it last in the first place. This fight nestles itself into the gearcheck category as both healing and especially dps numbers need to be at a decent level in order to beat the encounter. Once everyone managed to properly track font of corruption on them we started making headway. As a sidenote tanking this fight is a right nightmare, the damage is scary but the positioning of mobs is just horrendous as they just move so excessively while trying to position them. Once we reached phase 3 it was just a matter of time where people started dropping from the excessive damage but damage dealt was also reaching astronomical levels and with that we managed to down her with even one tank alive.

After having dealt with with fel lord Zakuun and having witnessed Grommash his hobby of whittling our next target was Xhul'horac. A void remnant who likes to summon demons all day errrrday. The core of the fight revolves around the old painting yourself in a corner scheme but with a big twist. Normally in these type of fights you just paint and at some stage you run out of room by which stage the boss should be dead or you will just wipe. On the Xhul fight however you can make the paint disappear by using other coloured paint. Xhul shifts between fel (green) energy and void (purple) energy and his demon adds are tied to a certain state (imps for fel and voidfiends for void). This means that sometimes people lay down green fire and sometimes purple fire. If you take damage from fel you are armed to explode if you touch void and vice versa. While dealing with the mechanic in the terms of debuffs from xhul himself is quite docile once adds are thrown into the mix the story slightly changes. 3 imps are summoned each and every time all 3 of which attempt to cast a fel orb. If any cast is successful an explosion will most likely follow causing people to die. If the imps weren't enough of a hassle to deal with the voidfiends tend to be even a bigger pain. Voidfiends shine a bright pink light announcing the location to which they are teleporting. If anyone happens to stand in said pink light while the voidfiend finishes his teleport cast purple fire is created at said location. Creating this extra purple fire causes a hefty strain on the positioning of the raid which in turn will cause extra explosions. On heroic we certainly had to work way harder versus normal in order to progress further into the fight. Having made slight alterations to our strategy we just had to practice handling the adds properly while praying no one stood in pink light. After an evening of progression on him tradition demanded that on the last pull we'd kill him and so we did.
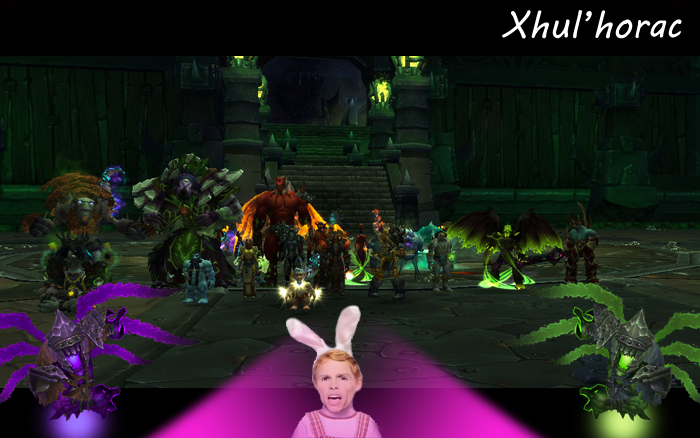
Fel lord Zakuun seemed like the best choice in terms of which boss to pick after having dealt with Socrethar. The core mechanic revolves around avoiding or blocking projectiles that are being thrown across the room either by the boss or by raid members themselves. Versus the normal counterpart the fight is quite different as explosions (projectiles hitting bad stuff) didn't really hurt much on normal nor was soaking those projectiles. Both these things are quite punishing on heroic. We settled on a basic positioning strategy that if executed well enough should give ample time for our raiders to successfully block incoming projectiles so they wouldn't hit the pillars or the debuffed group of people. Getting people to run to the right corners in about 3 seconds still proved somewhat hit and miss at times but we were making progress. The only annoying bit of the fight is the healthy dose of RNG that can make pillar placement a real pain but that's just inherent to the fight design. Our dps was strong enough to only endure one heavy handed phase before we managed to push Zakuun into his enraged state. Heroism was a good medicine to deal with the enraged burn phase rather quickly and soon after we had a kill. We untied Grommash and while we had our lovely kill picture he decided to go and slice up Zakuun's face.
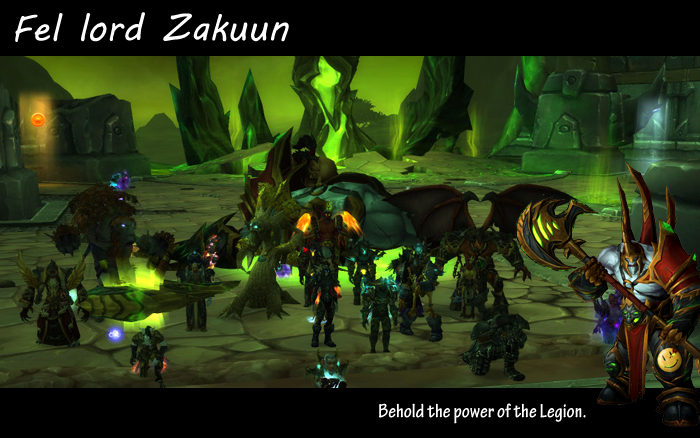
Socrethar the eternal is quite a gimmicky fight. Aside from the raid executing certain mechanics and positional requirements the bulk of the fight revolves around controlling the mechanized suit which houses Socrethar. The suit plays a big part during phase 2 of the fight by setting up the conditions for the raid to be able to execute their positioning and add wave control. The fight has a troubled history as it was bugged/broken/completely wrongly tuned during PTR testing, something which unfortunately spilled over into the live version. Blizzard even felt the need to buff the fight in order to salvage it from the loot piñata status. That said we has issues during phase 1 in regards to positioning and raw damage by the reverberating blows something which we managed to completely eliminate once we opted for solo tank soaking. After getting to grips with the suit mechanics and emphasizing the positioning during phase 2 the only thing left was figuring out at which point to force going back into phase 1. In our case after 3 dominators. Once we managed to to have a clean transition from phase 2 back into phase 1 everything clicked and soon after Socrethar fell but we're all sure even hellfire citadel was merely a setback.
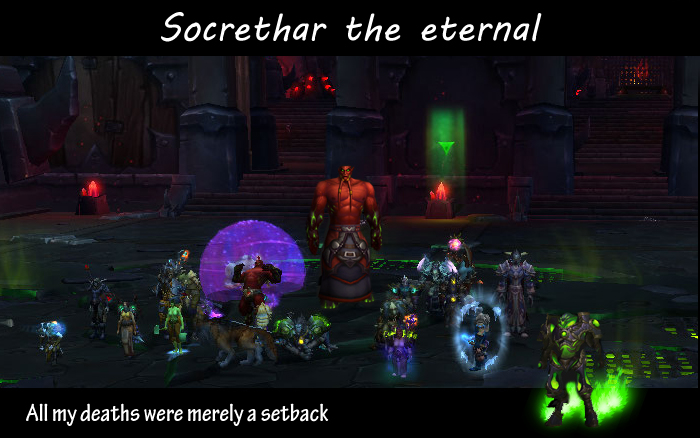
When I first tested this fight on the PTR the core mechanic of the fight struck me with fear. Having everyone in the raid be able to watch all of the raid frames to make informed decisions who to throw the eye of anzu to seemed like a recipe for disaster. We have seen it before and let us not stop with the tbc throwbacks here "Hi lady Vash" that throwing stuff around can go horribly wrong. Gladly we managed to learn the mechanic quickly. The only hurdle on heroic were the adds really. Being able to burst down the talonpriest quickly enough to get the bomb mechanic out of the way and responding quickly once we shift back into the ground phase. With a couple of good attempts along the way our old power mad questing buddy from talador fell and Iskar was no more.
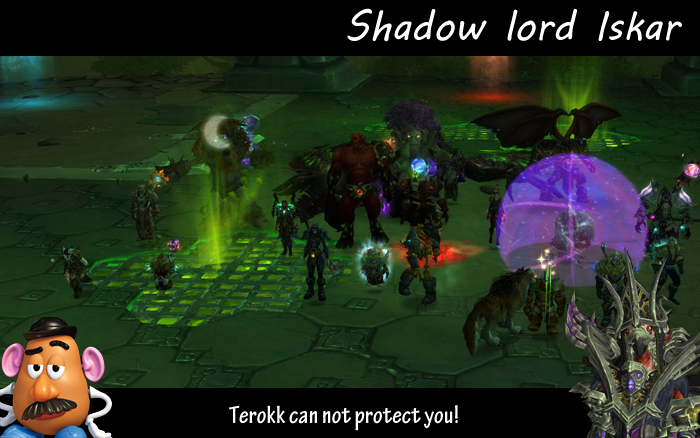
After freeing Teron'gor early at the start of WoD as he was being used to power the dark portal together with Gul'dan and Cho'gall we encountered him soon after in Auchindoun. A 5-man dungeon in WoD where we seemingly defeated him although him jumping off a platform while not being dead is not that much of a defeat. Low and behold we finally catch up with him again in hellfire citadel. Teron'gor has been busy with a soul cleansing clinic and gained some weight in the process. All jokes aside the Gorefiend fight is pretty awesome. It's a delicate house of card where everyone is busy with little independent tasks some of which you don't even have vision on as half of the fight takes place in his stomach. If everyone performs their task well enough the fight will feel very controlled and rewarding. Once people start to slip the house of cards comes crashing down as deaths will work against his stomach transport ability and adds can start spinning out of control, especially so on smaller raid group sizes. The fight alternates between 2 phases. One phases which is add heavy and is all about control. The other phases revolves around grouping up and trying to pump out as much damage and healing out onto Gorefiend / the raid. It also, for a change, gives tank an important tank while not actually tanking which is to headbutt incoming spectres that explode for some hefty aoe. A simple mechanic like that feels much more rewarding that trying to do some pretend-dps on a static boss that doesn't do anything for a minute. Getting the needed experience on the fight on normal we made quick work of him on heroic.
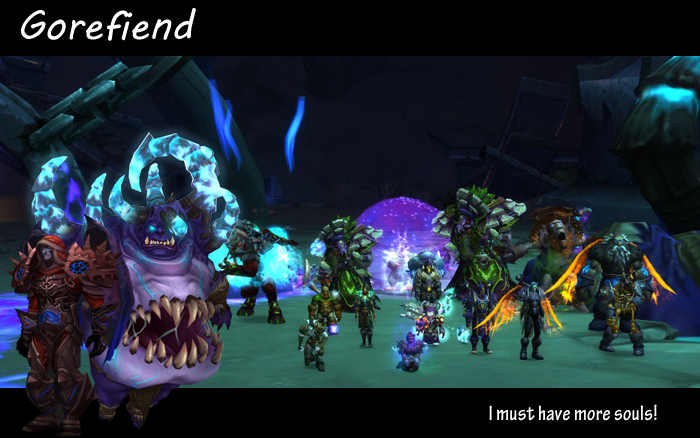
The last remaining orc clan leader after we decimated the rest in all 6.0 content. Kilrogg accepted Gul'dans gift and drank the blood of Mannoroth. The Kilrogg fight revolves around add control, making sure that the adds that spawn are killed and slowed prior to them reaching their end destination. Adds come in two flavors namely orcs which transform into hulking berserkers and oozes that are formed after another Blackhand style arrow projectile is being handled. Any mishaps with orcs results in massive raid dmg while any mishaps with oozes results in massive raid dmg and the boss healing himself for a large portion of his health pool. Especially when being ranged his health pool seems intimidating as it's rather huge. Luckily we all know that Kilrogg like his peers before him poked out his eye in a ritual to foresee his own death. Like so he uses a similar spell during the fight where a select number of people stand in his eye ray and are transported into a realm to foresee their own deaths. Upon returning successfully they will receive a massive buff to their dps and healing output which is how his large health pool is countered. Aside from those abilities every now and then Kilrogg goes cray cray and starts spinning like a madman throwing void zones everywhere that you have to dodge which sums up the fight. Once we started with a new positioning we had better control over the spawning point of the oozes. The right mix of melee and ranged is also needed as the adds do require a lot of throughput to be dealt with before they reach their destination, definitely not a melee heavy fight. After snagging up Ariok on normal mode 2 weeks earlier we were unable to replicate that feat on heroic, sorry buddy, but at long last we finally made Kilroggs vision come true.
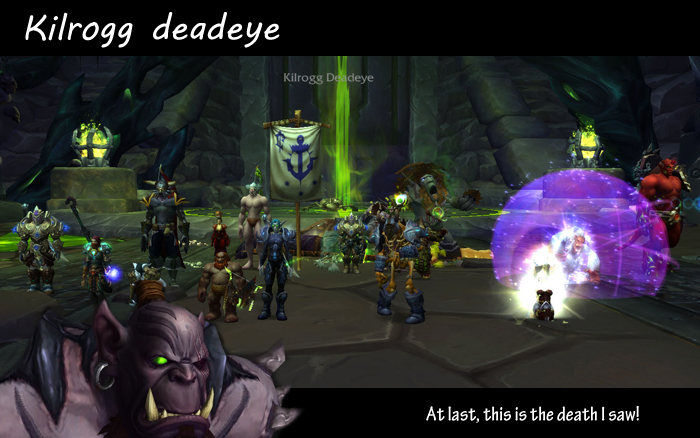
The hellfire high council was next on the menu. A true council fight where each member has its own health pool and thus they die independently of one another. The throwbacks to the burning crusade aren't over as gurtogg bloodboil makes his appearance even with his iconic blood boil mechanic straight from the black temple. The fight itself is not that fast paced. The main cause for deaths for us at least seemed to be related to mark of the necromancer, a powerful dot that dia darkwhisper casts on raid members. This dot remains on players growing in strength and can only be removed by dia darkwhisper herself when she casts reap. This causes all players with the dot debuff to leave a powerful void zone on the floor. Since the dot can grow too powerful to heal for healers they are forced to dispel it at times which causes the dot to spread to 2 people albeit resetting its strength. In turn this means you want to limit the amount of dispelling as much as possible. Jubei'thos a blademaster has learned well from blackhand as he uses the ever so popular arrow on the floor projectile shooting out so please dodge it mechanic. A boomerang version in this case as the sword he throws out comes back to him. Aside from being a pretty long fight, the dot and leaving the void zone of it at the appropriate spots during reap seemed to be the biggest hurdles. After paying some more attention to not get his by the busses of void lords that drove through the centre of the room (where all of our ranged hang out) we managed to punch further into the fight. Soon after the council was no more.
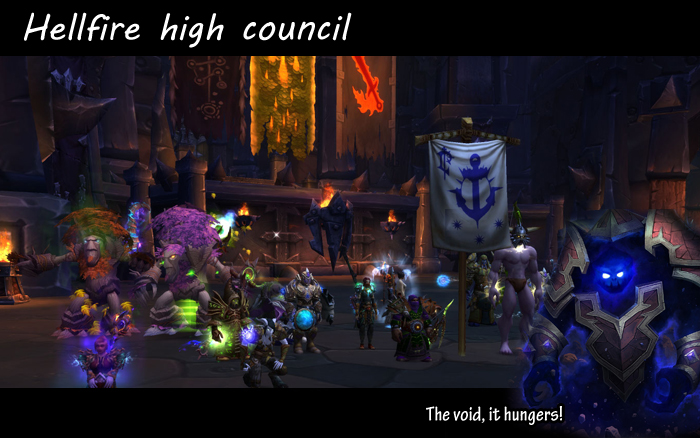
Morchok..kochrom...kromog no wait .... Kormrok that's it, that's what it is called. Another magnaron dragged up from some primordial soup kormrok faces you with pretty colours, grapsing hands, rune puzzles and most of all radical waves bro
Cobbled together with a mesh of previous seen abilities, hands from kromog, explodo-tank from imperator Mar'gok and generic frogger in the form of waves kormrok didn't feel that difficult of a boss to wrap your head around in terms of mechanics. The only new thing is the rune puzzle during the empowered orange pool and getting people to run in the right direction over them. The boss itself felt quite docile especially so when compared to iron reaver perhaps slightly undertuned nonetheless a welcome kill as our tier helmets can start pouring in.
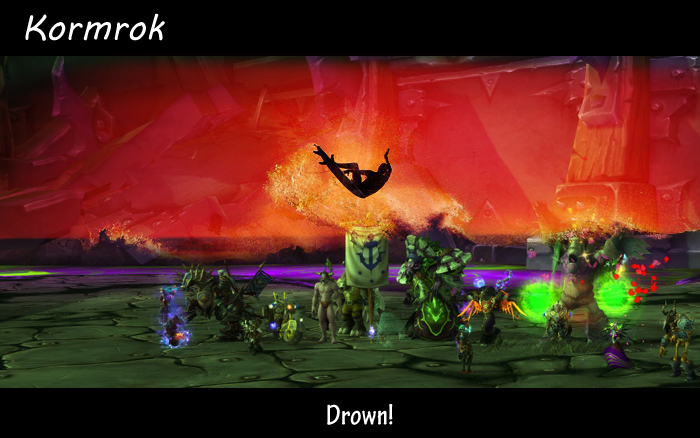
After making siegemaster Mar'tak flee the battlefield during the assault encounter we soon encounter her again. Strapped into a huge machine designed by the late blackfuse we face her again. Reminiscent of the ever famous "no no no NO NO NOOOOOO" xt-002 with even a similar aoe pounding spell this fight boils down to a dodge ability X fest. In this case that's barrage, a conal ability that must be dodged. Taking damage from barrage might not kill you but healers will struggle with stabilizing your health pool with all other spells going off. Improper spreading may lead to excessive dot damage from unstable orb and remaining within range is the hardest crux of all with a boss that's hard to position and ever changing raid positioning due to the barrage.
After some attempts we struggled mostly with the air phase as bombs tended to explode way too often. One day later, everyone with fresh eyes and those bombs were finally subdued. Soon after the iron reaver went kaplouie.
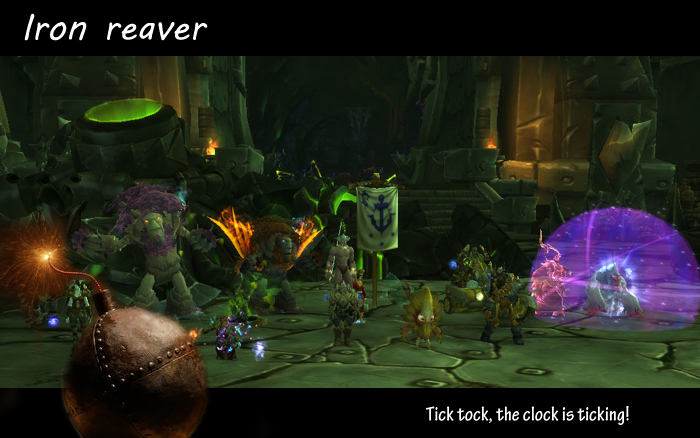
With a new big content patch comes a new raid, this the case of 6.2 that is Hellfire citadel. The throwbacks to the burning crusade keep coming and even the legion roars its head again. The first encounter if the hellfire assault which is a huge add wave type of fight. With the right amount of aoe and single target damage you try to keep the waves under control. Making sure that the friendly warlocks who turn into demon form and thus didn't receive the blizz memo about playing demonology drop down in health in a staggered fashion. They just love their felfire volley spell as a demon and it kinda hurts so we don't want too many of them at the same time. Once that is sorted it boils down to killing the siege engines in time who try to destroy the big cannons we use to blow up the door of the citadel. We almost managed to do it on heroic on day two of the 6.2 release after which we realized that blizzard, in its infinite wisdom, really wanted us to do normal mode first because going from heroic to heroic is seemingly an absurd idea to them. A slightly higher item-level across the board later and the assault lasts no longer.
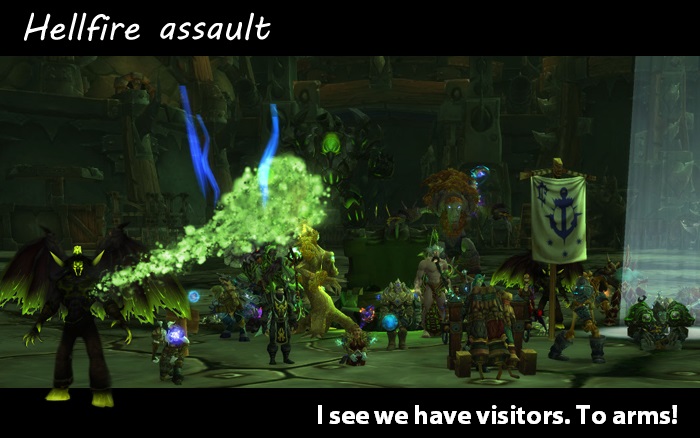
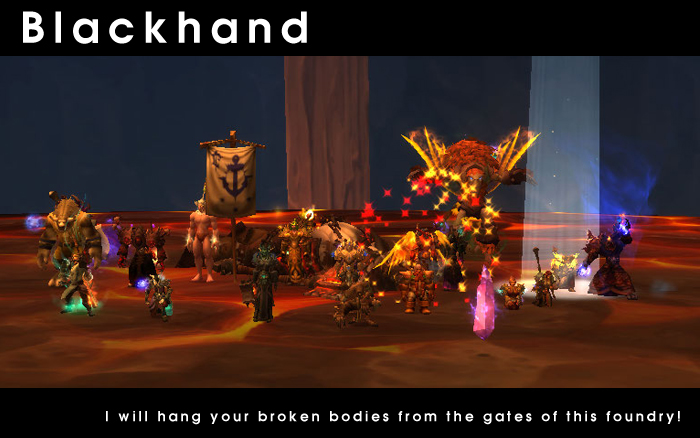
And so we have slain Blackhand and what a fight it is indeed. Very short for an endboss style fight especially considering the imperator fight we had in highmaul. The Blackhand encounter is over and done with between 5 to 6 minutes. Those minutes are packed with merely 3 mechanics that play a very brutal role as they punish you greatly if you ever get them wrong. Some bombs you need not step on, some arrows that point out the path of flying hammers and a stand in this circle to get some damage and a knockback. That hammer flying out spell is Blizzards new pet mechanic by the way as a lot of bosses in hellfire citadel will make use of that mechanic. Once you start the pull the Blackhand switch goes on and it wont go off until he's dead or you wiped. Phase 1 does get easier with aspect of the fox to tunnel healing cd's while dodging the cave ins but that spell is getting killed off in 6.2 That said even in phase 1 the pressure is on to keep on pumping out the numbers whether it be healing or dps. Phase 2 posed us with enough headaches that we swapped strategies how to handle it until we settled on something that worked for us in order to get to phase 3 reliably. All that was left was making sure everybody got enough time in phase 3 to get used to the placement of mechanics as bombs are dropped off by players instead of thrown on the floor. Once we managed to streamline the bomb drop locations and the hammer started to fly out the right way we saw more people live for longer during phase 3 which meant that this time around it was Blackhand who bit off more than he could chew.
Well done all who put in the time and effort into getting him down. 6.2 will bring us a naval fleet to assault tanaan jungle with where we will lay siege on the hellfire citadel stronghold. 13 new bosses with ample of burning legion influence.

The blast furnace fight is all about add control. Seemingly this makes you think AOE as there are a lot of adds but the key is actually single target burst dps. 2 types of adds will influence the fight greatly if you fail to kill them in a timely fashion. First up are lovely twin ogron bellow operators that yank the chain of big ole bellows. This in turn drives the heat of the blast furnace. More heat means quicker ouchiesâ„¢ on the raid and the raid does not like the big ouchiesâ„¢ especially not the poor healers who are trying to keep up. During phase two we have four primal elementalists who have obviously overstayed their welcome at the paladin bubble hearth school. The only way in order to damage them is to have a slag elemental die next to them which causes an explosion which will destroy their invulnerability shield and make them vulnerable for 30 seconds. It's within this window of opportunity that the primal elementalist must die. If it fails to die the fight starts taking too long. This means heat will rise higher and raid damage will get higher while more adds keep pouring in which means you're gonna have a bad time.
Sprinkle in some bomb handling, interrupt duties and dangerous aoe debuffs and we have the recipe for an engaging fight with a high level of personal responsibility, blizzards favourite these days. Once we managed to push into phase 2 while enduring only 2 waves of bellow operators we made quick work of the furnace and extinguished it for good or at least until the next reset. That leaves only one boss left in the foundry mister Blackhand himself.
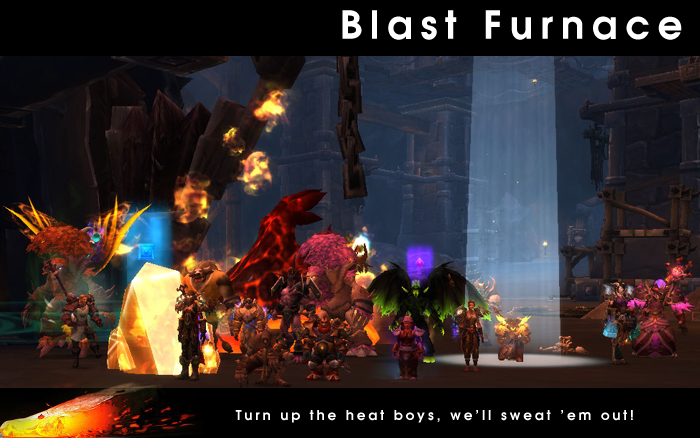
Now that we have reached all of the end wing bosses we decided to work on the iron maidens as our next progression fight. Consisting of three orc women whom represent the spearhead of the iron hordes naval fleet we faced: Admiral Gar'an, Marak the blooded and enforcer Sorka. For dps players this fight is the ultimate cleave encounter where much of it consists of sustained 3 target cleaving. That said there are plenty mechanics to deal with even if on paper there are only 9 in total. After having sorted how to deal with the mechanics and forming our strike team to grapple across the docks onto the dreadnaught to deal with the miniboss encounters things started to look up. While the trike team is aboard the dreadnaught the main bulk of the raid has to start doing a safety dance where they alternate between 2 safe locations that ping pong between being safe and dangerous constantly. While tanks got to enjoy the frustration of re-positioning bosses "OMG WHY WONT YOU MOVE or WHY ARE YOU MOVING BEHIND ME" the dps and healers got to enjoy doing the safety dance and handling the mechanics present at that time during the fight "oh hello penetrating shot / rapid fire / bloodsoaked heartseeker" After some attempts we also witnessed the bad case of rng this fight can throw at you as multiple mechanics can land on the same person for instance we had blood ritual and penetrating shot on the same person....so yeah....
All things aside this is an enjoyable fight as it is rewarding for handling the mechanics properly and punishes you severely if you don't which in turns gives you a sense of control over the fight. Then came the last phase when one of the maidens dips below 20%, oh boy. Chaos ensued as the maidens all gained their last and final ability. Raid damage spun up rapidly due to Marak's sanguine strikes, people took large hits from Sorka's dark hunt and last but not least Gar'an decided to run of and place dominator turrets to sprinkle some OMG MOVE MOVE re-positioning on us. We opted to kill Gar'an first here as the turret caused so much re-positioning and you kinda need to kill the turrets to keep their numbers to 1 alive at any time anyway. During that stage of the fight the cleaving is out the window and all focus should be directed onto killing the maiden destined for death as quickly as possible. We had quite some casualties in the last phase but as long as at least Gar'an died the fight became a whole lot more forgiving as 3 mechanics are instantly gone. Crippled but not defeated we continued on half our strength as we managed to kill Marak second. A combat res came of cooldown and tanking cd's were available we started to whittle Sorka's health away and got our first kill after much hard work.

Kromog is visually a throwback to the past as Kologarn in Ulduar is quite reminiscent of him. Visually similar but there is where any comparisons stop as the fight mechanics are nothing alike. Kromog deals heavy tank damage with his fists of stone and slam coupled with heavy intermittent raid damage in the form of stone breath. For us this fight with those types of mechanics felt quite similar to butcher in terms of pressure for healers to keep up with the twist being that butcher was a stand still fight while Kromog actually throws 3 types of spells at the raid they need to dodge while dealing with that pressure.
First of all there is the rippling smash which in our setup meant he could only do this towards 3 possible locations either the tanks, melee or ranged. A wave type of earth spikes attack that you just need to move out of. Second there are reverberations, oh hello Atramedes, small pulsating golden discs that fly outwards that you also need to dodge. Last but not least there is a mechanic that spawns two hands that in time will move together crushing anything in its path that needs to be dodged. We dubbed this mechanic "the happy clap".
After getting accustomed to the fight mechanics and rhythm of the fight we did find a couple of issues. Some of these were not being able to break out people out of the grasping hands after the thundering blows mechanic quickly enough. This caused several deaths as people in those hands kept on taking damage and were unable to move and thus failing to dodge the rippling smash that soon followed. Another thing we struggled with was the stone breath at the very end of the grasping hand phase but re-timing the healing cooldowns alleviated the pressure there. After slotting in an extra healer we reached the frenzy popped the heroism and managed to topple this giant of a magnaron.

Oregorger is a gluttonous goren that feasts on the ore in the cellar storehouse of the foundry. The fight alternates between two distinct phases that are driven by his satiation. While you fight him normally oregorger has but one or two mechanics for people of a given class / specialization to deal with. For the ranged that is dropping the retched blackrock pool in a controlled tight pattern to utilize most of the space in a hallway. For melee it means they have to interrupt blackrock barrage casts while dodging the small explosive projectile that is hurled at them. Tanks alternate in positioning while timing their active mitigation to be up while Oregorger casts his acid torrent as damage of this ability is copied onto the raid based on the initial damage taken by said tank. With that phase down after some slight confusion about distance and or positioning or both of them contributing to the acid torrent mechanic we went on to the real horror of the fight, namely Oregorger being hungry.
Oregorger turns into a full fled pacman while we run around in his maze breaking ore crates for him to eat while we attempt to dodge him rolling over us. We faced a lot of problems in our various attempts over the last few weeks while dealing with him. Having settled down on a pre-planned route alleviated a lot of the problems we were having in regards to line of sight and roll deaths. Coming back to Oregorger quite late in our progression path he did feel quite manageable getting a kill on the second attempt.
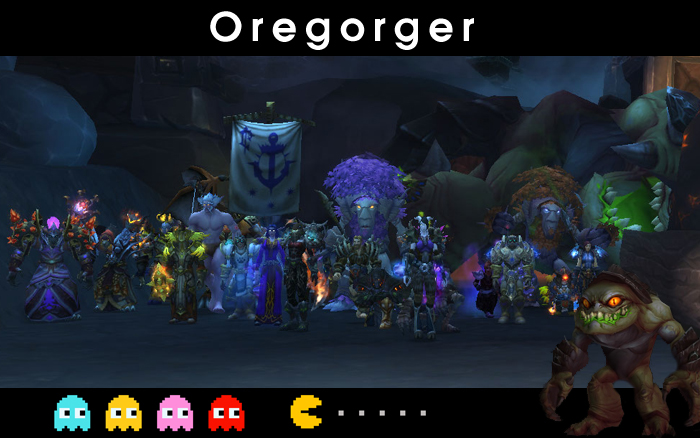
Choo choo hit in the face by a train that's basically the operator Thogar fight in a nutshell. As we had seen with grimrail depot, warlords of draenor satisfies all your needs when it comes to trains. While doing the frogger safety dance across the train tracks avoiding the 150 tonnes of passing trains we get to deal with a plethora of adds. Most of which are just random-ish trash as only 3 of them stand out. Firemenders, pesky healers that require interrupting. Gunnery sergeants, orcs that man big cannons on top of a train that only the ranged can deal with. They also like to lob some bombs on people with a long delay fuse. And the last add the very hard hitting man at arms. Given their size they are clearly working out in the gym and on a dose of steroids. After managing the splits properly and dealing with the adds in the right order we managed to pierce further into the fight. Having seen the headlamps of 4 trains at once, which is the berserk it was clear that we had the fight down and just needed to make sure DPS was up to par. A few attempts later and with all 4 trains inbound again Thogar fell with only a handful of people standing.
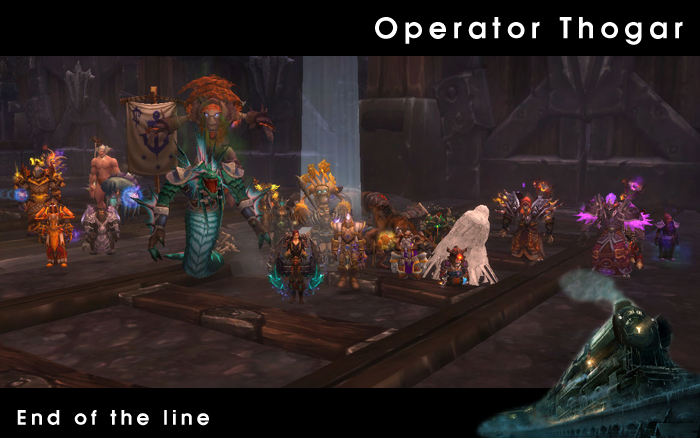
The flamebender Ka'graz encounter is filled with loads of mechanics and abilities which are avoidable if executed properly. The fight itself relies heavily on environmental awareness with its fire lines across the floor, its ravager weapon spins in mid air and not two pesky dots one a meteor split damage effect and another a hard hitting personal dot. After several attempts we settled on a basic positioning and started working on progressing further into the fight. Once we finally managed to get further into the fight consistently we did realize that with our rDPS output that the fight was going to take a while and that we might be running out of space due to the enchanted armaments. With a hopeful wipe at 14% and one last pull of the boss of the evening we managed to kill it in true classic retired style. Next up is our train loving conductor operator choo-choo Thogar.
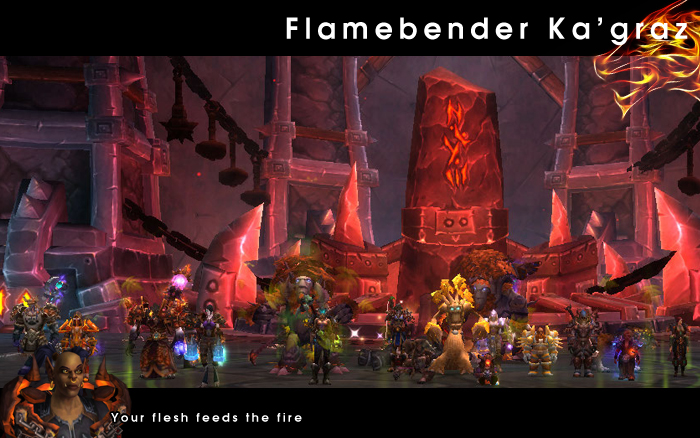
Hans und Franz our two Austrian weight pumpers is quite a gimmicky fight. We have seen it a couple of times now where blizzard is incorporating mini-games into the fights where the actual environment is starting to play a part into the fight with moving parts of sorts. On this fight which felt slightly undertuned the main difficulty is not getting hit by either searing plates or stamping presses while running on 5 conveyor belts. The searing plate stage is a very frogger like adventure where you just have to move from safe lane to safe lane while the stamping presses make the room feel like a 70's discotheque with squares lighting up a la Michael jackson Billie jean.With that said these phases of hectic movement went quite allright and the outgoing dmg onto the raid felt manageable. With some annoying suplex deaths and 2 more goes Hans und Franz were no more.
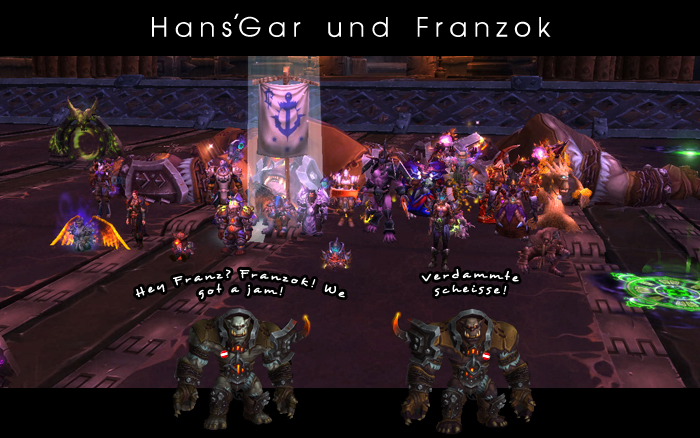
Beastlord Darmac was our next challenge in the newly opened Blackrock foundry. A passionate lover of animals and big game hunter, Darmac kept 3 of his favourite animals at his side which once killed imbued him with extra abilities. The first thing that stood out was the pace of the fight. Darmac himself merely has 2 abilities namely throwing out spears and summoning some pack animals to join in the fray. The rate however of these abilities make the fight a bit hectic. After seeing both the elekk and the wolf we struggled quite a bit with the rylak. After practicing some more on the rylak it was clear that we needed to alter our positioning in order to make this phase of the fight more manageable. The rylak change coupled with the fact that spears and pack animals were not melting as quickly as anticipated we decided to change our positioning in the fight completely. With less overall movement during the fight, survivability rates went up and we managed to consistently reach the point where all 3 animals were dead. At that stage it just took some more goes and down he went.
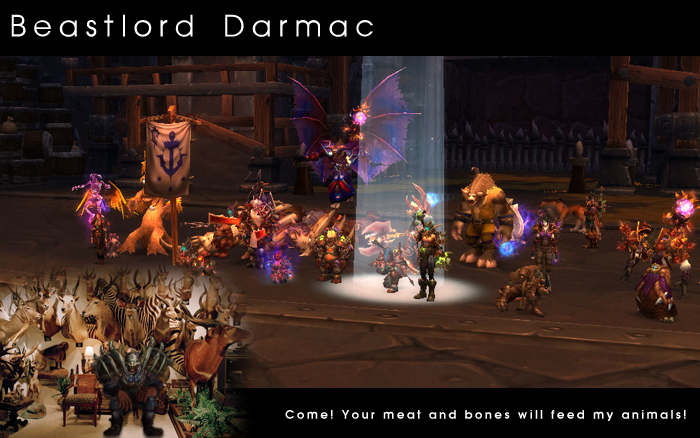
Once blackrock foundry opened we were all excited to see the new bosses. Unfortunately the most powerful boss on the server got resurrected with it. Instance not found: transfer aborted / 90% loading screen boss. After throwing our pixel bodies at the portal for quite a while we gave up and had to wait some extra days until we could have another go at it. That said, the layout of the dungeon is as such that we have quite some choices in which bosses to do in what order we like. First up on the menu was a blast from the past: Gruul. In this version of Draenor Gruul is still a legendary champion of gronn with the same potent offspring running about. That said Gruul is slightly different as he seems to have suffered from a work related injury as his left hand is a hook now.
We saw some of the old mechanics of Gruul, namely shatter and to a lesser extent cave-ins. With a new mechanic of inferno slice which keeps the tank occupied with proper positioning of the boss and overhead smash forcing some minor movement the fight is mostly a stand still single target endeavor. After a couple of wipes and finding out Gruul actually goes into a hard enrage at 6min we managed to down him. Next up beast lord Darmac.
The last boss in Highmaul is a cunning sorcerer who assaults you with an array of spells that morph into different mechanics depending on which phase you are. With a whopping 4 phases and 2 intermissions this fight is long and from a healer perspective it's all about the new WoD healing model of being conservative with your mana as it matters... a lot. Aside from tank swaps, arcane adds and a halo from hell the most important mechanic on this fight and perhaps the deceivingly simplest is the arcane bomb.
A rune is placed on the floor which arms itself quickly after which it will trigger a raid wide explosion if anyone manages to hit it / walk through it / stand in it. If a bomb is triggered the raid wont necessarily die at that very moment but the amount of hp loss that is required to heal back up again is a huge strain on mana. Such a strain that when 3 bombs are triggered during the course of the fight it's a wipe no matter what as mana will be gone before the fight is over.
All in all it's a very taxing fight and it has worked its way into the "proper end boss" category.
Ko'ragh is a stray mexican wrestler who likes to dabble in some magic shielding. There are plenty of mechanics going of and versus the twin ogron this fight is much more fast paced. While healers deal with healing off a healing restriction shield on the raid, the melee are concerned to spread out lightly to avoid blowing up for fire damage on one another. Two of the things we struggled most with were positioning the arcane adds properly into the suppression fields as positioning mobs with the server latency upgrades/fixes causing them to behave real twitchy. Once that was sorted a bit better we just needed to make sure that melee stop chasing after the boss once he went to recharge his nullification barrier so the assigned ranged dps could actually charge up his shield. Those players with those shields in turn became ultimate football headers as they deal with the incoming spheres. After managing the adds and the shield charging properly we managed to get deep into the fight which soon resulted in a kill.
After having dealt with the three optional bosses we headed further into the ogre bastion of highmaul. After dealing with some more trash we stumbled upon the dimwitted ogron duo of Phemos and Pol. While we heard many horror stories about the fire from Phemos and yes it actually was quite a mind boggling puzzle from time to time to avoid the fight itself wasn't that bad. While the mechanics come in at a different rate and thus a different order each time we felt that the time in between those mechanics was quite long. This caused the fight to feel quite slow which in turn gave healers a chance to get people back up that might have taken too much damage from certain abilities. Two attempts was all it took to down these rocket scientists.
Tectus is one of those fights that can do your head in as there is a lot of stuff to avoid that's creeping over the floor. The real crux to this fight is the middle bit where you are fighting a whopping 5 incarnations of Tectus who all have the same abilities. This causes several mechanics to trigger in rapid succession which can spiral the fight out of control if people are not disciplined to follow the generic positional directions. Crystalline barrage tended to be quite a big problem for us during this phase as it seemingly kept on going places where it shouldn't. Once we tweaked our positioning a wee bit different things started to click and we managed to get over that hump.
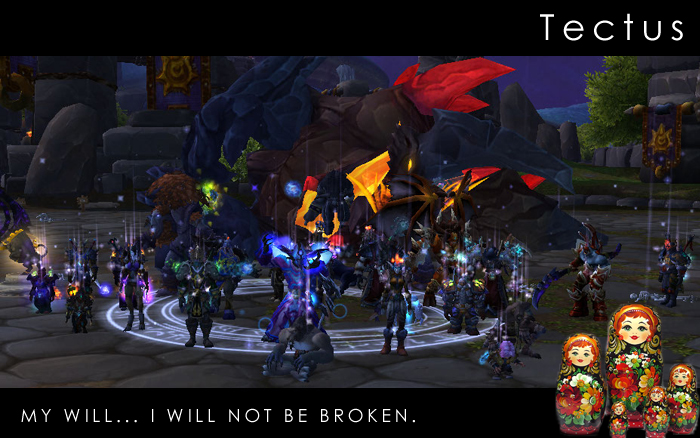
Brackenspore is a friendly fungal giant who merely wants to ai...O M G it's throwing up all over us. The fight is a hectic add and movement fight where you combat 3 types of adds who keep respawning, heal some friendly mushrooms who load you up with tasty stimulants..err buffs and turn 2 raid members into the local fire brigade to hold off the creeping of the moss. The two mushrooms play a pivotal part in the fight as the buff from the rejuvenating one really ramps up throughput to MEGADAMAGE levels in terms of the WoD healing model. Healers getting accustomed to the rate of the healing and the timing of the mushroom bloom combined with the fire brigade getting a sense of the rate at which the moss spawns were the biggest hurdles while progressing on this fight. Handling the vomit a bit better on the tanking side we managed to get some lengthy attempts in, which on the traditional last pull of the evening resulted into a kill.
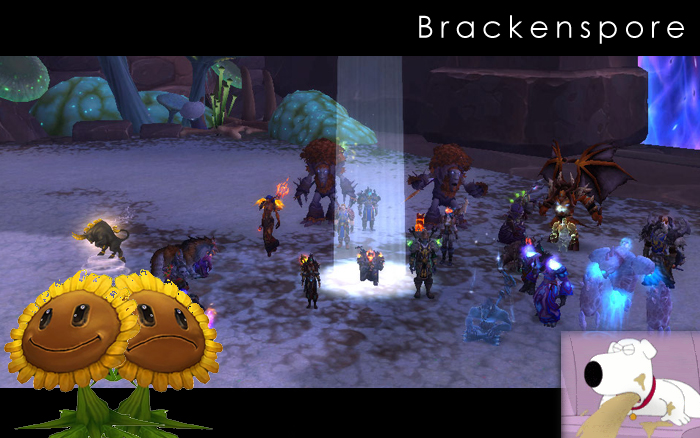
The butcher is a fight that has very little movement and very few mechanics which is something we don't encounter that much in wow raiding these days. Two piles of people who soak a bleed debuff and heavy heavy tank damage sums the fight up really. He serves a bit as a gear check which we felt on heroic so after trying him normal we got better results. As soon as the rotating soak piles were sorted this chef was no more and nor was his body, damn you server hotfixes /fist
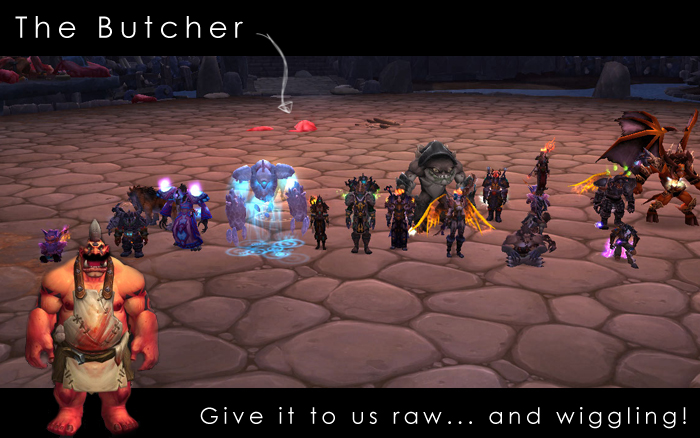
The first raid to open in warlords of draenor was the ogre stronghold of highmaul. We are first greeted by an Ogre who sends us up into an amphitheatre to engage in some arena fighting. After having dealt with the trash oh wait no... that's more like a mini-boss :o Kargath Bladefist himself shows up demanding his last remaining kill from back in tanaan jungle. The fight itself doesn't have that much complicated mechanics, there is some kiting and there is some important positioning aside from that its pretty straightforward. Each time Kargath goes into rodeo mode and swings the 5 closest players up onto the rafters they have to clear as much of the mobs present there while downstairs in the arena people need to make sure not to fall into tiger pits and to properly kite Kargath into a skull shaped flame pillar. With each pull we managed to progress further into the fight and soon after Kargath lay lifeless on the floor hand/blade detached and everything. Next up will be one of the 3 optional bosses Butcher, Brackenspore or Tectus.
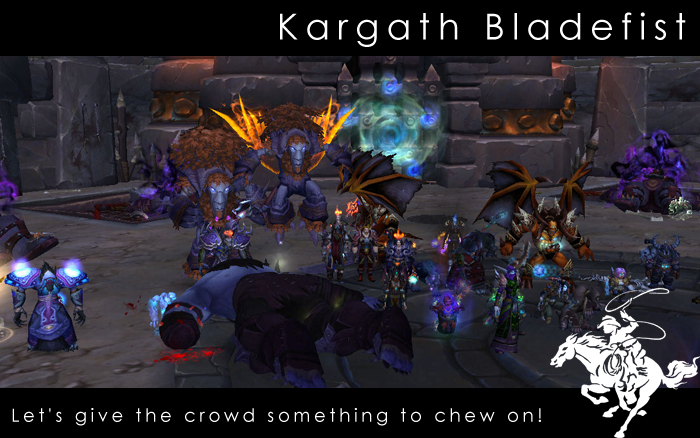
Iron juggernaut on heroic is not that big a leap in terms of mechanics from its normal counterpart. Merely 2 additional mechanics are present one of which is pretty much unavoidable as well. That said the fight can still be a royal pain in the *** as we seemed to be suffering from RNG bad luck from time to time. Having 3 or 4 mechanics picking you at the same time pretty much spells your death unless you have a heavy personal defensive cooldown or an immunity available to you. After some initial adjusting to the dmg taken and the slightly new positioning the iron juggernaut broke down and presented us his loot, thankfully not a cloak *grmblz stupid cloak loottables*
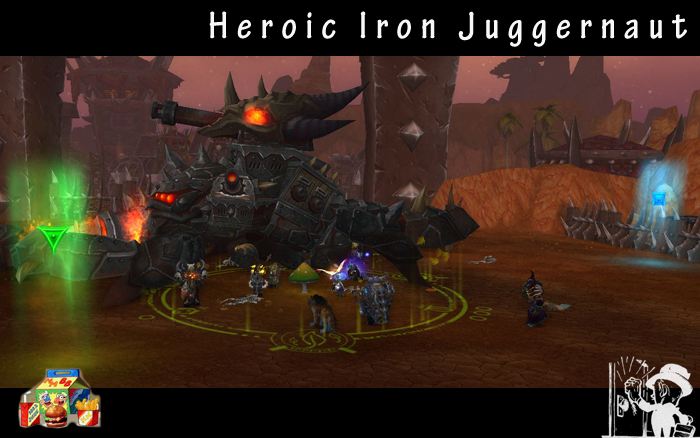
And so a dragon was slain, goodness gracious.
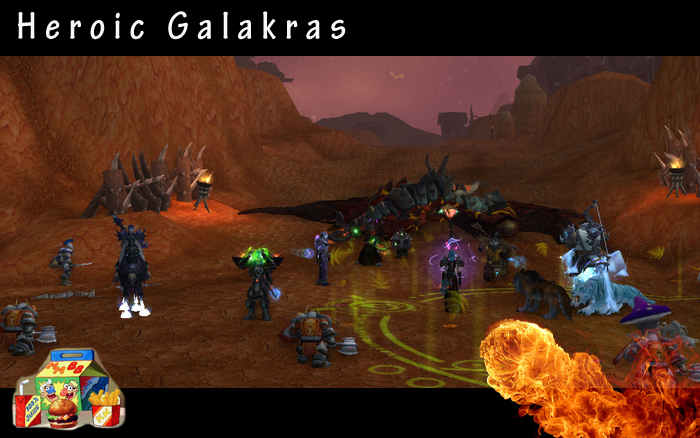
Norushen was a pretty straightforward fight on heroic seeing how almost nothing changes. Balancing out the number of people to go into the alternate realm while being able to handle the adds was the main difficulty. After that rate was sorted it was purely down to our rdps output which seemed hard for us. Some attempts later with everyone alive and kicking and Norushen fell.
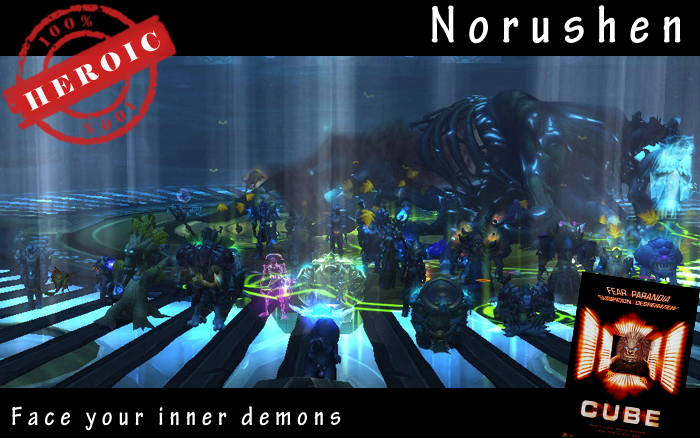
Heroic fallen protectors certainly was a slight wake up call from doing the fight on normal on auto pilot for so long. Making sure you don't stand in any of the bad crap really makes this fight a lot easier. We saw notable deaths from standing in He softfoot's poison or in Rook's spinning crane kick after picking an annoying clash target. Our first couple of attempts got better slowly but it was clear that we were off the dps target by a long shot. That in turn meant we had to resort to stacking all the pandas up much more to utilize all of the cleaving much better.
The drawback with it however especially with a melee heavy raid team is much poison around the center which happens to be the place where the bubble is spawned during Sun's desperate measures. Once we had a clearer understanding where the poison roughly always would be positioning inside the bubble went better, just the stray spinning crane kick that ruined an attempt here of there. The only thing left to manage was the anguish add and the order in which to trade him around the raid. Once that was sorted we had an attempt that was almost flawless and down they went.
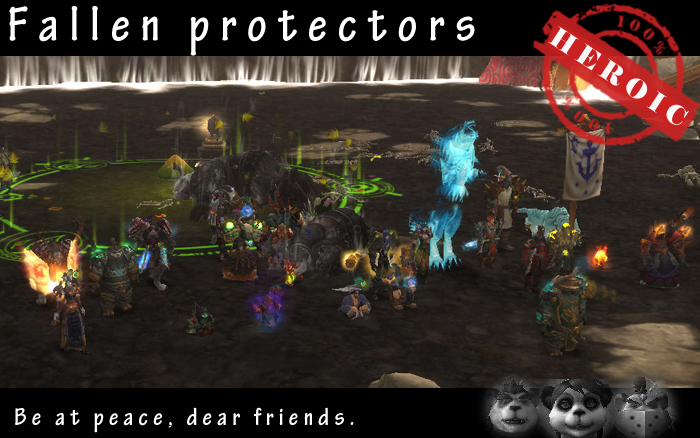
Immerseus was first on our heroic wishlist as seemingly he would not be all that difficult. The main change was during the congealed phase where instead of having people spread all round him you are somewhat forced to all stand together in a smaller area. This is to ensure that all the adds that spawn can be picked up by the current offtank without that much hassle. Aside from that, trying to negotiate the minefield of sha pools was the biggest hurdle. That said the first congealed phase really is the most painful and once you have overcome that one and enough ppl are alive the fight quickly falls into place at a more easy going rate.

The last boss of an expansion usually is a fight that makes you work for it, a lot. Garrosh Hellscream is no exception to this rule as boy has he made us go through the entire spectrum of emotional states. We laughed, we cried, we got excited, we got tempted, we got indifferent, we got frustrated and we got to be decent flooring inspectors and not in that particular order. First order of business was phase 1 which saw the death of many of Garrosh his personal elite Kor'kron guards and the occasional melee dps as they got run over by the iron star. Even in death Helix Blackfuse is taunting and mocking us as if his trash wasn't enough to do that. Phase 1 however soon was under control partly due to Razik being able to work one of the engineers into the ground over and over again on almost all of our attempts.
In came phase 2 and a plethora of different tactics we employed to see which one was giving us the best result. From killing axes to not killing axes, from perma stacking to having split groups, from ping-pong to directed desecrates. Oh did Garrosh taunt us as seemingly whatever "big" tactic change we made, seemingly for numbers it all didn't matter. During phase 2 Garrosh already starts to warm you up for the crux of the fight by sprinkling MC-ed ppl over the raid although in phase 2 this mechanic is still pretty harmless as you can use such a wide array of spells to counter it. The only main problem we've had with it was getting cursed by RNG and have 4 mc-ed people in our ranged pile. That said during our early attempts we clearly saw that our over DPS output simply wasn't enough to push Garrosh to 10% HP before he decided to suck us into the beating heart of Y'Shaarj for a third time. Diligently farming all of the other bosses for their shinies resulted in a nice boost to our overall DPS output. Our subsequent attempts proved that our DPS was on track and handling the minions was also getting better with less and less getting killed near one another.
As our attempts got better and better we suddenly found ourselves in phase 3. Garrosh managed to suck the last drops of tasty heart juice to pump himself up and then ALL HELL BROKE LOSE. Enduring phase 3 really makes you aware that phase 1 and phase 2 are just annoyance, a way to grind you down for +/- 8min before the actual fight starts. Since people are turned into sha during mind controls no longer will all of your fancy silence, knockbacks, stuns or fears work. It's just down to hitting that interrupt button at the right time and switching to these people asap. Failing to do so causes the entire raid to be mc-ed literally in a second or 2-3. Aside from mind controls we had to deal with desecrated weapons which for us partly was a problem as we had long decided to ignore weapons during ph2 meaning we had overall less room to work with during ph3. While dealing with those 2 mechanics, trivial stuff like not standing on Garrosh his head during an empowered whirlwind started to take it's toll. Players dying meant less people to handle mind controls meaning an inevitable wipe. Phase 3 quickly become aggravating as each individual mistake could and most likely would attribute towards a wipe if you happened to be picked for a certain mechanic. The last annoying mechanic we had to deal with were minion adds during phase 3, which Toaster had to deal with. Kiting them round and round while throwing kegs of beer at them to get their attention, apparently there is a bit of dwarf in each sha minion. In the end we had an attempt where the first 2 batches of mind controls were dealt with properly at which stage Garrosh his hp had dropped so far a kill was pretty much assured, if we didn't kill him surely the dots would. It didn't have to come to that as suddenly an achievement popped up onto our screens and he was apparently defeated. A nice cinematic ensued and do we find out ? They make Vol'jin new warchief (cries for Varok Saurfang it should have been you buddy :cry: ) and then put on the most flimsiest of handcuffs ever on Garrosh as surely that will stop him.
Well done everyone, off to heroics while patiently waiting for any new news regarding Warlords of Draenor where Garrosh surprisingly managed to break out of those handcuffs gee whizz.
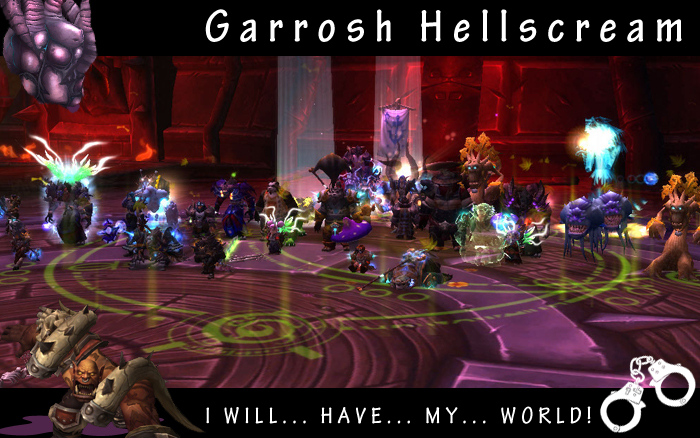
The Paragon fight looks so daunting on paper when we first went though the info weeks ago. The speculation about a random activation order made it even more of a headache but blizzard quickly saw the error of going that route. Luckily they made the activation order fixed so you can expect your favourite questgiver to activate promptly and suddenly bash your head in. All those good times playing together in the dreadwastes what gives guys? Always siding with Y'Shaarj you say, Titan usurper...lesser race. Fine off with your heads. The paragon fight takes a lot from the protectors of the endless from the terrace of spring there are just more bosses and more mechanics to deal with. Most of the abilities boil down to relatively straightforward mechanics, like killing adds, breaking an amber encasing, standing aside with a certain debuff etc. The time we had on flex surely worked out well as when we arrived at them on normal everyone already had a rough idea of all spells and abilities. Just this time round they might actually hurt. With aim being a massive pain on 25 we lost some people due to it, that did however not stop us as we managed to plow on through and kill all of our former best questing buddies on the first attempt. That leaves Garrosh on the to-do list and oh boy that fight takes ages.
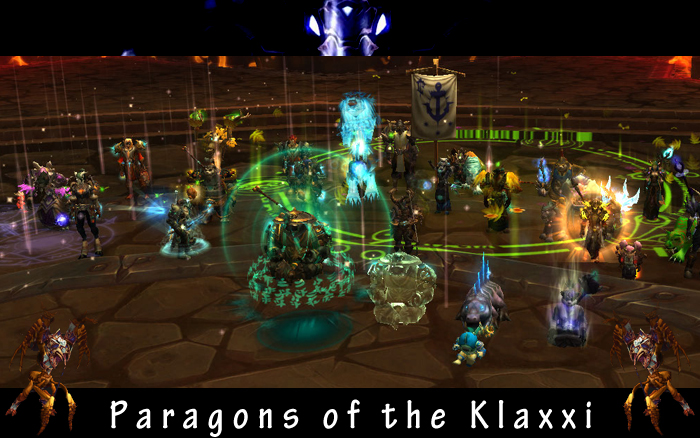
Facing of Helix blackfuse brings back memories of Nintendo and super mario. It involves pipes and hopping through them. Doing a the dodge a laser beam while scooting along on a conveyer belt and hopping once more through a set of pipes. It merely lacks the power-up sound or king-koopa making an entrance albeit we faced him off in the throne of thunder. At first the fight seemed more punitive than we envisioned beforehand but that sorted itself out with a different kill order for the conveyer group. With having to deal with less mines the uptime on dpsing the boss went up by a mile. As long as ranged and healers were trying to stand at max range and not having a player with a laser lock on run around in the most nonsensical way things were looking up. With many more borer missiles during the fight everyone got to enjoy doing another safety dance albeit some still don't have their dancing skills fine-tuned even with the assistance of that faint abba noise coming from the borers. As long as the conveyer groups managed to kill their weapon and return safely the fight is quite forgiving in terms of output. So on the second attempt Helix fell over and started some "<--- My roll, omg ninja" drama.
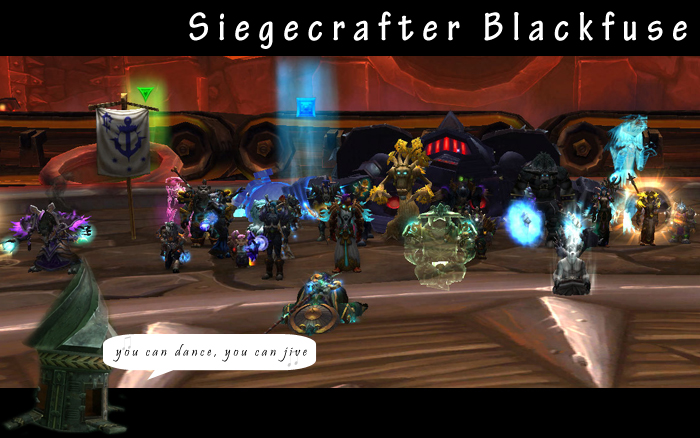
Thok posed quite the hurdle for us mainly due to dwindling numbers. After getting some time on him quite a while ago we weren't making much progress. Our phase one duration was too short and our kiting phase caused too many deaths with people having a great deal of liberty in the kiting process. We made some changes regarding the kiting and decided to micromanage all defensive buffs we could muster in order to extend the duration we spent in phase one. This all proved to work very well for us making a big leap in terms of progress on the fight. We were getting Thok sub 20% and then sub 10%. With another evening of practice we managed to get wipes on 3% or even 1%. At this stage everyone felt we mastered the fight but doing it with a mere 20/21 people was just holding us back from a guaranteed kill. Unfortunately we have been suffering from dwindling numbers for a few weeks now where either ppl are unable to raid or have lost interest. With the majority of recruits falling though we are having a hard time to keep progression going with a mere +/-20 members. Especially these later bosses just require sheer numbers in order to deal with all mechanics or to meet the output numbers.That said with the help of some social blood and a possible new recruit mighty Thok fell before us. Well done everyone.
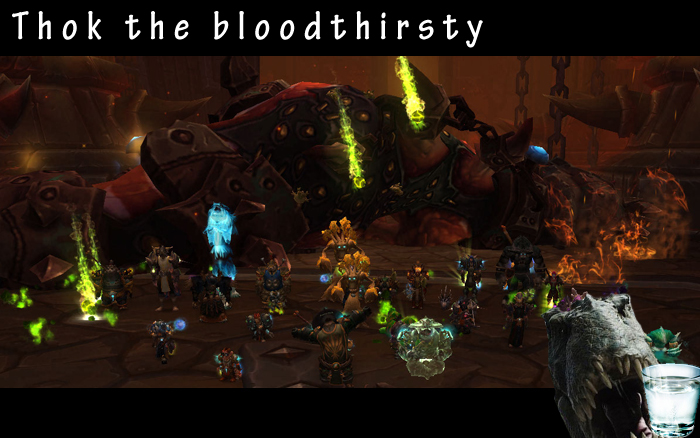
After having dealt with Malkorok and some trash we welcomed a latecomer to the mop expansion as suddenly Gelbin Mekkatorque made an appearance. But what an appearance it is, with a gnomish army zapping and permatrapping a load of trash we can casually walk by. Surely the only trash mob left this so called storeroom guard would pose no threat. The storeroom guard quickly made mince meat with that assumption as he was quite the pain, if this was a preview of what was to come on the spoils fight we would not be happy. Happily so, the spoils fight was anything but that gruesome. Opening up some chests with mobs popping out of them instead of Gwyneth Paltrow's head did not feel that difficult. Everyone has basically seen it all during their questing and what not so the old don't stand in crap, interrupt and dispel are the bread and butter here as the fight boils down to one big trash fight. Once we got a bit more aggressive with the opening rate of boxes we started to beat the timer and delve into the second room. A pull or two later and zing ding dong the system reset and threw out some loot for us.

Malkorok clearly has been lifting weights in the gym and might have experimented with some steroids here and there. Did it do him good ? Not really, as most people were clearly unimpressed with his size. Malkorok will however punish you quickly if you do not take him serious as the mechanics on this fight, while not being particularly difficult, are brutally punishing. Aside from dodging arcing smashes and not standing in the breath of Y'Shaarj the imploding energies are a pain to deal with. It took some tries before everyone was getting comfortable enough in their assigned section to soak them correctly. Speaking about orientation, that was another problem we suffered with where people after having to have moved for the breath were disoriented and wound up in the wrong area. Once both of those things were fixed we started making proper progress. Having the slight deficiency of "smart heals don't work on shielding" did not prove to be a major setback as we managed fine even with that many shaman healers so we didn't have to rely on Scotty boosting the power. One good attempt and Malkorok fell before he went into a second blood rage. Next up: what's in this box?
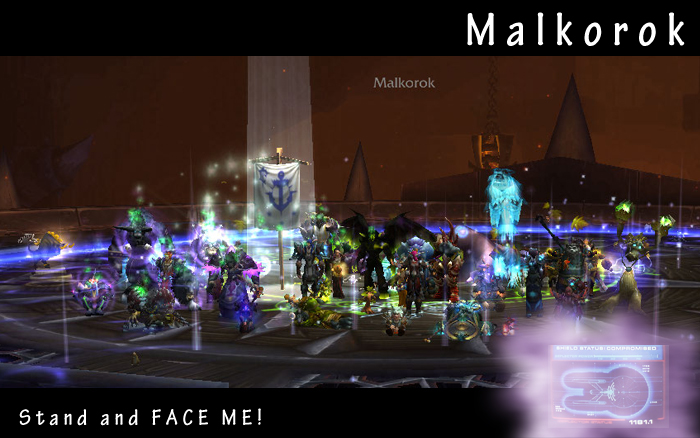
Ah Nazgrim, you salty old dog. You make everyone open up their spellbook and delve deep. The adds on this fight, next to the normal credo of kill them, require utility lots and lots of utility. So off with the dust on those spells as weird stuns and knockbacks, disarms and fears, tentacle grabby things and weird totems. The fight certainly makes everyone work hard to keep the adds somewhat under control while trying to do dmg on Nazgrim. Being able to postpone killing them to have more dps uptime during berserker stance certainly helped a lot during our tries. Then there is defensive stance and the "thou shall not hit Nazgrim" rule that follows out of it. A shame really how some pets or spawned creatures clearly don't understand such basic stuff then again in any LFR you encounter the same degree of intelligence. After some tries everyone started to get into the rhythm of the fight and things started to look up. A couple of melee got to be pretend ranged dps and adds felt like they were under control. Theramore proved to be our lucky charm as once we had its banner wielder and poster child with us Nazgrim fell. Next up: Malkorok and his lovely trash packs.
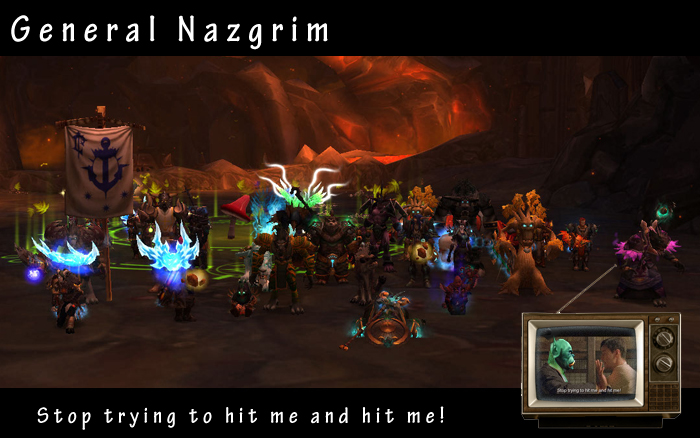
Ah the lovely shaman, how we were looking forward to this fight ever since we did it on flex when the second wing was released some weeks ago. Seeing how SoO is such a melee friendly raid according to blizzard this fight surely is no exception to that rule amirite melee? While i'm busy getting the rotten eggs, cabbage and tomatoes out of my clothes let me tell you about this hectic fight. First of all the fight starts of docile but quickly the shaman start getting new abilities that persist throughout the rest of the fight. We get lovely tornadoes, some hard ticking debuff dots, a foul stream of greeny goodness, some slimey adds bent on killing you in 2 seconds, a huge red circle of bad stuff where a tiny tiny meteor lands and to top it off we get a crazy batch of elemental masons whose sole job is it to build walls.
While the fight itself does not have a huge amount of mechanics the rate of them is fairly quick meaning there is constant movement and kiting required which makes you feel things can spin out of control quickly. It's this hectic nature that makes the fight really feel like a pain you are hardly in control off. That said once melee managed to die less to slimey adds and ranged got off their bum and started killing them asap things started to look up. Tanks needed to get some experience putting down the wall in such a direction it would block the least amount of area for ppl to move about in. We started to make them angry as they resulted to casting bloodlust consistently with each attempt but our careful counter of heroism made sure we had enough oomph left to kill the evil shaman twins in time before everyone was dead on the floor. Next up: General "oh please blizzard why can't i have a new character model" Nazgrim.
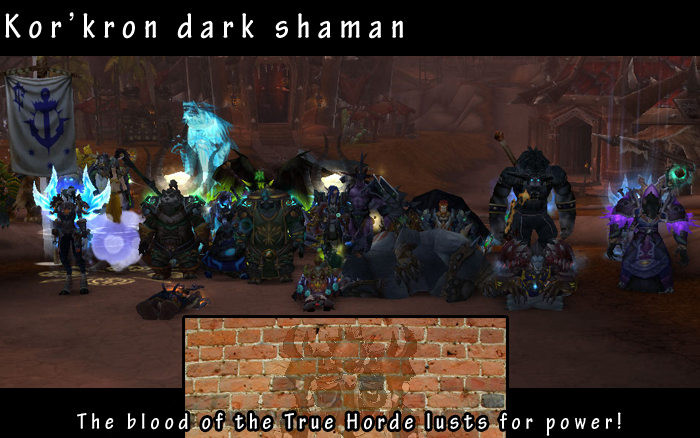
The Iron Juggernaut fight was daunting at first knowing that the siege mode with its seismic activity plus knock back pulse could spoil our party a lot if people didn't manage to position themselves properly. Once healing cd's where managed properly and everyone took a bit better heed of where to stand when the knockbacks were about to happen things started to click. All laser targets were able to kite properly not setting tar on fire, dps aided in blowing up mines albeit sometimes a bit overzealous. At that stage there was nothing more to learn so after 3 pulls that lil ole mechanized scorpion battlebot broke down and gave us some shinies.
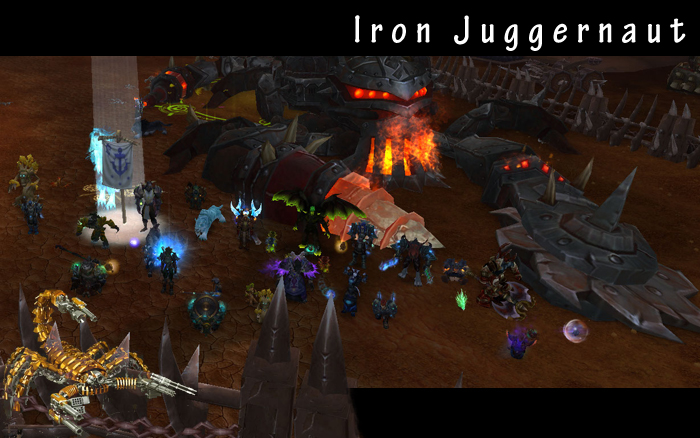
Galakras was quite a different fight than any of the others so far in the siege of orgrimmar. It's a true handle waves of trash pouring in one after another kind of aoe fest. That said it did take some finesse during the stages where multiple bonecrackers or tidal shamans were up. While the people on the ground deal with the aoe extravaganza a special ops team assaults the tower in order to take control of the anti air cannon on top of it. Two towers total and once they are taken the actual boss comes swooping down once it's shot into the face. This all is done while warlord Zaela (who really needs to cut down on her cigarettes) is shouting encouraging words at you. The second phase where you have to handle the actual dragon is rather simple if and IF people form a proper conga line (thanks Joss). The major hurdle we had to micromanage was dealing with one of the last waves where more than one tidal shaman was alive meaning HTT totems and heals got through causing a major delay before the adds were handled properly. Aside from that the boss itself was not that much of an issue and certainly far less of a pain to deal with than the Sha in regards of positioning.
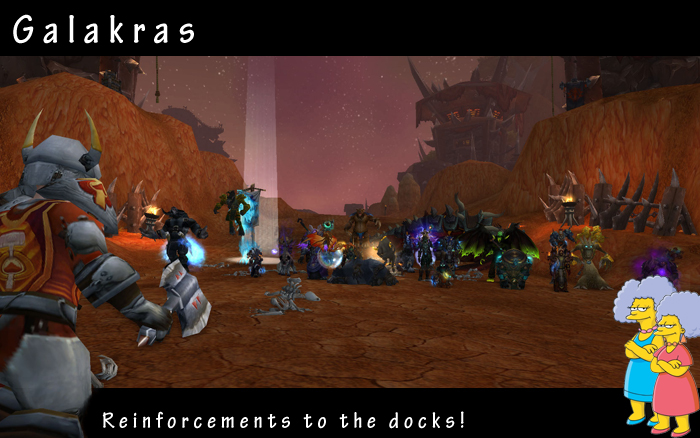
The Sha of pride fight was a bit of a step up compared to Norushen. Aside from all the mechanics in the Norushen fight (completing your task and making sure to block and kill adds / clump up) it's just a dps check. The Sha fight makes things a bit more complex with a careful positioning routine and some extra work regarding adds. In some way it was reminiscent of the lich king fight in regards to the swelling pride mechanic. On the lich king handling defile relied on making sure the entire raid was on position X at Y time to properly control where defile would land so everyone could get out alive and okay. We opted for a strategy similar to this to overcome the swelling pride mechanic where we carefully all stacked in the same position to control where the void zones spawn so everyone can run out safely instead of it being a minefield. Aside from handling that the fight itself just required some time to get the rhythm down. All mechanics happen in the same order: reflection adds>prisons>manifestation adds>swelling pride >>repeat. Once people got accustomed to the rhythm it was no issue to reach the sub 30% phase. Our overall healing and dps output surely went up as with 23 people present we had no issues handling the sub 30% and killed the sha on the notorious last pull of the evening. Well done everyone, next up Galakras: or how we old folks would call it Battle for mount hyjal 5.0
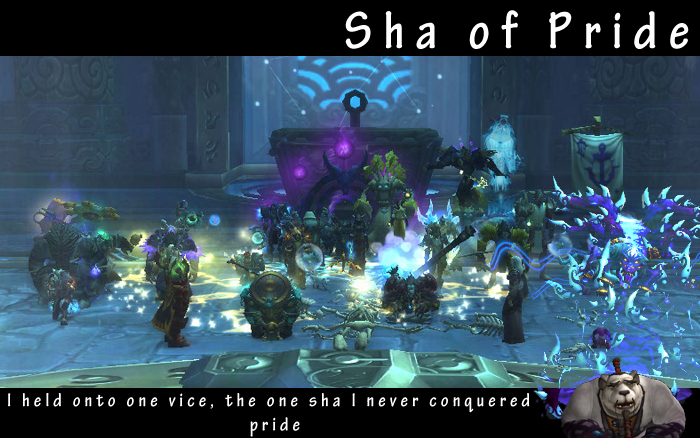
Norushen is the first fight that took some more practice in order to get it right and most importantly where the tuning is quite a bit tighter versus the Protectors or Immerseus. We got greeted by this not so friendly titan keeper Norushen who obviously is a big fan of the movie cube as he stuck us into one pretty quick.There is a lot of target swapping due the large amount of adds generated, snap repositioning to block essence add casts and let's not forget healers or dps dying due to manifestation adds whacking them in the face. In true blizzard 5.0 style this fight incorporates the more individual approach with role specific tests during the fight. In these test a dps, tank or healer needs to complete a task suited to their role. 25 man logistics came in to play with the old pen and paper in order to send 25 ppl to their alternate test realm in an orderly fashion. Eventually we managed to reach the berserk timer on several attempts proving that with 21-22 ppl we just didn't have the dps to shave off another 10%. Once we had a full raid the amalgam toppled over, gave us some loot and Norushen proved to be a good titan keeper and opened a door for us. Next up STACK<>SPREAD Sha of Pride madness.
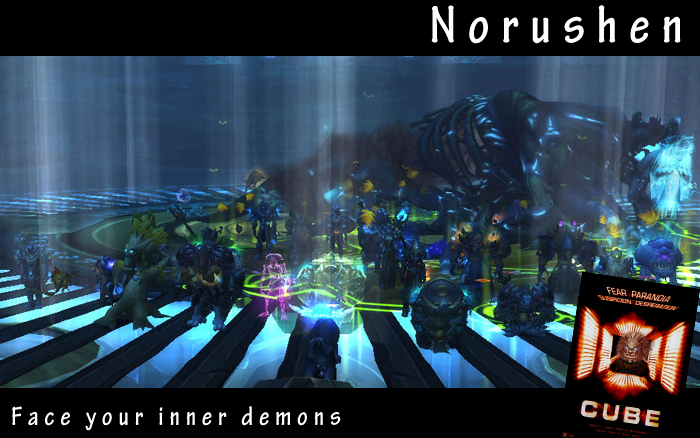
The fallen protectors is a council type fight albeit where the health pools are independent of one another. Taking off 1/3 of health of a boss forces them to go into a special state. There are quite some abilities going on and once people got a bit more adjusted to them we managed to make good progress. Our overall gear level proved we managed to push on through the raid damage without much trouble and with that we set our old questing friends free.
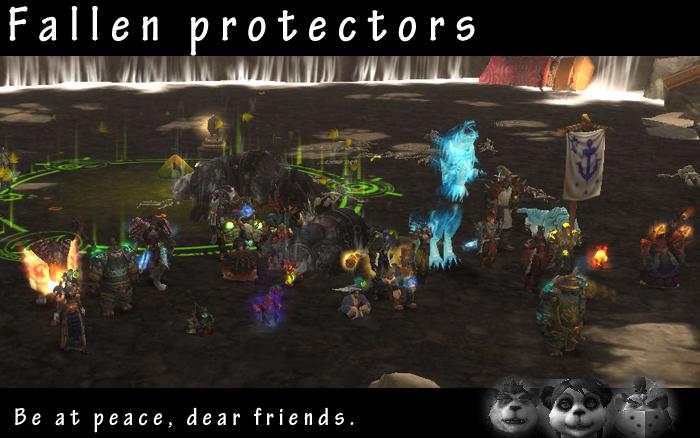
Immerseus, being the first boss in the siege of orgrimmar is not that complicated. Dropping voidzones in an orderly fashion and avoiding some spouts that shoot out from the floor and a big one from the boss is pretty much it. After having had some experience with it in a less optimal setting (alts and offspecs) once we managed to get in with mains and mainspecs Immerseus fell on the first go.
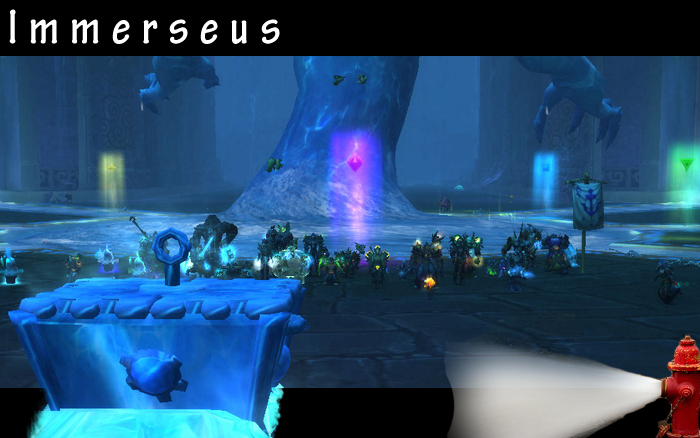
After having cleared ToT on normal we are finding ourselves a bit in a pickle. Normally we happily stumble into heroic content and see how far we get which is kinda still the plan. Alas that old chestnut called summer has arrived which severely dwindles people's motivation to sit behind a computer and play a game. With the sun out and plenty people on vacation it's always hard to maintain a raiding schedule. That said in the good ole retired fashion we decided to tackle heroic Jin'rokh with less than a full raid group. Two main changes vs normal being the ionization debuff which needed coordinated dispelling and the dodging ball lightning during lightning storm. The mechanics may not be that complex failing to counter them correctly results in raid wipes very quickly. Normally an individual mistake will lead only to your own death, this fight tends to kill everyone along with it. After plenty of wipes, seen nicely by the fact our skeletal remains outnumber us greatly in the killshot, we started poking further into the fight. Dispelling and positioning was under control and we were mainly only losing people during storms anymore. Close to the last pull of the evening and we were getting awfully close, the last pool formed everyone pumped out as much deeps as they could. Beserk timer creeping in 5...4....3...2...1.. BOOM ionization slaughtered pretty much everyone except for this lonely mage and priest still alive (cauterize/iceblock/disperse sigh) and while they stood in the corner as the lightning storm began the dots ended Jin'rokh. A fine butt clenching first kill.
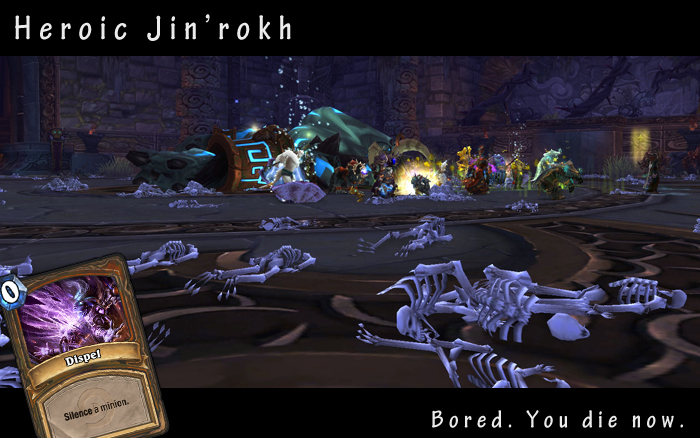
After much work clearing through his throne of thunder we finally managed to meet up with Lei shen and face him in all of his glory. It's safe to say that the encounter doesn't resemble the lfr counterpart by a long shot. On normal mode hardly anything is forgiving for screw ups but mostly the intermission phases are of a completely different order. It are these two intermission phases that are the main bulk of the fight as well, with the main phases being somewhat more docile and easier to handle. While going over all the tactics Lei Shen could clearly not be bothered as he was polishing his lightning conductor rods with a vigorous ocd passion. The first phase posed little problems as we had the dps to push him into intermission early on the 4th rod or even before that. Aside from the occasional timing issues and tanks getting used to at which point to move him away from a rod phase one was a doodle. Then came the intermission and all hell broke lose. Boiling down to individual responsibilities and a hefty dose of rng, these intermissions were hard to cope with at start and challenging later on. Especially when the fates conspired against you and you got multiple effects at the same times was when large groups of players keeled over. After spending quite some time on him we managed to get into phase two more often. At this stage we needed to handle the ball lightning which at the start we were far too slow with. Once that went quicker and we had decided how to handle the conflicting overcharge <> spawning of ball lightning we moved swiftly though phase two. Thus we entered the second intermission and did hell break lose again ? Well slightly but not as much as the first one. Only having 3 quadrants to deal with with more people than usual, it's really down to not having to cope with the diffusion chain anymore which allows you to be stacked all the time. It is merely for catching balls that the groups needed to disperse. On an attempt where we had little to no fatalities we managed to get into that second intermission a bit hectic but it was handled properly which resulted in a full raid group facing the third phase. Dealing with the wind proved of little difficulty. Some thunderstrucks, ball lightnings, a heroism and a dps potion later Lei Shen fell before our might and thus endeth the reign of the self proclaimed god tyrant. Until we heed the call to lay waste to ogrimmar we will be having a poke at some hc ToT and kill that bugger Lei Shen most likely a few more times.
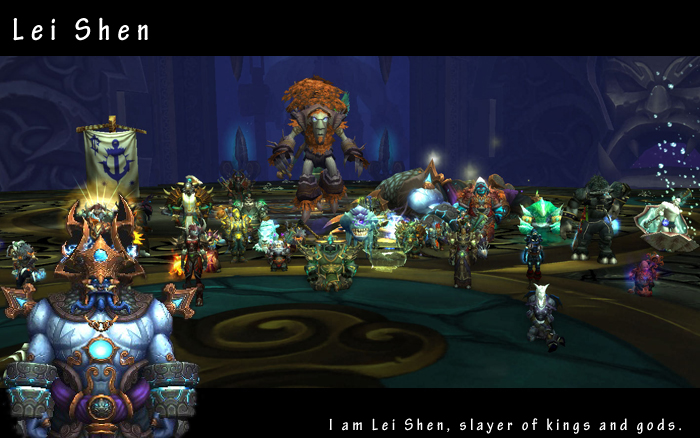
The twins apart from some tank positioning and healing care regarding corrupted healing had little else to offer on normal mode vs their LFR counterparts. We were mainly concerned with the dps output that lies quite a bit higher than Iron Qon. Apart from spreading out and making some minor adjustment to your positioning there is little to move from in this fight. A breath of relief to our ranged dps and healers that they could stand still and pump out numbers and that they did as we managed to kill the twins on the first pull. It's nice to have a kill that quickly but it also leaves you with a "what did just happen" feeling. Next up your favorite emperor / dictator / self proclaimed god incarnate / lord of thunder and general bad ass: Lei-shen.
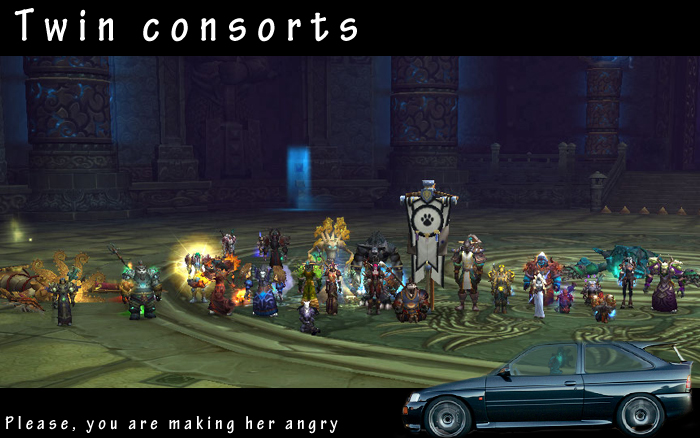
Iron Qon was quite the trip to memory lane as we saw multiple abilities from firelands once more. Rhyolith flame lines, Alysrazor tornadoes it was all there. Iron Qon falls into the category of being a very rewarding fight once everyone has learned the encounter properly. There certainly is a learning curve and there is both group responsibility as individual responsibility and failing either of these can quickly turn the fight into a wipe. Dealing with the first fire spitting quilen is the most intense for group responsibility especially in regards to the lfr counterpart. Once you've overcome the first quilen, the second flies in and it all boils down to individual responsibility of getting safely out of the tornado storm. Once those two are dealth with the fight slowly starts to phase towards raw numbers output both healing and dps. With an evening long progression on him we managed to down Iron Qon in that typical Retired style of last pull of the night and only 23 people present.
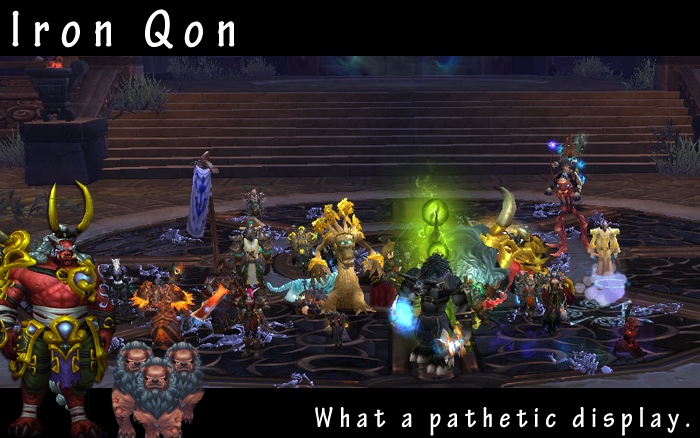
The dark animus fight is quite different from any other boss fights we have done in the throne of thunder. We used a tactic that involved quite some waiting and patience as quite some people were out of range to assist on other targets beside their own assigned golem at the start. Emphasis on this first bit is making sure anima golems didn't get too close to each other as they would cross-link and start killing people. Once people got comfortable with their positioning and the slight movements required not to cross-link golems due to matter swaps things started to look up. Once we activated the actual boss it quickly became a burn fight where it just was a matter of keeping everyone up and trying to overcome the large amount of tank swaps. Avoiding any explosive slams by dps/healers too close to any of the offtanks aided a lot in having sufficient numbers to burn him down for the kill. Quite some people are thoroughly frustrated with the fight coining it as "worst ever" but i'm sure that will change over time once we have killed him a few times.
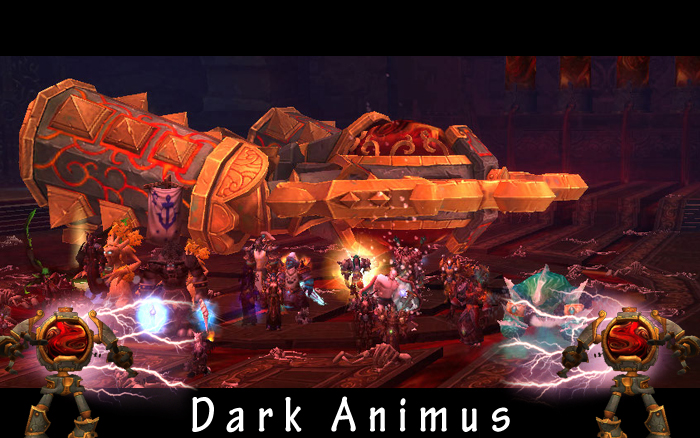
The Primordius fight is pretty straightforward. Kill oozes and run through the correct red pools in order to get buffs. Once fully mutated into a saurok you simply dps the boss then rinse and repeat. The dispelling and positioning would seemingly complicate the fight but for us at least it didn't really. After handling Ji-kun and Durumu this just felt a whole lot easier and more forgiving. Up next is that weird gizmo fight that looks awfully confusing on paper.
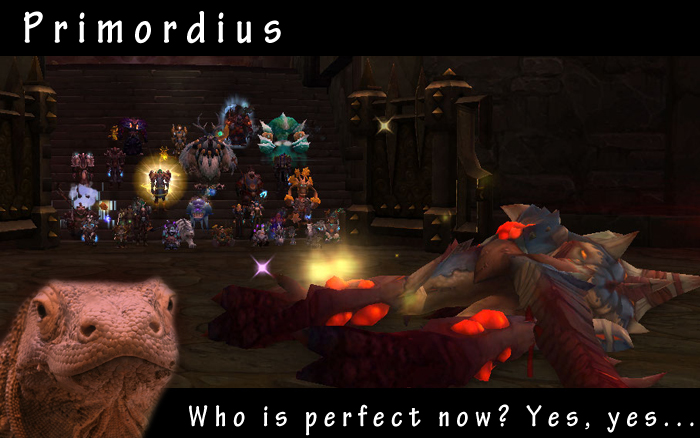
Durumu is the kind of fight you can get really annoyed with, due to the level of rng in it. Raid leaders always dont feel a 100% comfortable when they cant influence or control certain elements within a fight and Durumu much like amber shaper is one of those fights. That said after tweaking enough and spending enough wipes on it the muscle memory started to sink in where to go and what to do. Apart from speeding up the light spectrum phases so adds would die a bit quicker and debuff stacks would remain controllable the maze ofcourse was the real problem. We tried all kinds of varieties but in the end settled on melee being the standard starting position to enter the maze unless you were really uncomfortable with that position and thus start out further at range. Maze deaths subsequently became less common and later that one eyed disco lover fell to the floor, no more Ottawan for him
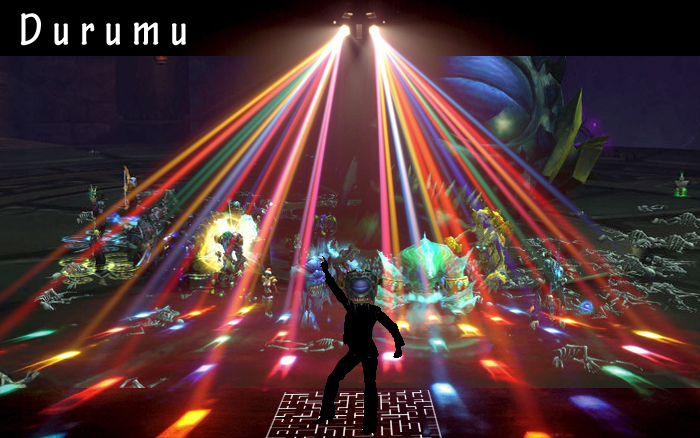
Ji-kun was quite an interesting fight. The fight took place on the main platform where Ji-kun stood but also on several smaller platforms around the room, some of which only accessible through flight. The main bulk of the fight was getting the groups on nest duty to properly know their route and build the muscle memory how to handle them. Taking quills damage mid flight while the healer isn't near or not able to heal properly would be a bad example. Once we managed to get the nests under control we were getting good progression even if that said night we were trying to tackle the fight with 22 people. We assigned spare dps who weren't on nest duty to pick up the extra feathers in the lower nests so they could aid in cleaning up the main platform by intercepting the green food globs Ji-kun spits out. At that stage we were very near to a kill, and the next time we arrived at Ji-kun this time with 25 she went down without much problems at all. Next up Durumu.

Megaera is not that complex of a fight as you only have 3 abilities to deal with and some loose positional constrictions. That said this fight took us longer than expected as the sudden onset of mass panic around the 6th head was causing clockwork wipes. We still had the occasional fire spot or icebeam path in locations where we didn't really want them but we were getting to the end part of the fight consistently without losing people to avoidable damage like the conal breath. We finally had a good attempt where the panic of head number six seemed to turn into, hey I do know what to do, which meant we reached the seventh head at full strength. A heroism and some cooldowns later the seventh head went down and submerged into the pool. So what does Megaera look like hmmm it's a cloud serpent gone wrong with crazy anima experiments by mogu so what's it look like ? Well the answer is simple, it looks awfully a lot like a chest and we love chests in the world of warcraft. On that bombshell we are off to Ji-kun where we can fly around and kill baby birds if only PETA knew.
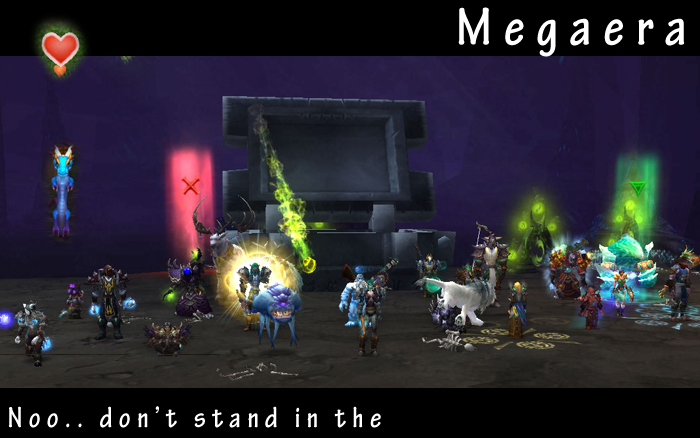
After defeating all of the zandalari might in the throne of thunder, Lei shen was all but pleased. Soon we found ourselves in the caverns beneath the throne complex where a very big turtle was blocking our way in. Straight out of the nintendo franchise we were presented by a koopa troopa that was giving us some of the most frantic movement during a raid encounter we ever experienced. Standing still is not really a big part of your job description during this fight with spinning koopa troopa's and cave ins constantly forcing you to wiggle about all over the shop. That is not even the last of it as like in the mario games you have to kick these turtles and hit other turtles notably tortos with them. All jokes aside, we struggled early on with the shear numbers we needed to pump out to keep control of the fight. After that it was mainly tweaking some positioning and spell usage to accommodate for people not getting their face eaten in by bats or applying the proper stuns at the right time. The progress was showing but it remains a fight where individual mistakes can quickly result in death which then spins the encounter out of control really quickly. Tortos dealt with and bowser in tears we are now facing the hydra/snake what on earth does Megaera actually look like fog boss.
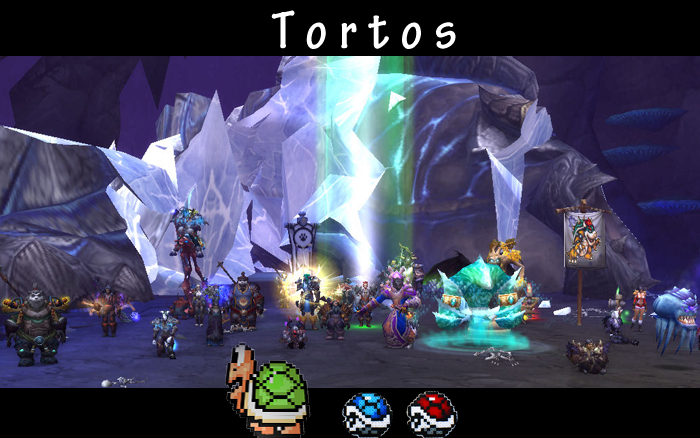
Hey everybody! It's another council fight! Will it be hectic?...Yes! Will there be carnage?...Yes!
So council fights. You either love them or hate them as usually there is no middle ground. That said, I like this fight even though it is hectic, as it gives you a lot of control over the fight. We have seen before on bosses where we able to cope with mechanics, yet fail on enrage or raw dps/hps numbers, which always leaves a bad taste.
Instead, here we have a fight that will punish you severely if you don't handle the mechanics properly but isn't tuned like a turnip that you are fighting a tight dps check at the same time. Every pull where people got accustomed to the mechanics more and more we felt significant progress. Some adaption of targets at the start and we were making good progress which soon resulted in a smooth kill.
With all the trolls dealt with, it's time for us to head into the sewers and find what is lurking below.
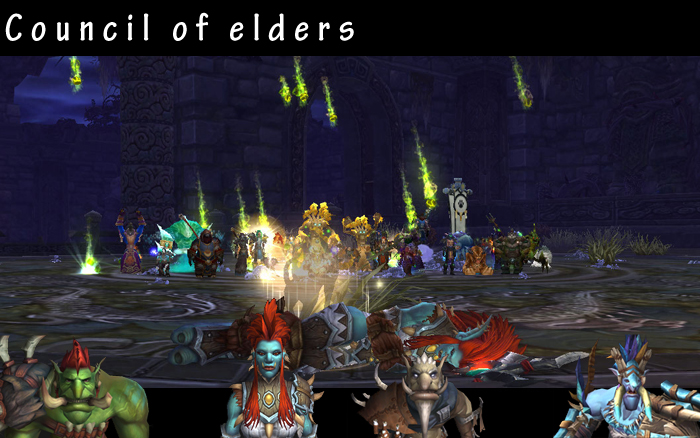
Horridon was quite a leap forward in difficulty and tuning compared to Jin'rokh. The main crux of the was the waves of troll adds that keep rolling in. Different types of trolls for each tribe, each with their own spells and mechanics. And to top it off, some trolls needed focusing as opposed to others. This was a lot to take in at the start but once people were getting the experience of handing each door and tribe things started to fall into place. Smoothing our positioning helped a great deal to aid with the dps on the adds as multitarget damage really shines in this encounter.
Once we managed to handle all the doors the fight quickly changes into a dps burn with a heavy emphasis in single target healing vs aoe/group healing. The fight in itself is quite rewarding, not the faceroll that Jin'rokh was. Learning the strategy, getting accustomed to it and executing it all properly all resulted in a rewarding kill. Paladins saw themselves return to the "we are important" bench for us and we all got a nice reminder how molten core panned out for many of us in the olden days of vanilla: dispel....dispel.....and some more.....DISPEL.
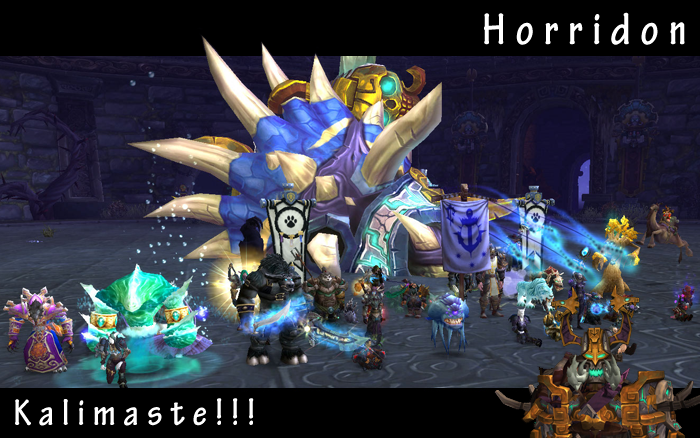
After spending the bulk of our raiding time in the new Throne of Thunder, we decided to try and clear the Terrace of Endless Spring. We didn't have a chance at killing the Sha before the nerf and we still wanted him dead and the shinies he had to offer us. The crayon boss was quite similar to it's looking for raid counterpart, the main difference was how to handle the outside platforms. On LFR you basically ignore everything while there while you dps a panda. On normal mode you can't get away with that. After those reassuring words that people really needed to pick up orbs we started making progress. That said, even with the tactics down and everyone performing their assigned roles the fight seemingly took forever. Traditionally on the last pull of the evening our cell shaded crayon master of fear was no more and we can finally rest that we completed all of the 5.0 normal content.
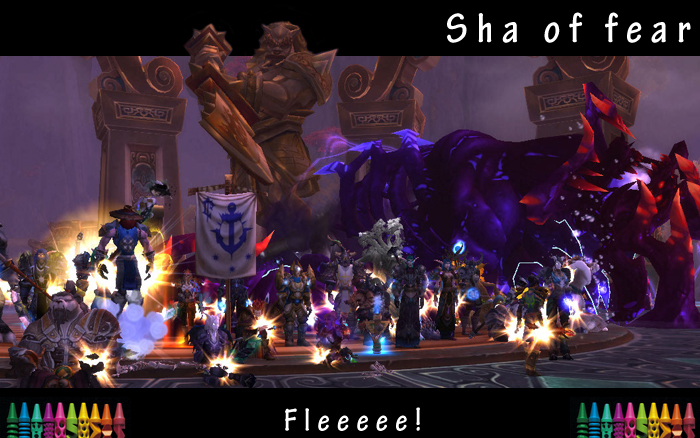
Jin'rokh the mighty berserker troll posed little to nearly no challenge. With fairly simple mechanics like running away with ball lightning and some tank swapping we had few problems dealing with him. While a bit of a disappointment to start the raid with an underwhelming encounter like that, he was kind enough to grace us with 3 Thunderforged loot drops.
Next up is Horridon!
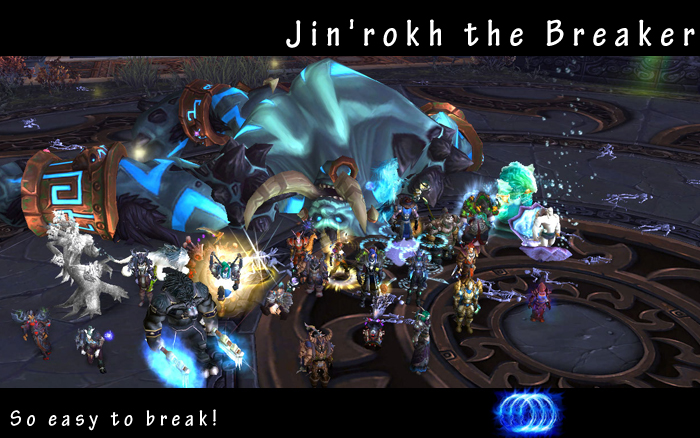
Lei-Shi posed little challenge and perhaps was easier than her LFR counterpart. Mostly due to the fact people would listen and not stand in front of the boss and thus avoiding spray damage. That said, the tank damage near the end was a good wake up call for the healers, and was by far the hardest tank healing of the tier so far. The 5.2 patch unfortunately stopped us from killing the Sha of Crayola in time for a nice feat of strength, but we will be returning to topple him over in the near future.
For now, our focus is shifting towards the Throne of Thunder!
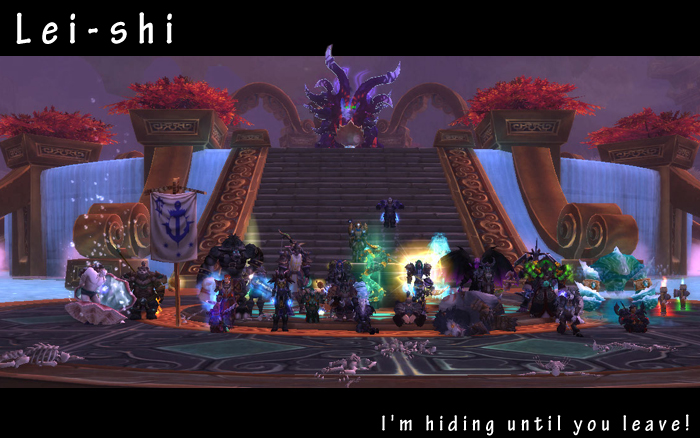
Tsulong is an interesting fight which healers have come to either love or hate. A straightforward dps phase in which you drop a debuff by quickly standing a beam of light and attempting not to stand in any crap of the floor, meant that the Night phase posed little challenge. The Day phase however was more interesting with having to manage incoming adds in a 360 degree radius, dealing with a single high health add and its subsequent fear casting small friends. If that wasn't enough healers during that phase actually have to focus on healing the boss and not the raid. With a wink to Valithria in ICC, our healers did their best at patching Tsulong up. This was to no avail though, as we started hitting the enrage timer with around 25% hp to go.
A fresh day with some re-evaluation on how to best heal Tsulong while 'bathed in light' and we started seeing much more progress. That along with the lovely aid of DPS offheals, and we soon had freed Tsulong of the corruption that beset him. Next up Lei-shi with his lovely voice oh so reminiscent of XT-002...
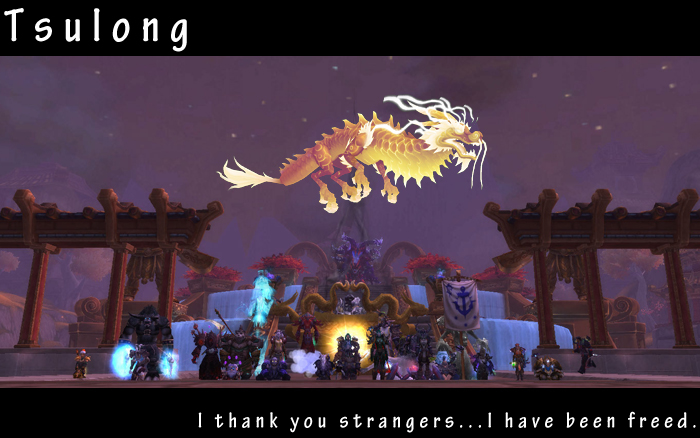
We finally reached the last boss of the Heart of Fear. Grand empress Shek'zeer was an enjoyable fight to execute, and quite a contrast to Amber Shaper Un'Sok. We had a high level of control over the fight, which makes it really satisfactory when execution is done correctly. That said, it's not a pushover, and due to individual errors we hit a wall sometimes. A fresh evening proved to be the cure. We quickly made progression and the Empress went down.
Suddenly we had 25 "attuned" people who could lead us into the Terrace of Endless Spring. No secret haxxing on our part, how about you other guilds eh? The Protectors of the Endless turned out to be a pushover. Probably partly due to the different orders and complexity to which you you can kill the Jinyu. Apart from the odd people standing in the really obvious lightning ring, the Jinyu quickly bit the dust. Tsulong is next on our list, and hopefully we might clear all of ToES before 5.2 hits.
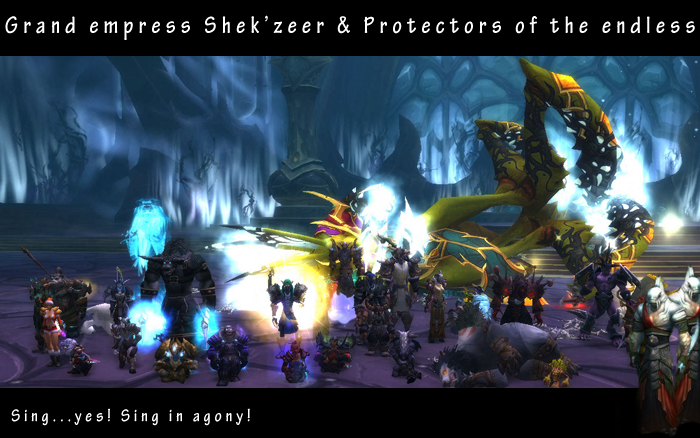
Amber Shaper Un'sok is one of those fights where you wonder what they were thinking when they first designed it....
The crux of the fight is the mutated construct players, who have to perform certain tasks with a very small margin for error. Failing to perform the given task as a mutated construct quickly results either in a wipe... or a wipe a bit later. It was the RNG mechanic of how people are picked during Phase 2 to become a mutated construct that imposed a very long learning curve on 25man.
In this forgotten raid size, over 20 people could be chosen to perform this task, and having them all experience the fight first beforehand would take ages. Even having everyone experience it gave us no guarantee of a successful execution in which no errors were made. It brings back memories of doing Teron Gorefiend in TBC pre-nerf, which also imposed a very luck driven quirky mechanic that we don't think of any fondly.
That said we managed to finally kill him rather suddenly and progressed onwards to the Empress, who seems much more docile as opposed to Un'sok.
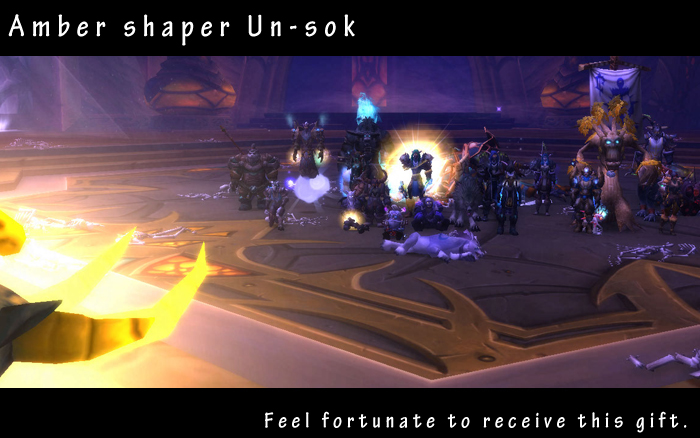
This was one of those fights, that sounded harder in theory than it actually was to put into practice. The LFR method even popped it's head up to a certain extent.
Yes we CC-ed, and yes we had to slightly manage the Amber Prison debuff ("GET OUT OF MELEE!!!") but all in all, this was a very straightforward fight.
Once we tumbled into phase 2 it was just a matter of managing healing cd's to deal with rain of blades, and not walking into Wind Bombs. Oh yeah....them. After making a quick headstart, individual mistakes and a bit of careless aoe in P1 gave us some setbacks. Once we tackled that hump we just had to avoid triggering wind bombs, which was quite a feat for some of us.
That said once no one made any obvious mistakes our mexican mantid overlord was no more. Bye bye gringo and we're off to Amber Shaper Unsok.
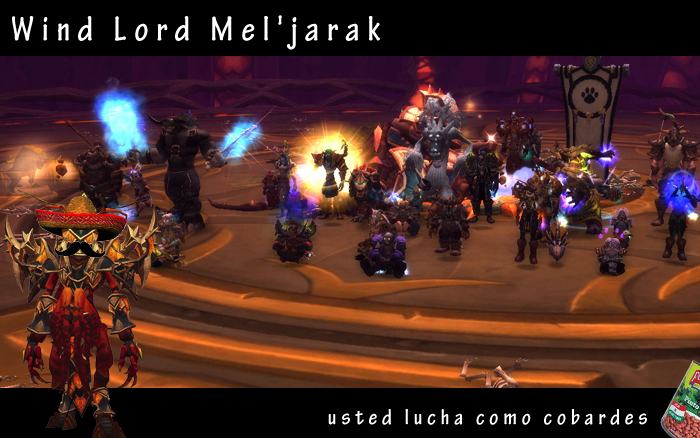
A fight that on paper (or you know...the interwebz guides) seems like it has an emphasis on positional coordination and well executed pathing. The truth however, as always, is far from it.
Once you get the kiting down and the pheremone sharing that goes with it, Garalon turns into a filthy dps race. Since kiting is a factor in this fight, hunters were first on the list to take up this job. We all know hunters are the kite kings of ye olden days. However, almost all ranged dps needed to join in at some stage as on 25 man you need 7 to 8 kiters! So it was up to the hunters to pass down the knowledge of kiting like a pro. Which is more than just running away btw, as running away is just that... running away.
Once we finally managed to reach the enrage timer we saw how far off our dps was. Standing in front of the boss remained ever popular for some through our attempts, as different people found themselves swiped to death and unfortunatly sheeping the legs also didn't work. Once we managed to get things together we were wiping at around 9million+ hp on the zerk timer. One last attempt of the night yielded a kill and the mighty Garalon, with his tiny tiny wings, fell to the floor with a loud thump with less than 10seconds to go. Next on our list is our Mexican friend Wind Lord Mel'jarak.
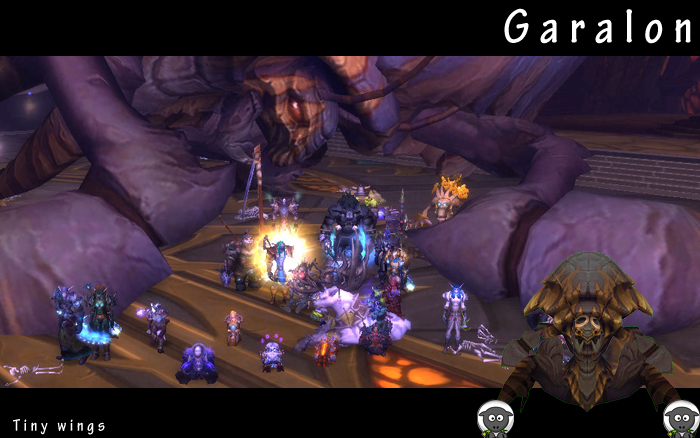
Blade lord Ta'yak made us fiddle with positioning and unseen strike knockbacks for a bit until we settled on something that seemed to work okay for us. Unfortunatly by the time we were making progress on the fight christmas and new years threw our progression out the window. Once me managed to revisit him we managed to get back to where we left off pretty quick. That gave us ample time to enjoy the tornado dodging and the personal aggro that tends to generate. Once people got comfortable with that he died pretty swiftly paving the way for the terrace. What do you mean we can't enter ? then why did guild X... oh they get someone to open it... LK all over again. Next up is Garalon and apparently he can fly and might have sheep for legs.
This fight proved to be very forgiving, at least at our current gear level, as it only took us a few tries to actually kill it. The fight is pretty much the same as in LFR except for the fact you couldn't simply ignore the mechanics. Some positioning for inhale/exhale, avoiding the discs and that's pretty much it. A very pretty looking boss but kinda underwhelming fight. Blade Lord is next!

And so we arrived at the final encounter of Mogu'Shan Vaults. An ancient mogu creation machine, called the Will of the Emperor. One would suspect many mogu during this encounter and boy that is no exaggeration. This fight for most people is all about adds, and then some more adds to be topped off with a lovely dessert of adds. While our early progress didn't fill us with that much hope, some tactic and assignment changes did the trick in getting the adds under control. The majority of our dps was busy target switching like there was no tomorrow to keep all those mogu in check, some dps had the chance to show us how good they were at playing nintendo and landing those quadra hexa super combo moves. A bit of a strange fight to end this raid instance with as you never get the feeling you are really battling some big bad boss of sorts, Elegon fulfills that role better. We can't complain however as finally clearing MSV means we will get some time to start our adventure in the Heart of Fear. Where no doubt we will find plenty of opportunity to wipe on bosses that even on LFR are just a pain.
Elegon proved quite a challenge for us and there have been times when we all felt hopeless about this encounter. The dps requirement for our group proved simply to steep during our initial times on this encounter. That said not only the the dps requirement was hard to overcome on 25 also the amount of logistical assigning of positions and adds proved quite a bit of work when trying to make pillars and adds die at roughly the same time or in time before they did too much nasties. With some more tweaking we managed to make good progress on the fight which then made us aware of the dps wall when hitting the enrage while Elegon still had plenty of hp left. Some more upgrades and some time later we were finally making headway on the dps front. A few more people tried to thwart our kill by falling into the hole but finally we managed to kill Elegon. Our MSV progression is back on track and we hope to enter heart of fear soon as our klaxxi comrades need our assistance.
The Spirit Kings is a council fight, which tend to be...hectic but fun encounters. This one is no exception, as when you counter the mechanics appropriately you feel very much in control. The start of the fight kept plaguing us with death as people were either repulsed by unfinished sympathy and didn't join the rest of us or felt deeply swooned by annihilate. That said the real difficulty of the fight is when you face the 3rd and 4th spirit. Given that the order is random it changed a bit on difficulty on each try as each order is a bit easier/harder to deal with. Meng proved to be the most annoying spirit to deal with for us as tank damage and reflect damage led to untimely deaths on several occasions. Maddening shout also posed too much of a temptation for some of us to debuff the entire raid with debuffs and dots (Howling Blast anyone?). After a few more goes we finally managed to down the kings much to the satisfaction of Albert, BB and Freddie.
Gara'jal, Fine! Time to play...friends, proved not that much of a challenge as far as mechanics go. The main crux was managing the groups going into the spirit realm which gave us quite a headache. Poor Auri still has nightmares that wake him up at night shouting GROUP 4 TO TOTEM! That said, the enrage timer seemed hard but we soon discovered that healers were able to handle quite a number of spirits. A wipe on 7% and a wipe on 0% (yes that's possible, but don't ask GG...he disagrees) and Gara'jal finally toppled over. Our first troll kill..will there be more this expansion? Of course, one can always be sure of more trolls mon! Onto The Spirit Kings.
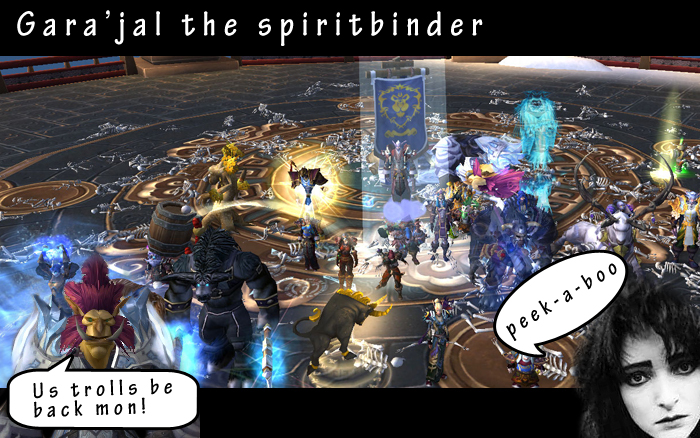
Feng the Accursed gave us quite a headache at the start while trying to learn the fight. The information about his first phase and the use of the 2 special tank abilities was sketchy, inconclusive and incomplete. We finally settled on a tactic that seemed to work much better at least for us. With phase 1 finally under control we started making good progress with each try. After some firm pointers to really move quickly with Wildfire we started to reach phase 3. There we got to enjoy our "did I just blow everyone up?" Arcane Resonance debuffs. Raid leaders with push to talk held firmly and butts clenched we shouted MOVE IN and MOVE OUT like some bad 80's aerobic VHS. It all paid off as Feng bit the dust and decided to die, well kinda until he gets ressed again. No doubt lorewalker Cho will lead us to our next boss with pen and paper at his disposal to write down what happens while we do all the work.
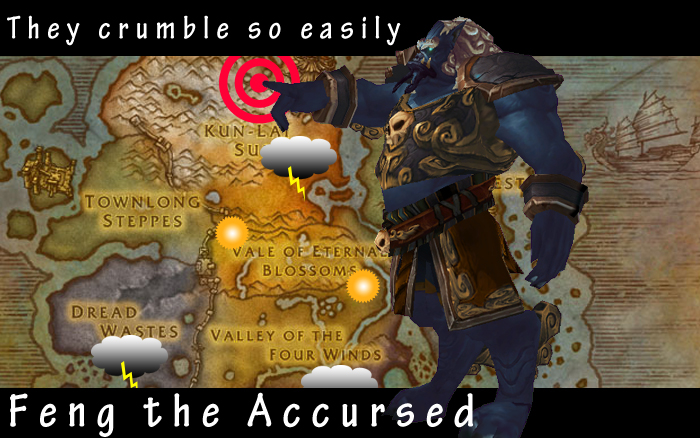
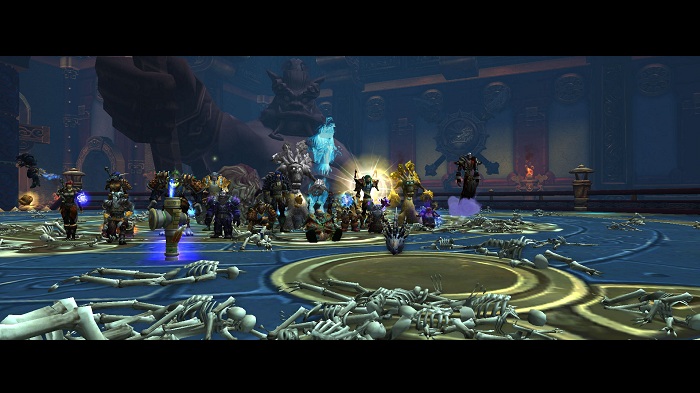
The first boss on the schedule was The Stone Guard, a ferocious quad of ugly quilen. These "I got my head stuck in the cookie jar" dogs work like any council fight. Shared health pool and a rotating order of who to focus on. Once we had our color coded taunts sorted, we could focus on some more survivability. With people assigned to clear up some cobalt traps and everyone getting into the mindset of staying together with their jasper chains, the fight seemed to progress a great deal. After hitting the enrage timer several times, it was all about upping the dps. On the first attempt of a fresh raid evening the dogs were no more. Onwards to Feng who seems to enjoy killing us with epicentre way too much...
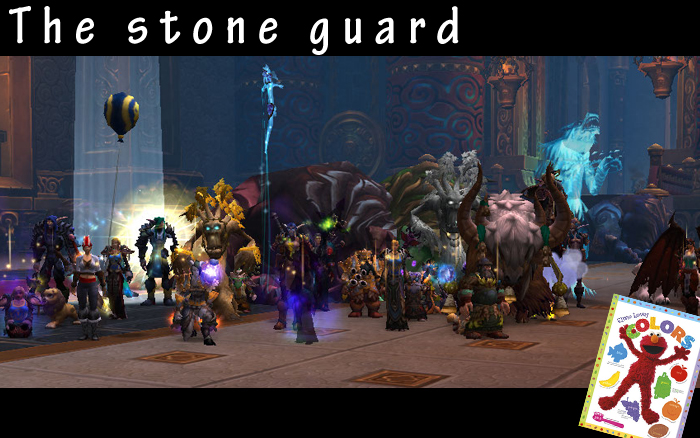
Zon'ozz posed somewhat of a challenge as using any standard tactic fully seemed to not work for our guild. This meant we had to tweak some stuff and do some mixing and matching to come up with a tactic that suited us better. After having the positioning and assigning out of the way we could focus on the lovely tennis play. Which resulted in some more mashing of numbers to get the debuff to align with the ball impact for phase 2. Once that was sorted we made quick progress and killed him in a thrilling match of 5-7, 7-7.

Warmaster Blackhorn, oh boy how would this turn out to be. Good for practicing your shuffle dance moves as this fight wants you to move... a lot. It was clear at the start not everyone liked or could be motivated to move appropriately leaving some poor people soaking twilight barrages all by themselves resulting in a timely death. That said once we managed to properly soak barrages we got to enjoy the ever increasing deckfires and the apparent gnome firefighters who seemingly were understaffed or just lacked the awesome MIMIRON WATERSPOUT ZX4/D UNIT. In order to get some time in phase 2 we went with a heroism during phase 1 which quickly put us into phase. Ermm... did we cover this bit during the quick recap ? .... I don't think so .....oh dear. Stack UP, Hit the drake, OMG move OUT of the shockwave. Don't be a square and just stack up on said square. Moments later everything seemed quite docile and it was a straightforward kill at that point. Zon'ozz is next on our list.
Not much to say about this fight as it's really not that different from normal. A rotation of people to soak HoT's and some stooges to forcefully die by it if GG pleased it so. Apart from that the fight revolved around a button and we think you had to click it at some point. That said, dead dragon so time to mess with the bull.
Yor'sahj and the sweet collection of oozy goodness. This fight surely gave us enough aggravation as it seemingly was so similar to the normal mode. The details of when you add switch and when you would kill the mana void mattered quite a bit in the long run. The real crux however remained that elusive deep corruption and we surely have sifted through plenty of lists to narrow the spells down that could cause stacks of it. I'm sure Murtle has a nice story to tell about chain heal when you ask her. Once we managed to get full control over the deep corruption and didn't stumble into the pitfall of healing too much or too little (both causing a bad case of death) we started making good progression on this fight. A wipe here and then, some refocus motivational speech and down went Ivan's protégé. We are looking forward to down Ultraxion and his seemingly lightning quick fading light omgpushthebuttonwtfqq timers.
We finally managed to progress nicely on the heroic version of Hagara the storm binder. The main crux for us was the lightning phase which almost gave raiden a run for his money. After quite a few attempts we finally managed to get man, woman and pet into position to form our mega human chain of electrifying goodness. Once that was sorted it we made quick work of handling the frost phase even if some ppl just can resist the attraction of the dispel button. The last step was getting everyone to notice they were about to be entombed into a nice chunck of ice. With those key elements sorted it was a matter of time before we killed her and so Hagara is no more and Raiden can be relieved as he is still wearing the master of the lightning hat.

After clearing DS on normal we are having a poke at heroic DS. First on our to do list was that gullible giant named Morchok. On heroic Morchok duplicates himself into his mirror image Kohcrom who does exactly the same just a wee bit later. The raid splits in 2 apart from that the fight is exactly the same as on normal. Since there are less ppl to split the stomp damage and all abilities hit harder on heroic, healing was quite different vs the normal encounter. This time instead of battling the sleep inducement, positioning actually mattered a lot. Once everyone got accustomed to the positioning and healers adjusted to the amount of incoming dmg these twins soon toppled over. Our next heroic endeavor will be Hagara.
And so we managed to get enough people to come to the madness of deathwing fight. The epic final fight and conclusion to this expansion... well kinda. We saw him on LFR before and he was like faceroll, have some loot guys while I explode into a soap bubble exit. That kinda took the epic out of the experience of the proper normal mode kill. The fight itself wasn't that straining as our dps and healing numbers were in the right area and it was mostly an execution fight. Overcoming the "do not jump from the platform at that spot or you'll die" was one of the challenges presented to us. Others included "switch to the bolt", "get in the damn timewarp" and "Brig ? why are you standing theee....aaaandd dead". A full clear pre nerf despite our troubles keeping the 25m machine going, nice work all. Onwards to the farm and the heroics or even a stray single chinese dragon boss raid because pandaria is going to arrive on time :!:
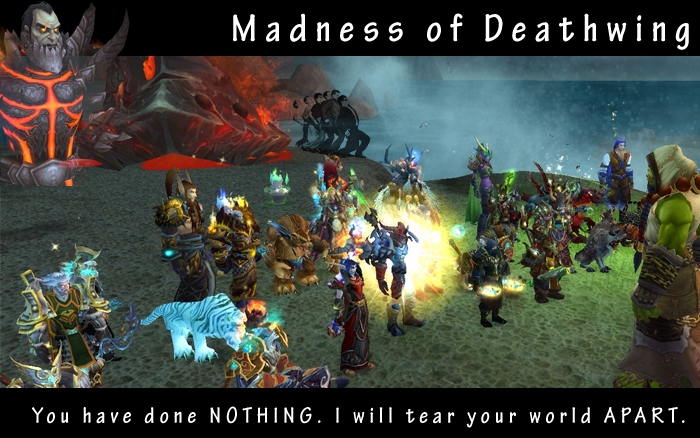
Struggling with numbers our 25m raiding is a bit under strain and thus our progression through 25m content slowed down. Nonetheless when we did get all our ranks and members aligned we managed to deal with Deathwing's spine. Switch target galore and "what a nice camera angle" this fight is all about control and the proper execution of it. As we've seen in the past regarding the tuning of certain fights in 10 vs 25 settings this fight is the new fandral fight with the 10m tuning being way off and low vs it's 25m counterpart. Once we managed to have everyone focused and use burst dps on the tendons this fight finally to start making sense and soon after we pried off his last plate and welcomed the thought of trying to overcome the madness fight on normal mode.

We're getting near to dealing with Deathwing himself as we managed to kill his last lieutenant, warmaster Blackhorn. This encounter is really a helter-skelter fight as movement and target switching is constantly thrown at you in an endless barrage of spells and adds. The fight was a nice change versus the Ultraxion encounter as that simply is a gearcheck. This fight however keeps you constantly under pressure and stress levels are high during the entire encounter which makes a kill feel extra rewarding. This gunship battle really feels like an aerial fight with the cloud formations swooping by a success compared to the previous incarnation of a gunship battle within the icecrown citadel. Next up, we face Deathwing's immune system as we pry his armor loose.
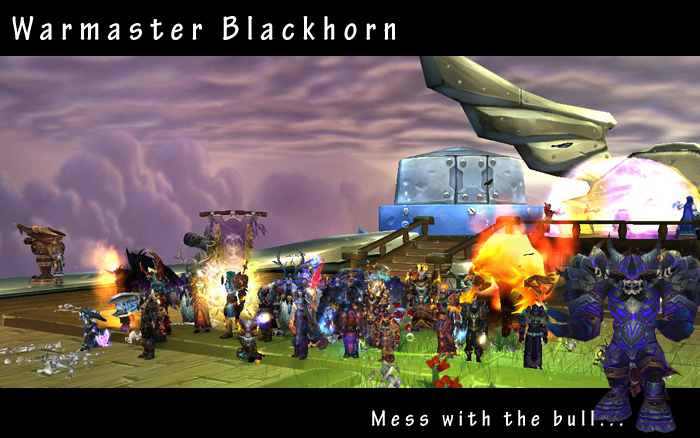
The 5th boss in the Dragon soul raid was next on our to kill list. Ultraxion is a relatively simple fight with only 2 mechanics both of which are countered in the same way, by hitting the extra button on your UI. Failing to do so at the appropriate moment spells instant death. That being said this fight is a true gearcheck as the real challenge is being able to pump out the numbers in the dps department and to a lesser extent in the healing department. After some stressing to assure everyone fully understood when to click their button we managed to bring him down with 5 seconds to spare until the enrage. We then got to enjoy Thrall going all power ranger on us as he fired up his power morpher and screamed "Tyrannosaurus Rex". He didn't :?: all right, no he didn't it was merely the freshly charged dragon soul which made Deathwing plow into the horde gunship. Go us \o/ alliance and take that horde and your zeppelin based design. Next up we will be revisiting a gunship, no lootship although.
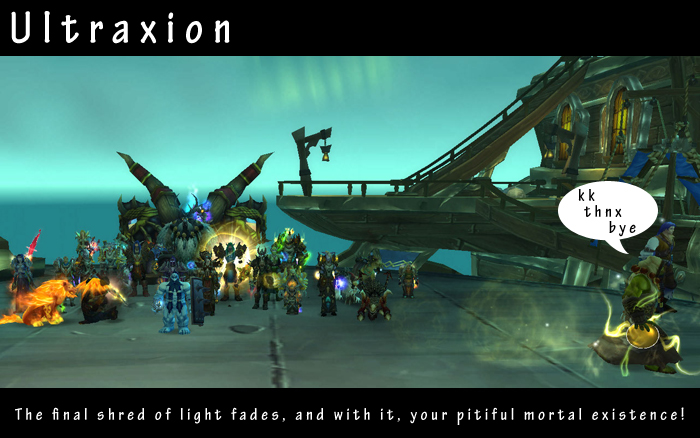
So far we got to enjoy the new raid and all of it's new design and artwork. A complete new raid instance, oh wait no wyrmrest temple I seem to remember from that previous expansion. Elemental giants and old god minions I seem to recall stumbling into them before surely Hagara will bring something new and fresh. Some roleplay between the aspects and soon to be aspect thrall and we have to go where ? The eye of eternity... didn't we used to go there as well oh well the absence of a certain butterfly winged goatee dragon spamming "I give you one chance. Pledge fealty to me, and perhaps I won't slaughter you for your insolence!" can certainly be seen as something positive. Hagara is a mix between quite some elements and it's mainly an execution fight as the dps nor healing threshold don't seem that severe. Getting the right ppl to block the ice lance spam and getting people to notice that they were about to be turned into an iceblock was the main challenge. Apart from that it was kumbaya hold my hand and we form a human chain and down Hagara went quite quickly. So we say goodbye to this unimaginative looking female orc wearing tier 2 shaman armor and onwards we go to Ultraxion aka mr patchwe... err gearcheck.
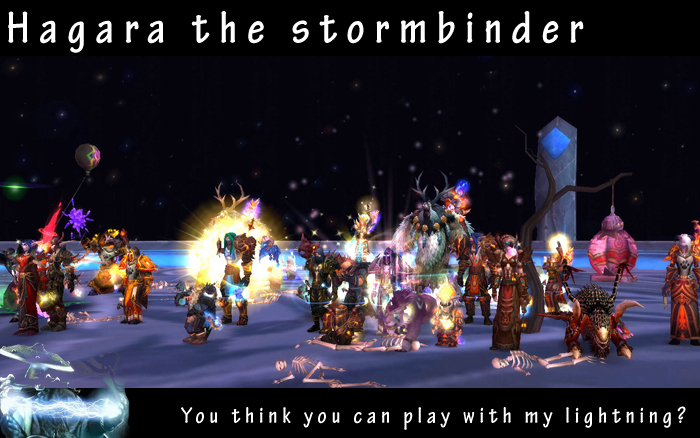
We were a bit cautious of this fight as we figured it would be more taxing than Zon'ozz given the amount of adds and all of their abilities. We proved that to be a misconception as the ooze colors were quick to learn and understand. Overall this fight turned out to be quite straightforward with just 2 major challenges, being able to pump out the hps during a yellow ooze and to refrain from direct heals on the main raid during a purple one. That said we made quick work of Yor'sahj and her oozelings. I just wonder what heroic Yor'sahj will bring, perhaps a tripple rainbow and btw did you notice [b]"the oozes have faces"
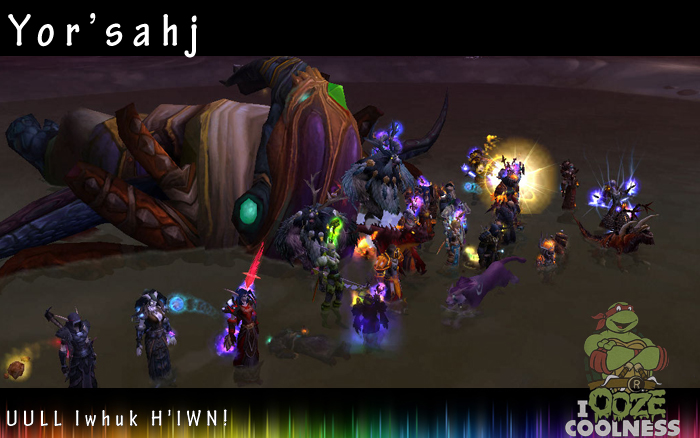
Warlord Zon'ozz his favourite sport is tennis and he plays it rather well since he's able to dodge some of the balls carefully aimed at him. After getting past the grief of seemingly erratic orb bounces, we started making progress on this boss. For us this boss was a steeper challenge than the other non linear boss as the fight was really taxing on our healing department as their mana pools dried up quickly with the barrage of damage and dispels going about. Our attempts were going all over the shop and we kept struggling with the fight until we started to see some progress. Then all of a sudden everything clicked, cd's were timed perfect and our heals landed on the right time and Zon'ozz was no more.

4.3 is here along with it's "i think my addon broke" spam. Our first endeavor into the new Dragon Soul raid was Morchok, a big gemstone elemental and cousin of Ozruk "the pug destroyer". Morchok presented us with no problem really, mostly because he has such limited abilities to worry about. A standard tank swap based on stack numbers, a soak my bubble of explosion goodness and last but not least a stand out of line of sight behind huge spikes. First try of the evening and Morchok fell and in that regard kudos to cousin Ozruk for creating more wipes and mayhem. Next up, time for some tennis and awaken the inner John McEnroe because seriously THAT BALL JUST HIT A TOTEM/PET/SHADOW APPARITION
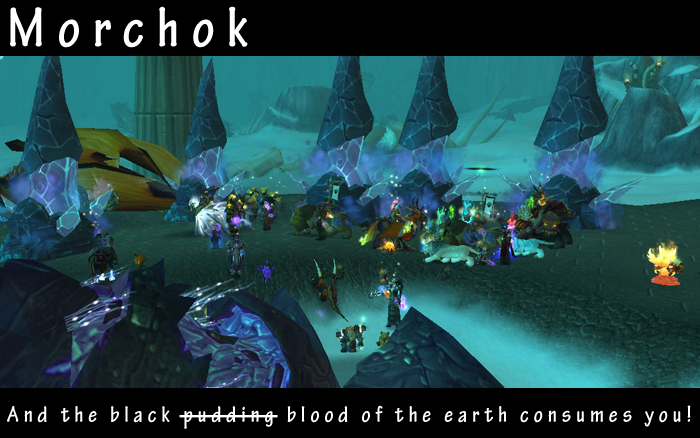
After much soul leeching Geldar, our boomkin powerhouse, finally got all the essences he needed. One semi-dead fire lord later, and with the Heart of Flame fished up from Rag's lava jacuzzi, we headed off to Stormwind for the turn in.
Congratulations to Geldar for obtaining the first legendary of this expansion!
Video of the stormwind event is here


Our first endeavor in heroic firelands we seemed to struggle more with the trash than anything. That being said our first couple of attempt with hc shannox weren't that productive. A change of approach paved the way to a kill quickly and thus without that much struggle the heroic dog master was no more next up is heroic lord of the dance rhyolith.
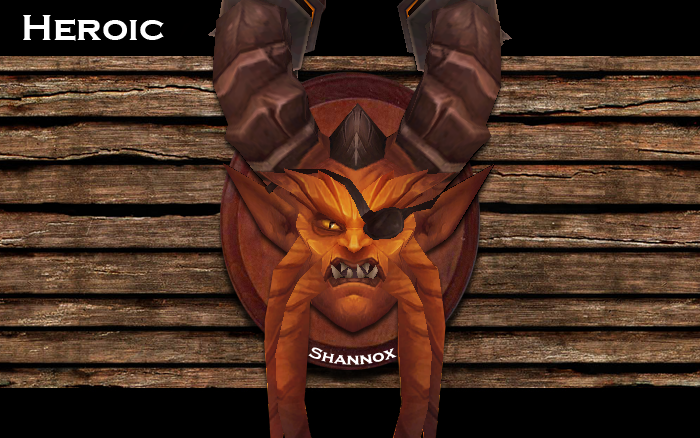
Since we only had the chance to face ragnaros in his nerfed state we can't really tell how much he has changed. That being said, we did enjoy learning this fight and managing to get one phase after another under control. In time people were dodging lava waves properly for most of the time and we didn't experience magma trappers falling from the sky to their deaths and phase one was sorted. Intermission phases were also soon under control with proper allocation of the raid vs the sons. Phase 2 presented a bigger hurdle with the molten seeds and the engulfing flame. A combination of the dmg on the raid and the position of the raid made us spend most time of the encounter getting to grips with this phase. Another intermission and we poked into the last phase which in all fairness is a bit of a let down at least that's how I perceive it. Rather than a phase where you feel in control as long as everybody does what needs to be done, this phase boils down to a kill it quick or you'll be overrun mechanic. Sure people need to kite meteors and not run into them and we allocated people to bounce the meteors back but still at a certain stage the meteors just ramp up and the fight spirals out of control.
Ragnaros was banished once again as it evidently remains too soon to get rid of him and we have cleared the way to have some fun on some heroic encounters while we await the wonders of 4.3 and to hear about what blizzard has in store for those pandas.
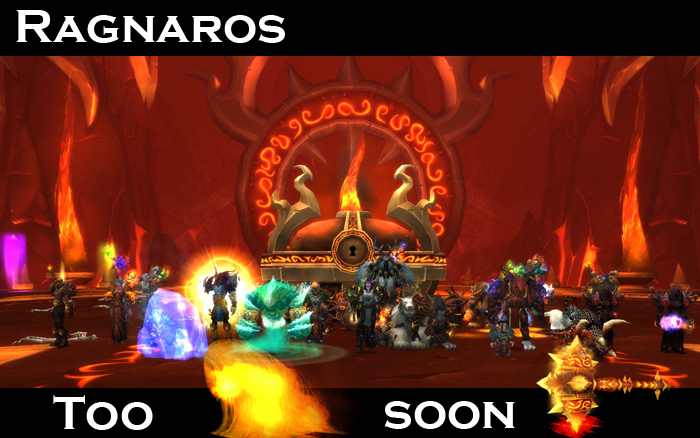
Our progress on our favorite vanilla questgiver, :!: what do you mean you need even more morrowgrain, was slow but steady during the summer pre-nerf. We were getting around to dealing with the flamescythe/searing seed phase properly when ghostcrawler came along and decided to smack everything in the firelands with a nerfbat. Post-nerf Majordomo is merely a echo of his former self and actually resembled the 10m version of him pre-nerf which was a joke to begin with. No more trips to un'goro and off we went to face the lord of fire.

Another bridge protector, where would we be without them. Baleroc is a fairly simplistic fight where the emphasis on beating the encounter is determined by the healing team. Crystals spawn which the dps handle in a given rotation but beside from that it's a tank and spank patchwerk kind of fight for them. The healers have to endure into a healing rotation of healing crystal soakers and after that the tanks when a new batch of crystals spawn. Switching at the right moment and landing the proper heals without getting tempted to cross heal were key elements we had to focus on. Some attempts later and with a few deaths we had our first kill, not quite textbook but a kill is a kill. Our adventures lead us to Fandral now where i hope he will still accept my batches of morrowgrain, he made me collect in ungoro.
Alysrazor, 4 phases, rolling balls of fire, spinning fire worms of death, starving hatchlings, tornado mini game and interrupt galore all packed into one fight. Although alysrazor was a daunting fight at the start everything started to make sense once we got some practice on it which lead us to a hurdle that seemed very hard to overcome namely hatchling hp. Still having a hatchling up once ph2 commenced was big set back as ppl couldn't really get much practice dodging tornadoes while there was a angry chick biting their head off. After considering several options and juggling some gear around the tanks started to do some much needed dps on those hatchlings and together with some help from the dps we managed to take them down on a regular basis before the tornadoes spawned. Having survived the tornadoes and perhaps picked up some haste buff rings during it phase 3 was straightforward, hit it like you mean it. The fight reached its climax in ph4 where there was a ton of dmg flying around on the raid and the tank and once the swapping was sorted we managed to handle this phase. Now it just was a case of rinse and ... repeat.
With our favourite single of the trashmen in our cd player it was just a battle to stay alive to endure the length of the fight which for us on our first kill took 3 rotations of all phases.
Our travels through the firelands took us to the lair of Beth'tilac, a most cunning wall crawler. The mechanics of this fight were not that complicated figuring out how to distribute our dps to deal with the adds was the biggest challenge really. Once our upstairs team got the hang of the meteors and lava patches and not dropping down through the web again we made decent progress. Downstairs it was just a matter of add control and not getting overwhelmed. Out came the slowing glyphs/specs and the spiderlings were manageable before they offered their succulent flesh to the drones or for worse matter Beth herself. 3 smoldering devastation's later Beth was on the floor and we were up in her face, well bum because those four pair of eyes will follow you anywhere. Phase 2 being a very simple burn phase we managed to almost kill her on our first attempt of our second night seeing her. Some tweaks later and some funky use of bane of havoc and we toppled those 8 legs and this little spider was no more.
Next up are our attempts to create a headline to raise mass awareness of a certain avian variety because it's our understanding that everyone had heard :!:
Check the hair, check the clothes okay i'm ready. Lights... and cue the music time for our columpio de la muerte. Lord Rhyolith is our firelands resident dancing partner which engages us in a gimmicky fight trying to steer him round the room stomping volcanoes by adjusting the amount of dps we do on each foot of his. After initially suffering from a lack of control steering him round we managed to get that under control. Although we did fairly okay on the fight we didn't manage to progress much further with it. We kept on struggling at the same point in the fight and ended up down on the floor in shame like a rejected american idol applicant. We took some special care addressing the lava lines which erupt after a volcano has been stomped upon and took a wee break from having another batch of futile attempts on him to return on our next dancing errr raiding date. The break obviously did no harm as we completed to execute our shindig correctly on our second attempt and this time it was lord rhyolith who hugged the floor in much discontent. Next on our menu is spider soup.
Our first Firelands raids led us to trash and much of it. Some of it naturally inspired by the old Molten Core trash (some of it copy + pasted), some of it "Dear God it Explodes!". After having dealt with enough minions, we drew the attention of Shannox, Lord of the Hunt aka "The Lizard" aka "The Salamander" aka "The Prawn".
Shannox being a hunter inspired boss, he was accompanied by some nice pets, with pleasant names like Riplimb and Rageface who have ironically appropriate attacks like Face Rage and Limb Rib. Once our tanks managed to perfect dropping their stacks of the Jagged Tear debuff, the encounter felt much more under control and we started to make progress on the fight. Now it was just up to people to master the art of DONT STAND IN THE DAMN TRAP (Kael..move..Kaela..move..KAEL!) which we at later stages (and after some boss mod updating) handled much more successfully. Without that much there were no further problems, apart from that tiny issue of an air-tight cooldown chain from the healing cartel during his sub 30% double frenzy state....
Anyhoo, Shannox quickly turned from predator to prey, from "The Prawn" to Prawn Cocktail.
Next target: Lord Rhyolith. Or in the words of a wise raid leader...
"Left foot, no right foot, no left, more on left, no rig- OH GOD WHY WON’T HE TURN!"
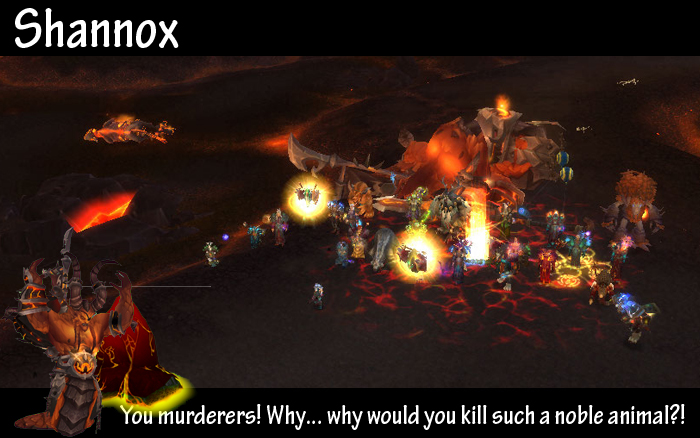
Another end boss has fallen, this time Nefarian...(again). This fight has caused us much more trouble compared to Cho'gall, however the fight feels much closer like a proper end of tier fight.
Individual mistakes on Nefarian are swiftly punished by death, merely your own or the entire raid. In phase one we have Nefarian resurrecting Onyxia (she has to be sick of this by now right?) who has been turned into the demon duracell bunny from hell. Her electric lightning charges are easily dealt with as long as you know basic angles, however both dragons have specced into Improved Tail Swipe which is more than an annoyance for dps and healers alike. Soon after Nefarian lands and when not taking quickly out of range from Onyxia both will receive the children of deathwing buff which ramps up inc tank dmg quickly. Bone warriors spawn and our offtank springs into action gathering them all up and kiting them to their desired death spot. We had melee swap to Nefarian after he landed and ranged stay on Onyxia to bring her further down. Nef reaching 90% of his health and we endured his Electrocute a whopping 100k raid wide dmg on everyone. Cooldowns, trinkets, class abilities, glyph choices helped a lot to lower the inc dmg on these electrocutes. With Nefarian under 80% we killed Onyxia and went into phase 2.
The floor lowers and lava rises and next came another hurdle. The "omg how do I jump out the lava onto the platform" issue...ah the memories of sweet old lurker below in SSC. Perhaps the biggest challenge of the encounter is phase 2, where there are 3 pillars with each one mob on them. They try to get off a spell called Blast Nova, we had 2 melee on interrupt duty with a tank as backup. A lot of our wipes perhaps the bulk of them were due to Blast Novas getting through as they do a lot of dmg on the raid coupled that with the incoming shadowbolts and things can take a turn for the worse very quickly. Once we managed to get it under control we focused on getting a electrocute in phase 2 as we needed it to shorten the length of phase 3. With extensive use of our cooldowns/racial/glyphs/miracles and what not we managed to endure this as well and we started making progress. Finally we were getting into phase 3 more often and much more controlled with healers having some juice left.
We opted for a phase 3 strategy that was a bit similar to the Halion encounter in his shadow realm whereas Nefarian is tanked in the middle and is being rotated clockwise with the raid stacked up at his flank. From there on it was a brutal burn, with the offtanks on the bone construct trying to dodge shadow blazes. The raid taking electrocute charges in a much more rapid succession than phase 1, flames creeping in from the sides...yes it's safe to say the pressure is on in this last phase. The final attempt of the evening and with merely 23 raiders in the group (some of which non frequent raiders) we managed to kill Nefarian BOOM dead car battery and cheers all round.
The Nefarian fight felt much more rewarding compared to the Cho'gall one and one which seems unlikely can be outgeared easily as we have to get the mechanics and interrupts right each time. Only one more boss stands in our way for our nifty "Defender of a Shattered World" title and that ambiguous bird mount you can buy. Onwards to reach havoc on Al-akir.
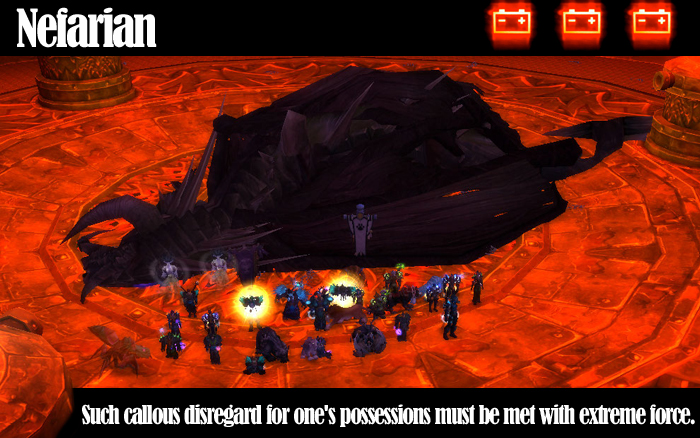
And so we laid waste to the bastion of twilight (normal) by killing Cho'gall. The fight itself can be quite hectic and the "don't stand in stuff" motto surely applies here. Once we got to grips with all the various mechanics we managed to push the fight forward by quite a bit. Being late with interrupting/stunning the mind controlled players had cost us several tank deaths and subsequent wipes. We managed to get this under control and although Cho'gall having a bucket load of abilities the fight itself did not seem so intimidating. The incoming damage on the raid, the corrupting adds and the oozes all felt controllable with our dmg output being in the right place to not feel overwhelmed. The tank dmg was quite high and spikey at times giving tanks and healers quite a few butt clenching moments. With Cho'gall dropping below 25% and into phase 2 we had to face the trusted old gold tentacle madness. We tried with melee on tentacle duty first but opted for ranged instead which proved a bit more reliable. Some shouts later on vent to clearly turn away from people when you were about to vomit, Cho'galls health was steadily dropping. With the ranged still focusing on the tentacle spawns the ogre fell to the floor dead... we did it. No deaths, cheers all round for our first kill and having cleared the bastion of twilight some people felt a bit disappointed with the fight. Some healers were out of resource near the end or during phase 2 but overall the fight felt pretty controlled. Being a end boss some people expected to end the fight with 2 people standing half dead and smoke rising from their barrels but given we have three end bosses in this first raiding tier in cataclysm i'm sure those moments will come. Our future kills will prove whether the fight is as controllable as it seems or that we just got lucky on our kill. Also lets hope Cho'gall will be a good boy and drop a hammer on each kill because it looks great, which must be due to the fact it was forged by dwarfs.
Nefarian and Al-akir await.
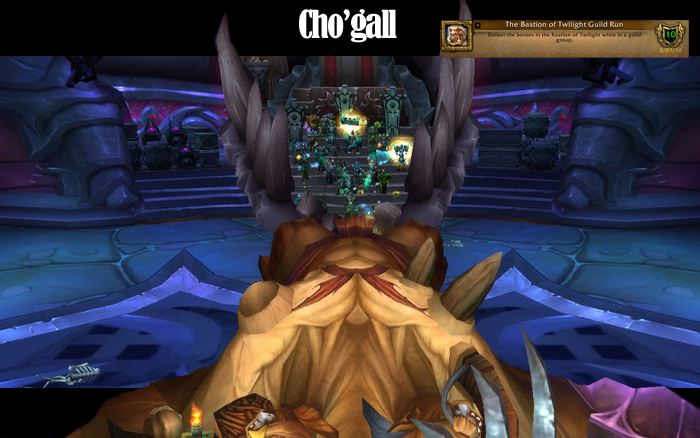
Fire... Water... Earth... Air with our powers combined we form a fire seed, gravity crush, chain lightning spam bot with defile 2.0! The twilight ascendant council is a very dynamic and heavy mobile fight. First off were the fire and water ascendants Ignacious and Feludius. Interrupting the hydrolance and having all the dps burn down the protective shield on Ignacious during aegis of flame were pretty much key to this first phase. Clearing the waterlogged debuff by actually running through the fire was a nice twist to a "don't stand in the fire" rule of thumb.
Phase 2 with Arion and Terrastra was much more complex. Arion keeps teleporting all over the shop with the ranged pile following it. Getting the proper buff in time is crucial for the majority of the raid to not get instagibbed on a quake or thundershock. Secondly having the 3 lightning rod targets (huge yellow arrow) disperse out of the raid and to the sides to not chain through the raid and kill a lots of ppl was one of our biggest challenges. This was also complicated by interrupting Arion's lightning blast spell unwillingly which causes the chain lightning to be instantly cast instead of giving adequate time for the targets to move out of the raid. Once that was settled we started piercing into phase 3 more often. Having all targets as close to 25% as possible when pushing them beyond helps a lot in phase 3, it's really about control until you hit phase 3. Phase 3 where they join up to form captain pla.. The twilight monstrosity is a heavy heavy burn phase. Having the ranged spread out 10yards apart and blowing all cooldowns for everyone (dps and healing) to end out of resource and have steam come out your ears is the proper approach to kill the monstrosity. We managed to kill him in the end with a very thinned out raid as once people start dropping they start dropping rather quick. We can thank our bear and perhaps the absence of a assistant professor green qiraji battletank for our successful kill.
Onwards to Cho'gall.
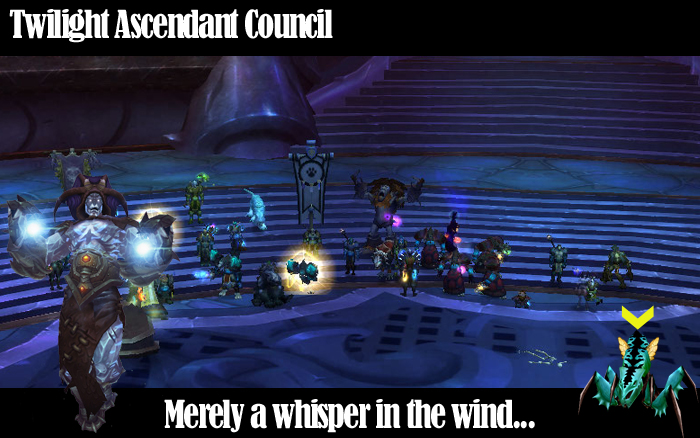
After a week of not making progression we seem to have picked up some speed again. Chimaeron the 3 headed... oh wait no 2 headed aberration of nefarian. A pretty unique fight due to that lovable gnome adventurer Finkle and his array of gizmo bots. The bot gives the raid a buff which prevents you from dying, in turn it brings you health back to 1hp. The drawback is that players who drop down to this health need to be healed up to 10k hp asap as being below 10k will make the bot ignore you. Couple that with a gathering phase which starts when the bot goes offline (Move in, no too soon / Move in, too late / Why didn't no one call out? / Argh timer $!@$!) and that requires massive aoe healing to manually heal through 3 caustic slime spits and you can certainly say the healers have their work cut out for them. For dps however this fight is pretty dull as there is little you can do to influence the outcome of the fight except for using some self healing or survivability spells during the feud gathering phase. Making sure you can see the debuff "low health" on your raid frames and resisting the urge to heal ppl further than 10k health are key to this fight. Couple that with being able to provide enough HPS during the feud part and this fight shouldn't be that hard as the second phase where healing goes out the window is very forgiving.
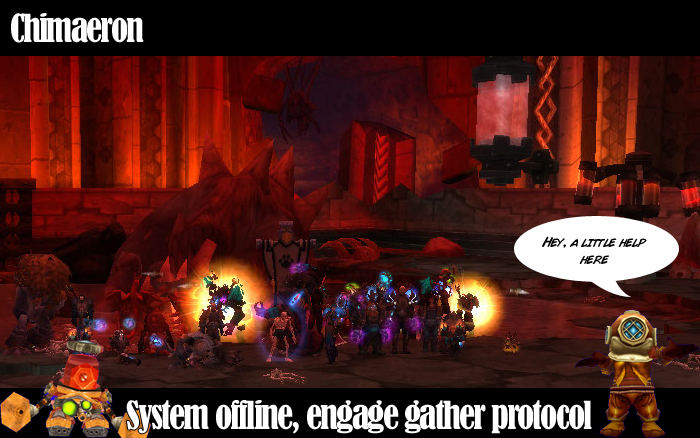
And so our journeys led us to a blind drake named Atramedes which was another interesting fight. After killing the spirits of dwarfs that once were we got to enjoy a cutscene. As we have seen with cutscenes before the second raid day we got to see it people already were wishing it was skippable. The actual Atramedes fight is a interesting one and the back-story of fighting a blind drake that uses sound to locate its prey is quite nifty as well. For melee this fight is a bit more of a pain considering the sound discs are harder to avoid thus resulting in a much higher sound level on average. Once we had a decent gong banging rotation we started to make progress on the fight. Only 3 pitfalls remained, getting the gong banger assigned to interrupt searing flames time it right so only 1 tick got off. Getting people with tracking on the ground phase to actually encircle the boss and not just run away. And last but not least on the start of the air phase we got everyone already running to avoid a one shot tracking fire beam. Once we had those 3 major obstacles covered it was a mere pumping out enough dps so that Atramedes would bite the dust before we ran out of gongs to bang, which wasn't that hard to do.
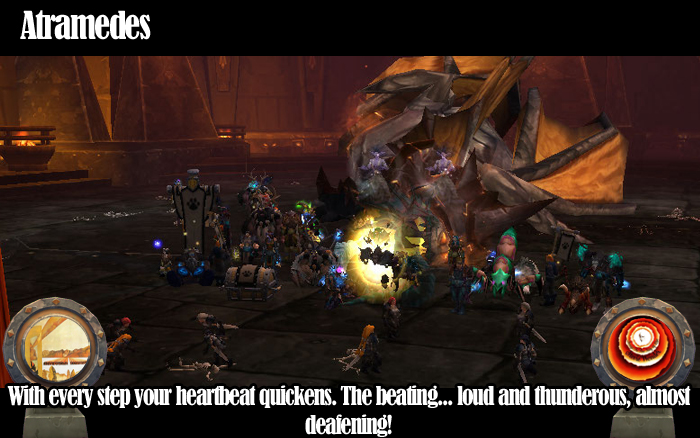
The conclave of wind must be one of those fights where no tactics really seemed to suit us and we've tried quite some different ones. We finally settled on a tactic which seemed to allow us to progress on the fight and have better control of the djinni. After struggling getting the flowers to stick to tanks/dying quick enough to not get caught in the zephyr we made headway on anshal. Once we sorted the jumping of the several groups at certain focus levels across the sky bridges everything fell in place and a bit sooner than expected we all stood at nezir's platform burning him down in the 1min window after any djinn dies.
The fight itself has 2 sides, it's unique in its design and the aesthetics of the skywall plus the djinn are really bang on as far as fresh new content goes. The drawback ofcourse is the great distance between platforms which results in having no control or overview over that part of the raid and whether they are executing the strategy properly. The skybridges are nifty and make for good fun in and out of combat unless your name is Slash and decide that on each jump you should really wind up at Al-akir.

Funny looking dragonkin, what will we be facing now ?
Interrupts sorted! DPS the adds during the green vial phase asap sorted! Dead dragonkin. The rest of the mechanics are trivial and easily doable/countered so we welcome the new lootship 4.0
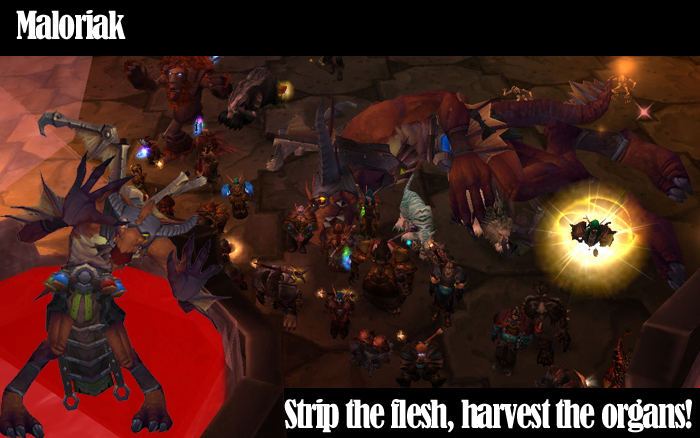
This fight at first didn't seem that hard to overcome since on our early attempts we were getting the duo drakes down to sub 60%. That in turn turned out to be a bit misleading. As the drakanoid paladin promo team turned us into flooring inspectors for a entire raid night. Overall dmg on the raid was heavy and the healers quickly had to resort to the old wotlk spam mode of dishing out heals to everyone all the time. Given that and tidying up the positioning a bit better: omg spread, omg collapse, yes you have a debuff you are pulsing disco stars. We managed to do a bit better but we pretty much kept on wiping at roughly the same time which was around the 3rd transition. At that time we pretty much had given up and trash had respawned so we decided to kill some of it in the hope of a trash epic drop. The gods of gambling were on our side and a staff dropped although no one really got excited with it. 10 minutes left of raid time we went to have a final go of the evening. We had quite a few casualties on the attempt but it didn't feel like a loss, combat resses were ordered around with clear cut clarity "Geld res nik, nik res lav, lav res somebody". The drakes kept dropping on hp and all of a sudden we had them sub 5% was this going to be our kill ? and BOOM yes it was. The drakanoid paladin promo team bit the dust and fell lifeless to the floor.
The enrage timer was still a long time away giving us plenty of time to streamline this encounter and getting the positioning a bit better for our future kills. Also if this fight doesn't want to make you watch saturday night fever again with spells like fabulous flames and dazzling destruction I don't know what will.
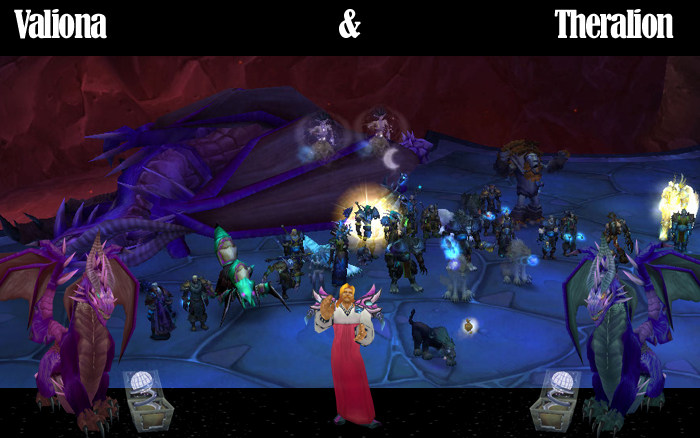
A worm was up for grabs and we had a few attempts on it the night earlier so the majority of the raid roughly new what was coming. Plenty of ranged dps seemed needed, at least for us, in order to properly deal with the larvae that spawned after the lava pillar. The main difficulty with this fight was the actual spotting of the flame pillar effect. Timers are off, no surprise there this early in the expansion but the visual effect on the spell is just so small. With all the fancy healing spells and particle effects and not to mention the aoe dps it was challenging to spot the small yellowy orange eruption prior to the flame pillar effect. In the end we got better at it and we progressed until we managed to also overcome this fight. One dead worm later and our focus lies towards the duo drakes of pinkhood in the bastion.
With the release of 3 raid instances, excluding baradin hold there are quite some choices where to go and what boss to attempt to kill next. On our list it was the Omni... no wait Omnotron hmm is that right ? oh wait it says here "Dark iron golem council" on the achievement panel. A council fight which tends to be hectic and here we get 4 of them each with their own unique abilities and cycling between activated and dormant golems quickly. We saw proper add control, we had shiny beams "acquiring target" and the elusive power convert to beat. Slowing, dedicated interrupting, dedicated purging/spellstealing and a hefty amount of situational awareness, do not stand in the red beams path, and several wipes later we managed to beat this encounter. The random cycling which golem starts is a nice twist as that will make people more aware of each golem's abilities. All in all a dynamic, frantic but fun fight.
It's been some time since we posted a news article but we are slowly getting back into gear with the raiding. 4.0.1 passed us and so did the shattering giving us a whole new azeroth to admire. Between killing race/class combination's in pvp, killing critters and fishing in fishing pools we're still working hard getting our raid members geared so we can get into 25m raiding again. Our sign ups were large enough for us to have a go at 10m raiding and so we did. Bastion of twilight was on the menu and vent crackled with *where is the entrance?* And there it was high in the sky atop the spire. The raid trash is no exception like heroic dungeon trash so our good old friend cc proved useful again even if the pathing on some mobs makes for challenging trapping :D
The halfus fight was a interesting change as opposed to some wotlk fights as it can vary from week to week given which dragons are included in the fight. Our first couple of tries were not that successful but we did make good flooring inspectors. After some time we tried another couple of things, reforging/setting the whelps free and then the fight seemed much more manageable than it was before. A few more goes and we were making good progress and finally on the last go of the night Halfus went down!.
What have we learned so far? don't stand in fire, click the lightwell, make a macro to announce holy radiance and you do can point your gryphon upwards to fly instead of pressing spacebar. We'll be back soon we hope with more raiding news.
Some of our recent 10man runs into ICC were focused on progressing further into more heroic fights.<insert wipe/new tactics/frustration> And so sindy hc and prof putri hc both finally fell and suddenly we faced ourselves being in reach of the Glory of the icecrown meta achievement and getting ourselves a nice frostbrood vanquisher. Most achievements were easy enough or just needed some minor change/management to complete. Two however stood out, full house and all you can eat. The problem with full house was partly because of our lack of cc in the given raid and maybe our impatience at getting the 5 mobs. We managed to work around it and got it done. So there we faced Sindragosa and her all you can eat meta achievement. Oh boy did this turn into a woeful fight, our tactics seemed solid but still every now and then lossing the buffet correctly behind the block seemed to fail on ppl. We managed to get to the point where only the tanks we still really suffering to los the debuff in time. Although it did seem we made progress spending a entire evening without getting it done gave rise to the idea to try and approach it rather differently.
We knew that marrowgar had been successfully tanked by Bubbles which gave rise to the idea to a pet tanking Sindragosa in the last phase. Easier said than done as info/theorycraft about pets tanking raid bosses is not available in abundance teehee oh ye of little faith. Once we were comfortable with the info we gathered one of our hunters adapted his BM offspec to suit pet tanking and decided to give it a go.
All excited about if this was going to work or fail miserably, sindy went into her last phase and vent crackled *pet taunt* but omen remained silent. Oh dear nothing happened, a quick inspect on the wol showed the taunt to miss. Maybe a fluke, some more hit gear attempt no2 and see if it changed anything. The moment there, the finger on taunt and.... nothing again taunt missed.
So desperate times, desperate measures, away with our player tank and pet tank it from start to finish. Aggro management was key and a lot of md's were used to keep the threat of the pet in the lead. All dps needed to watch omen closely and drop their threat as much as they could. But there we were doing it, with our pet in the lead and eating all Sindy could throw at her. We could tell Sindy was not happy because of the occasional tail swipe we got to endure. Okay it was a technical issue but still, she must have been annoyed.
So here we may remember the day Kame came and shellified that dragon in the face!
Kame took 1295276 dmg over the course of the kill, with the frost breath hitting for a average of 4,5k.
With our 25man progression in full drive and going strong, we found our 10man raids to be struggling behind.
Our sign ups for the Lich king 10 encounter were low and when we did manage to get the people together, the group wasn't always balanced. The fight itself still managed to give us headaches from time to time as we have developed a love hate relationship with defiles, but we stuck to it. At last we were making progression through it and punching into the last phase at a more steady rate than before.
Now the big question just remained how to handle the vile spirits, did we have the ranged dps to nuke them down or thin their ranks enough or did we solely had to rely on the offtank to soak them all up.
As long as no ranged dps-er was sucked into frostmourne to hit some evil spirit warden over his head we managed to reduce the number of vile spirits enough to not be a major problem. But when a ranged dps-er did manage to get sucked into frostmourne our palms went sweaty as we went into butt clenching time to not let the spirits blow up as a group but to single them somewhat out.
So with our hearts racing at 180 beats per minute we pushed him to 10% and BOOM he, well WE went down. Ventrillo fired up with excited screams and especially NOT TO RELEASE. We enjoyed the roleplay with the exception of Tirion who finally managed to break out of ice cube and join the fight. We patted ourselves on the back for our first LK king and we will see you in ICC10 heroic. hail to the King..... slayers!
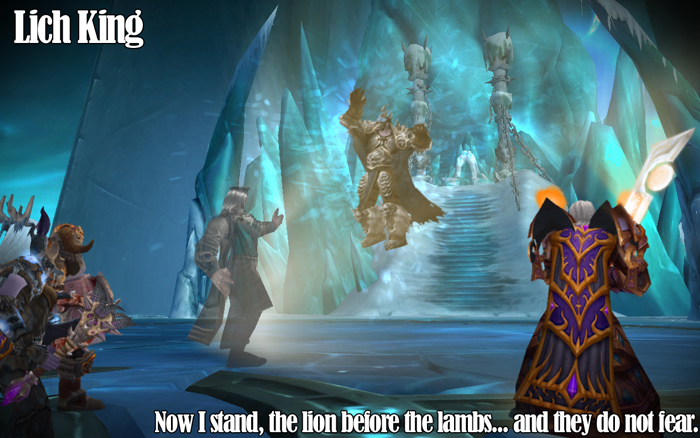
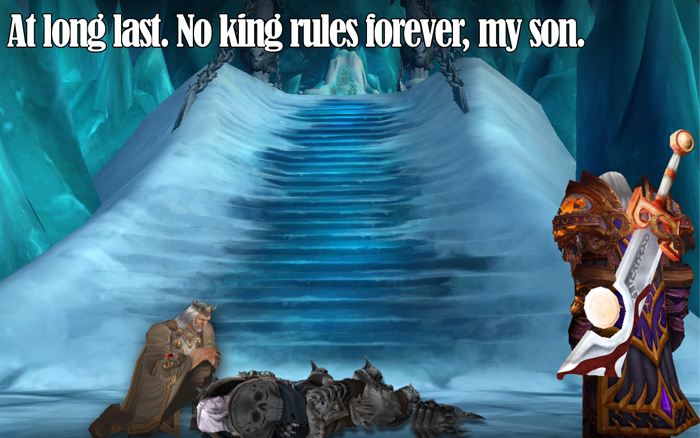
Our guild efforts at obtaining legendaries are finally seeing some results, we had one of our priests with 30 shards from ulduar waiting a long time on his mace. Trial of the crusader got in the way of our efforts at Yogg+3 and so did Icecrown Citadel.
Any time spent on yogg in subsequent raids were with large intervals and not enough time, making these attempts resembling more relearning the fight than actually doing the fight. I'm glad to say that when we finally managed to get the pace in Icecrown citadel up we managed to find some extra time to visit that grumpy old god and smack him over.
So congratulations Corpsefire on your shiny Val'anyr
Our efforts at obtaining shadowmourne are also getting along nicely with the first person in line having done all of the infusion quests at the subsequent end wing bosses. This ofcourse means it's merely a waiting game now to obtain enough shards from boss kills before we can welcome the first shadowmourne into the guild.
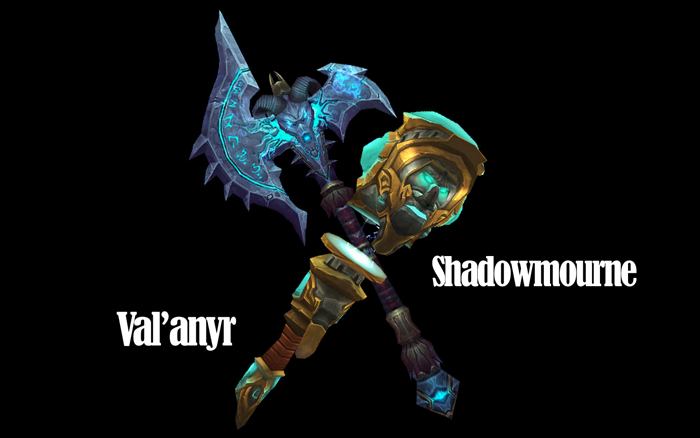
After all our efforts it means we stand ready to face up to the final challenge in this expansion and that's making sure the Lich king dies and stays dead so nevermore he will haunt us with defiles!
The frost queen Sindragosa has long been plaguing us, since she was the first endwing boss we have attempted to learn and kill after Deathbringer Saurfang. The first mechanic of the fight which has caused us many headaches and frustration were the iceblocks, how and were to place them and the rate of killing them.
Although the iceblocks were a source of a lot of frustration they did make for funny screenshots.
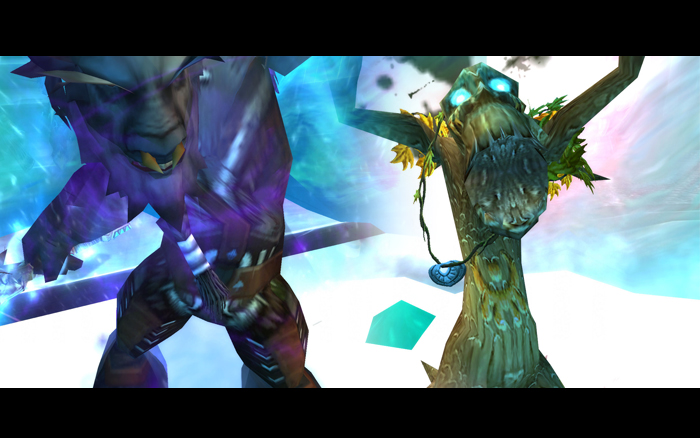
Once we sorted a placement and kill order for the iceblocks we were progressing steadily and managed to get into the final phase of the fight on each try. Our enthusiasm was quickly dampened by the fact that we couldn't get the final phase under control. Each attempt at whatever hp we managed to get sindragosa down to, it never felt we were on top of things. After some weeks of frustration we decided to halt our efforts on sindragosa to focus on the professor and the blood queen which we subsequently killed.
With the Professor and the Blood Queen dead, we returned to Sindragosa with a revised final phase tactic which proved to give us a lot of control over the final phase making a kill all of a sudden seem very viable. Attempts that seemed like a kill still were suddenly halted by a person not moving away from the main raid while targeted as a iceblock, resulting in a lot of frosty people.
Still after some more pushing of where to stand and what to do the frost queen went down and at the rate we are killing her these days in our raid evenings we can consider her pretty much on farm. I guess our magic won't betray us no more.
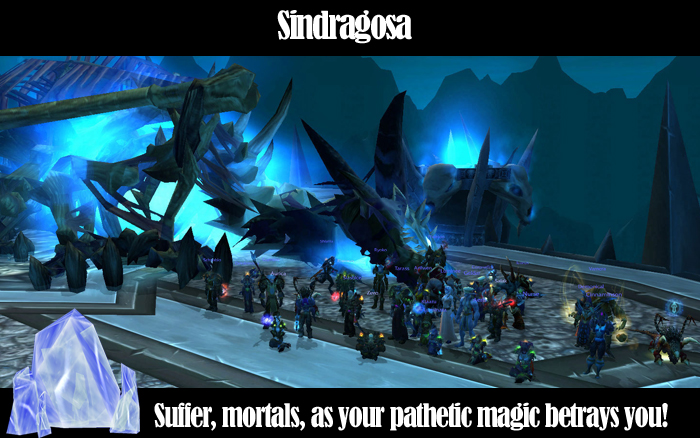
The blood-queen was the final endwing boss we attempted to kill since the majority of our endwing boss adventures were mainly focused at downing the frostqueen Sindragosa.
Technically the fight wasn't that of a challenge as long there was a way we could manage the biting process, the other mechanics were relatively straightforward. The only main crux we've had when facing this encounter was making sure that after the fear during the flying bloodbolt whirl people were quickly topped up and that no one stood to close to one another as losing dps here or even worse vampires proved a to big loss in dmg output to beat the enrage timer. The mechanics were quickly learned and the execution just needed a wee bit polishing, but down she went as the queen found herself to have bitten off more than she could chew.
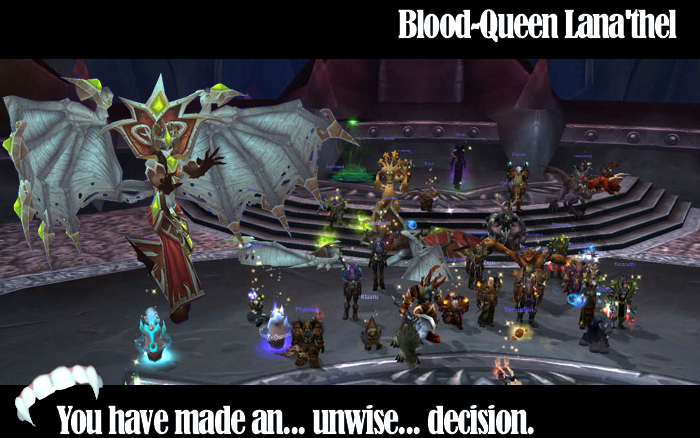
Our first endeavors on the professor had not been going well in our 25m raids.
The ping-pong tactic of switching raid positions proved to be to strenuous on our overall raid dmg output to keep up with the spawning slimes. After we changed our tactics how to approach this boss on 25 we made good progress and only the malleable goo dodging seemed to be in the way of a kill. Once everyone got their heads around the goo path and quickly made their way out if it we managed to down him and dissect his festering remains for some shinies.
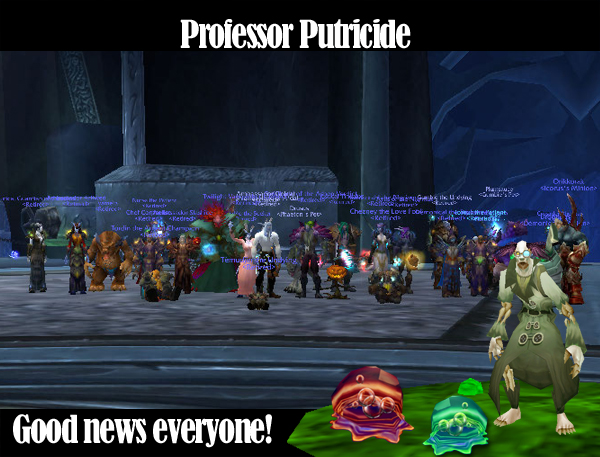
All prior info was unfortunately lost to the server kobolds.
 Deegeejay#1390
 Warcraftlogs